
Introduction
As an analyst or incident responder, there are times during investigations when you need a malware analysis environment. In this walkthrough, I will guide you step by step on how to set up a malware analysis lab using VirtualBox and FLARE-VM. This environment will allow you to perform both static and dynamic malware analysis safely.
If you’ve already built a malware analysis lab and you’re looking for a guide on how to answer the questions, click here – https://blogs.wiredcyberknight.com/step-by-step-malware-analysis-answer-lab-walkthrough-letsdefend/
VirtualBox Download
Step 1: Download VirtualBox
- First, open Google and search for “VirtualBox.”
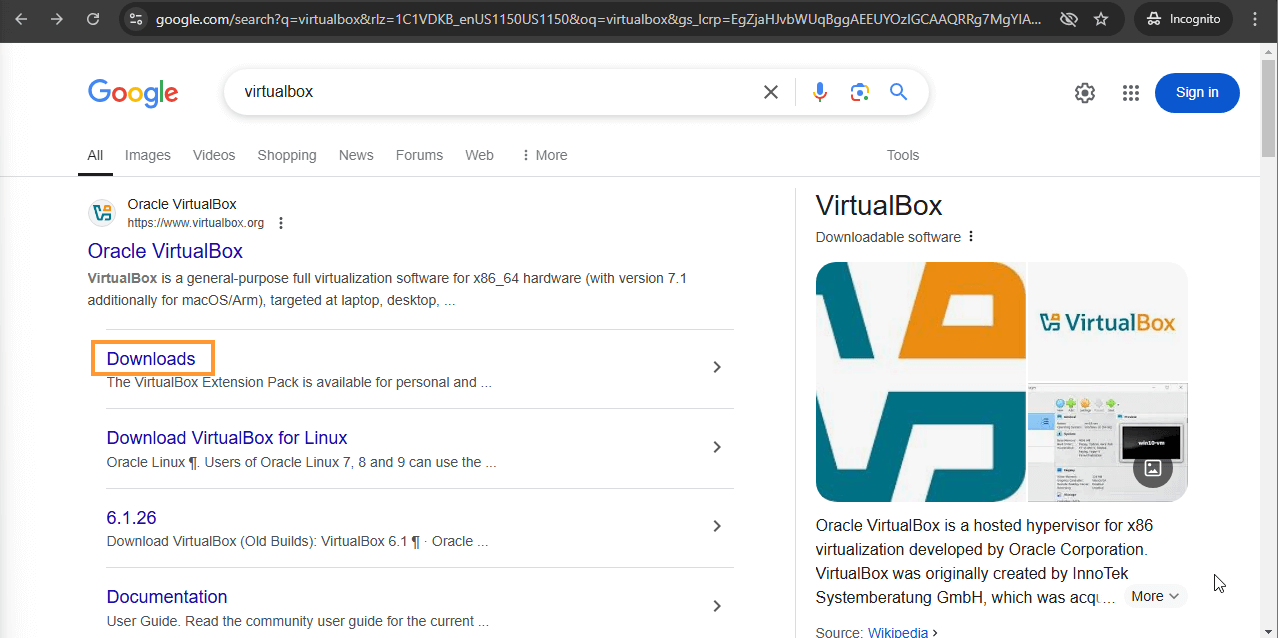
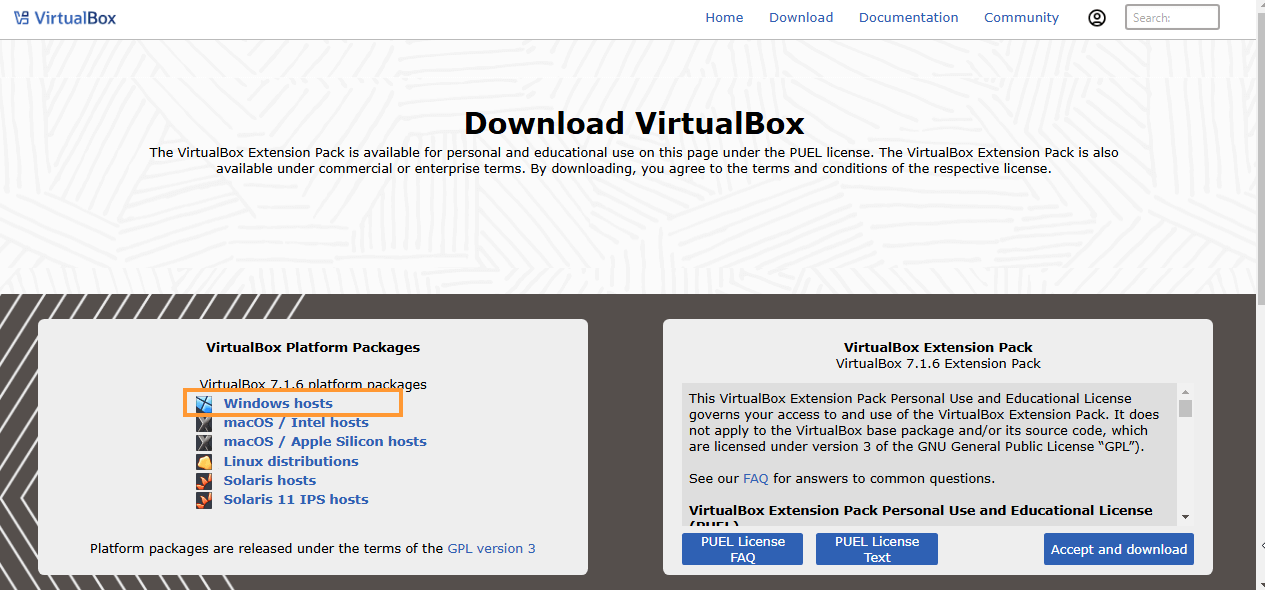
- Once you’re on the VirtualBox website, choose the correct package for your platform. For this guide, we’ll be downloading the Windows host package.
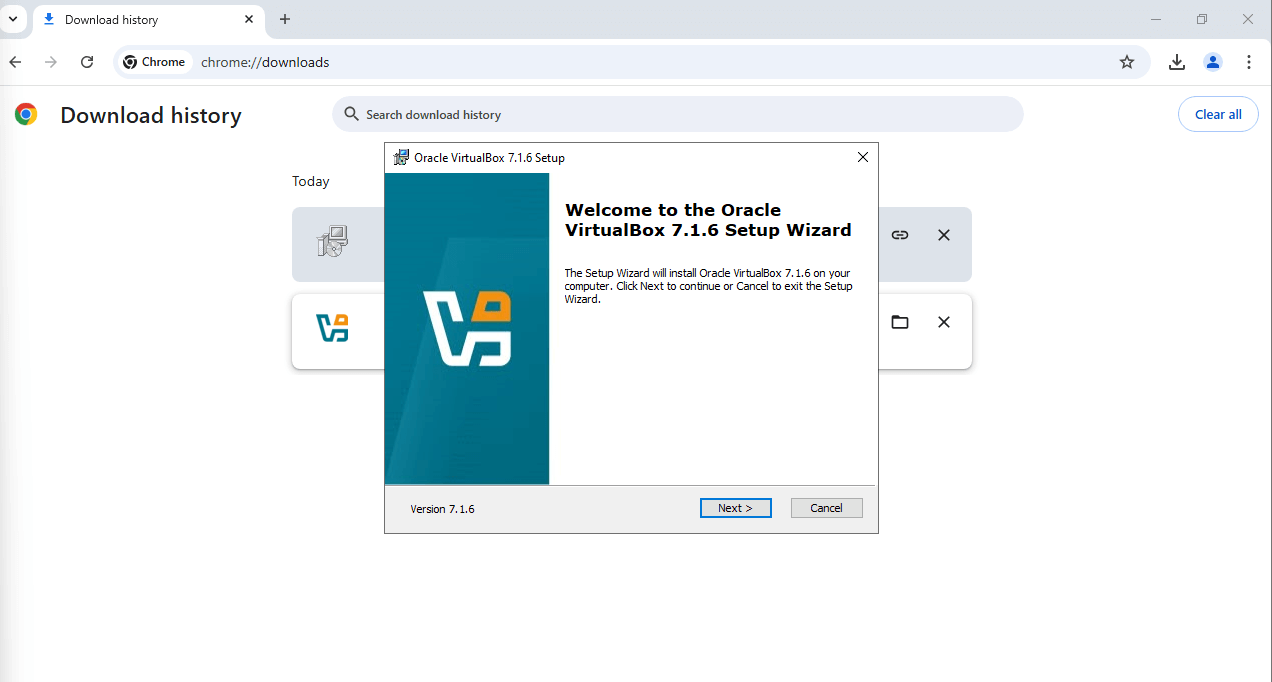
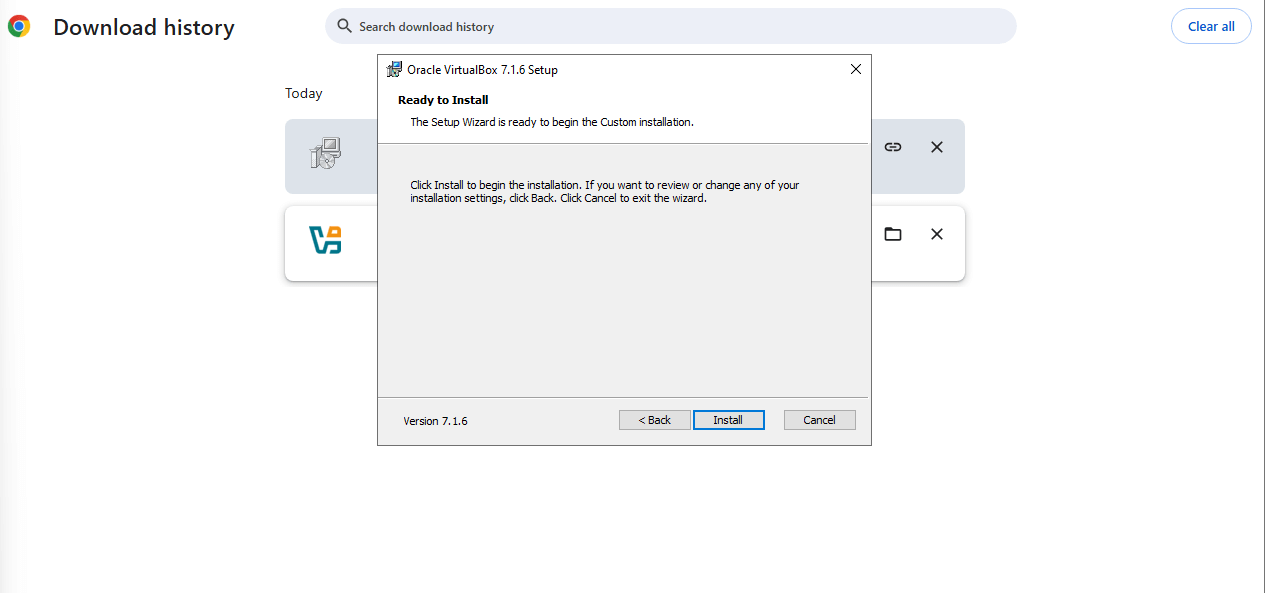
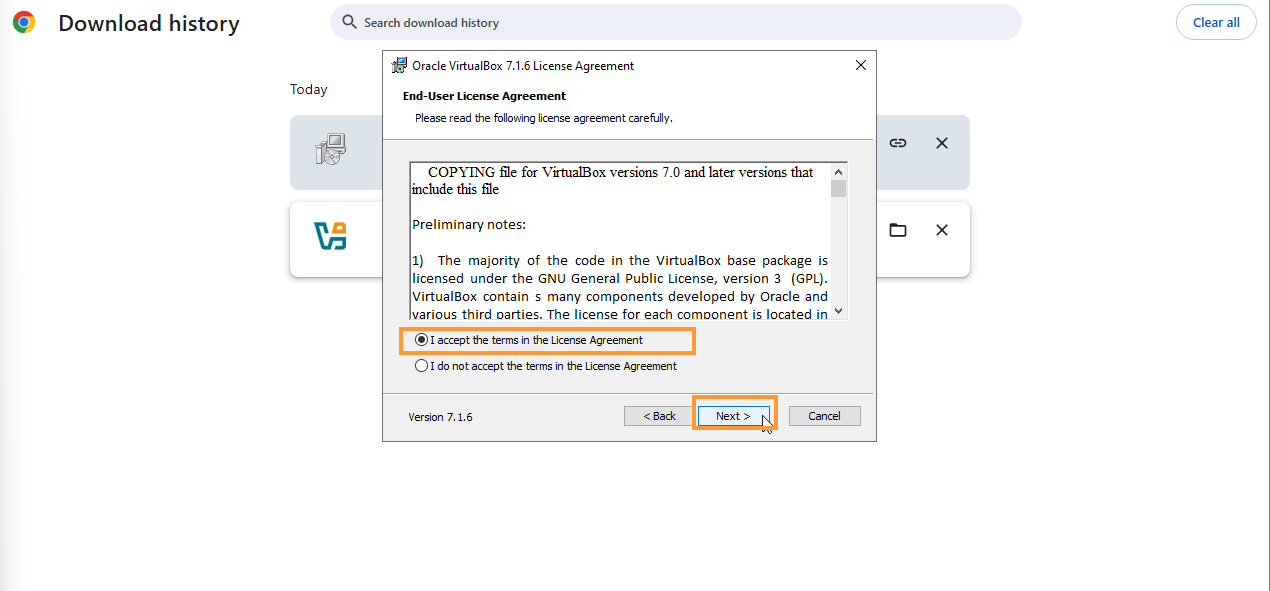
- After downloading, open the installer and click Next to proceed.
- Accept the license agreement, and click Next.

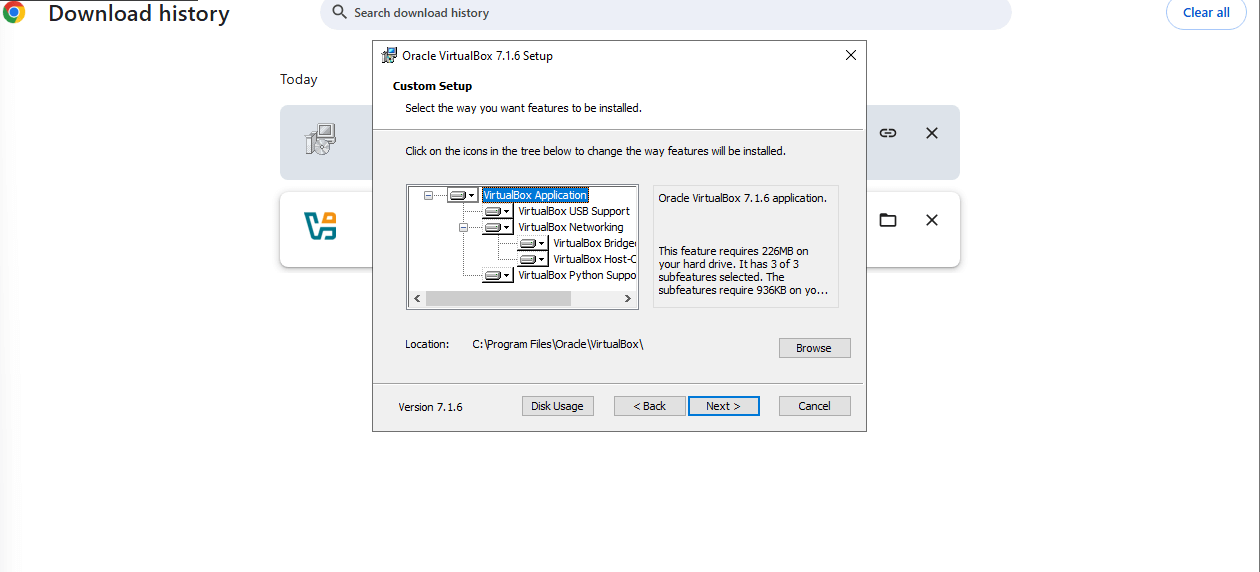
- You can leave the default settings for the installation or modify them as per your preference. Personally, I prefer to leave it simple and have the desktop icon for easy access.
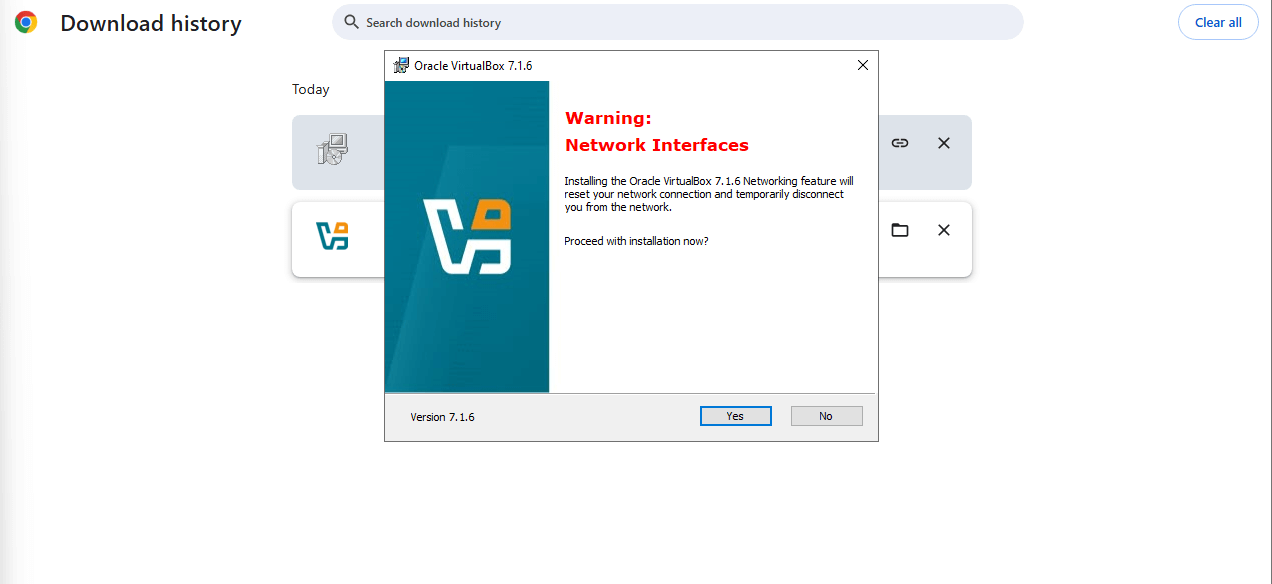
- After installation, you might see a warning that your network may temporarily be interrupted. Click Yes to continue.
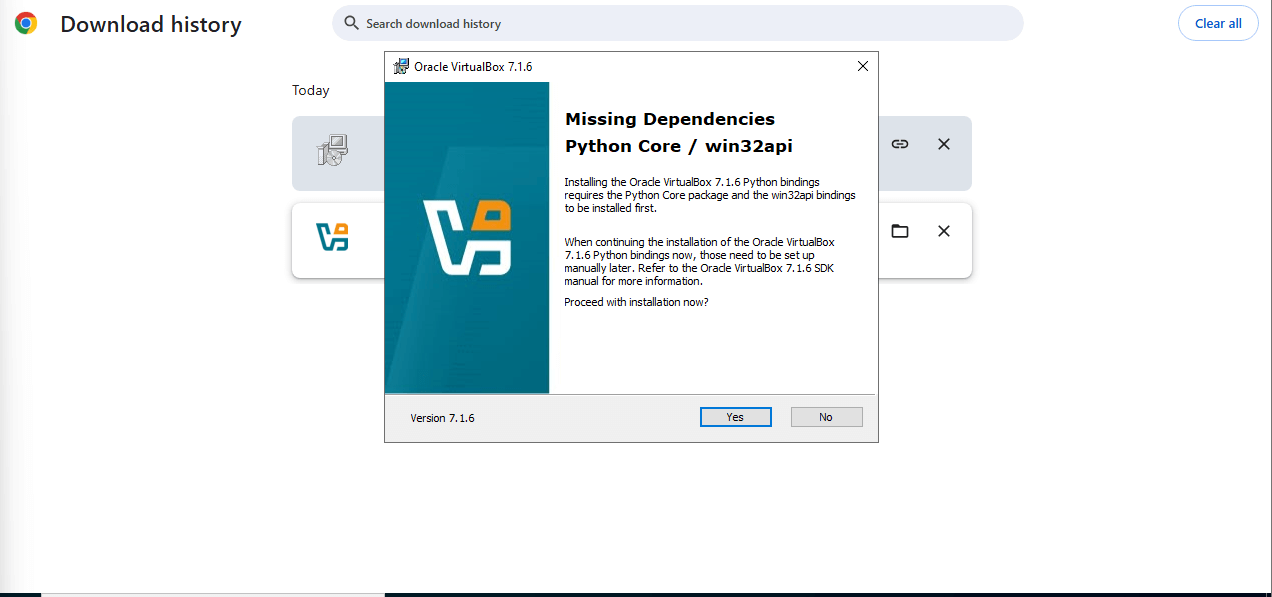
- You may also be prompted to install Python Core. It’s important to confirm this is included.
- Once the installation is complete, you can pin VirtualBox to your taskbar and remove the desktop shortcut to keep your desktop clean.

Windows 10 ISO Download
Step 2: Download Windows 10 ISO
- Open Google and search for “Microsoft Windows 10 ISO.”
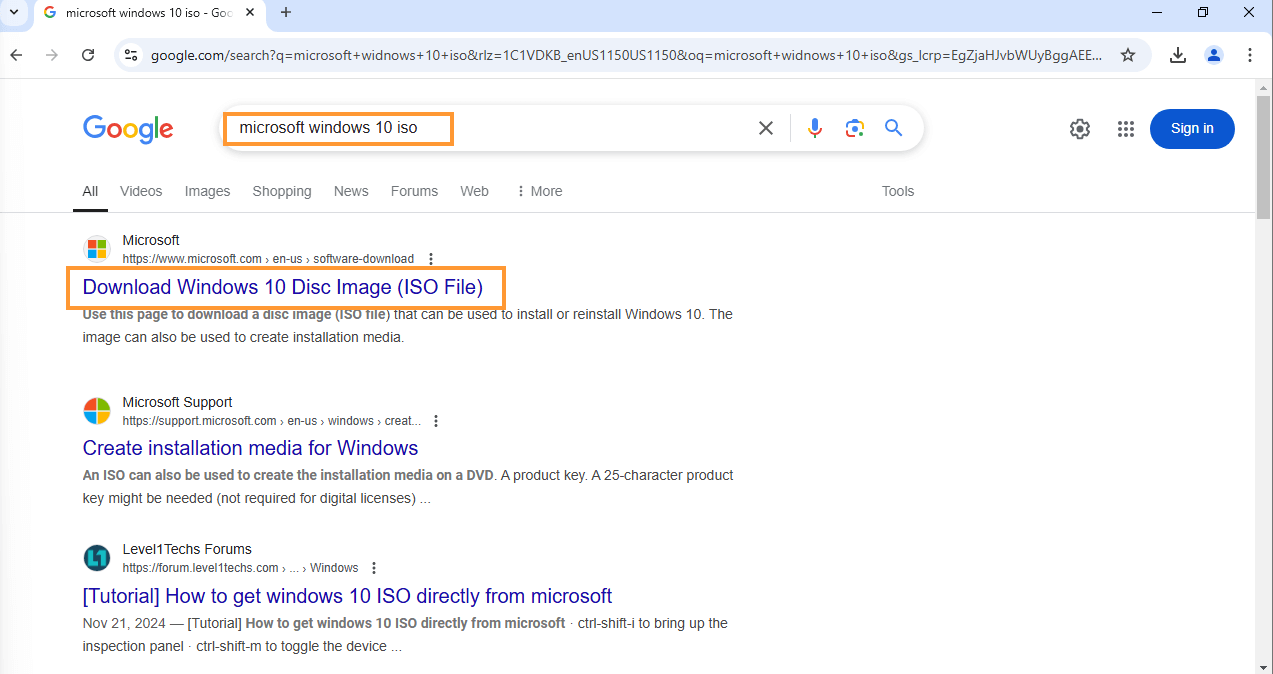
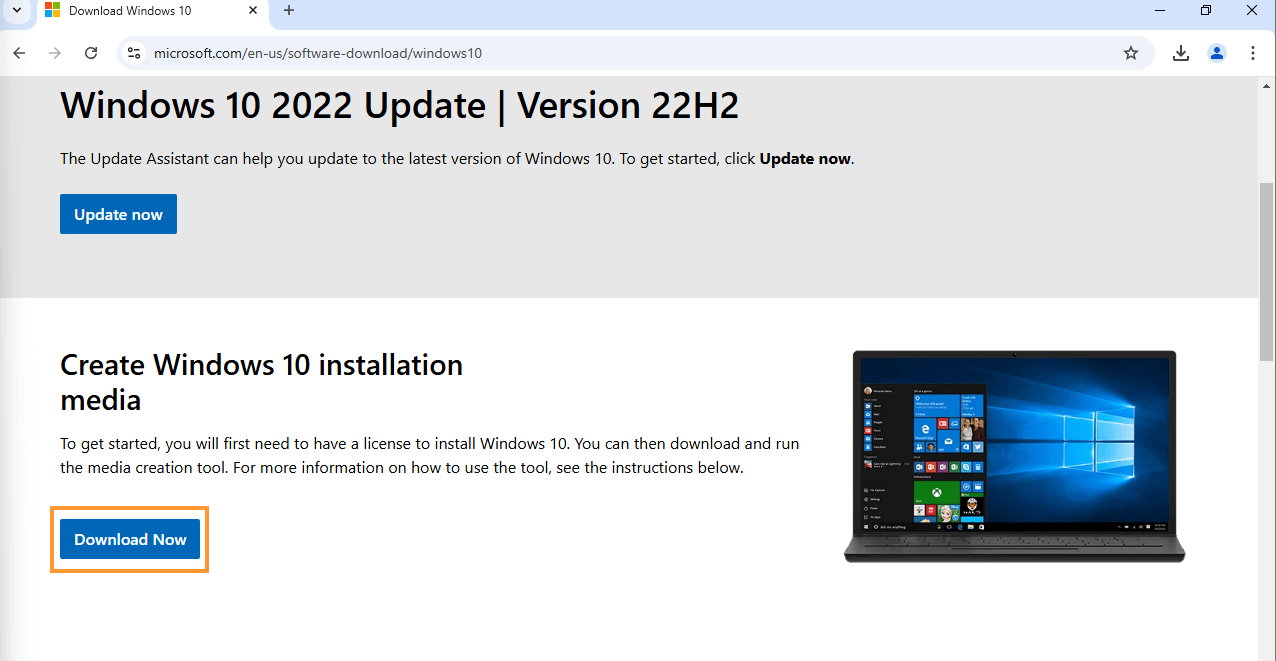
- Scroll down and click on Download Now to begin the download.
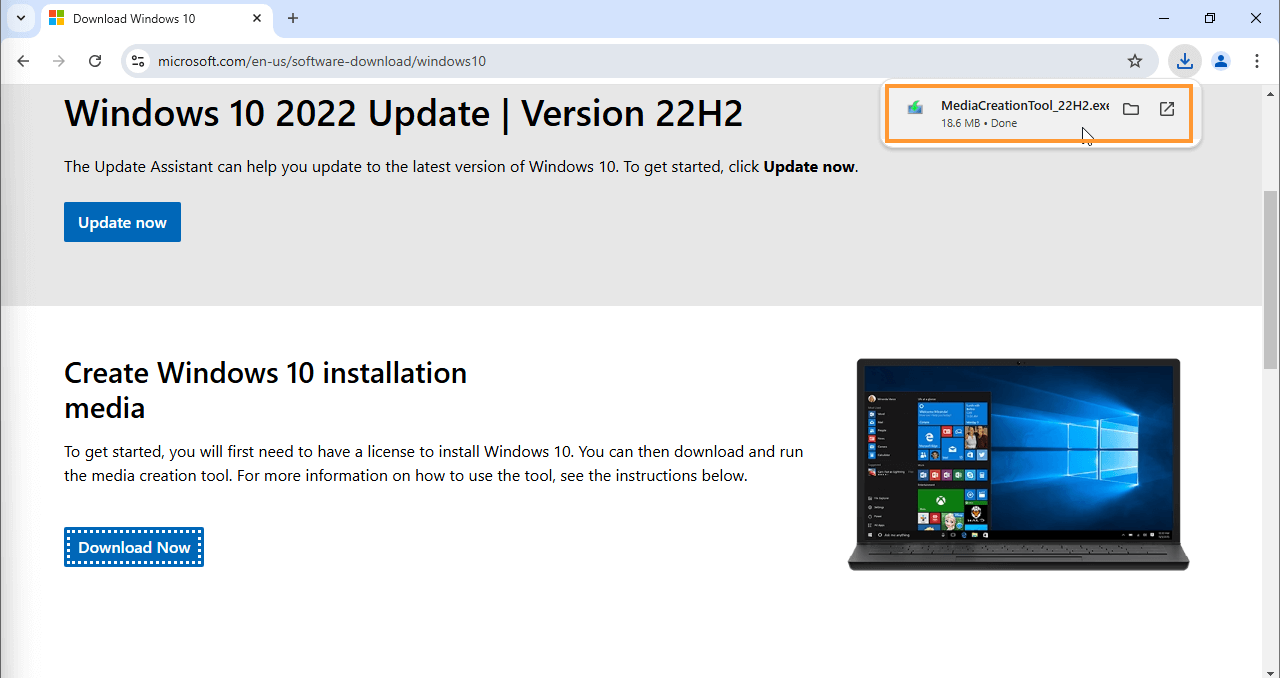
- Once the tool has downloaded, open the MediaCreationTool installer file.
- Read the license terms and click Accept to continue.
- In the next window, select “Create installation media (USB flash drive, DVD, or ISO file) for another PC.” This option will allow you to download the Windows 10 ISO file that you will use in VirtualBox.
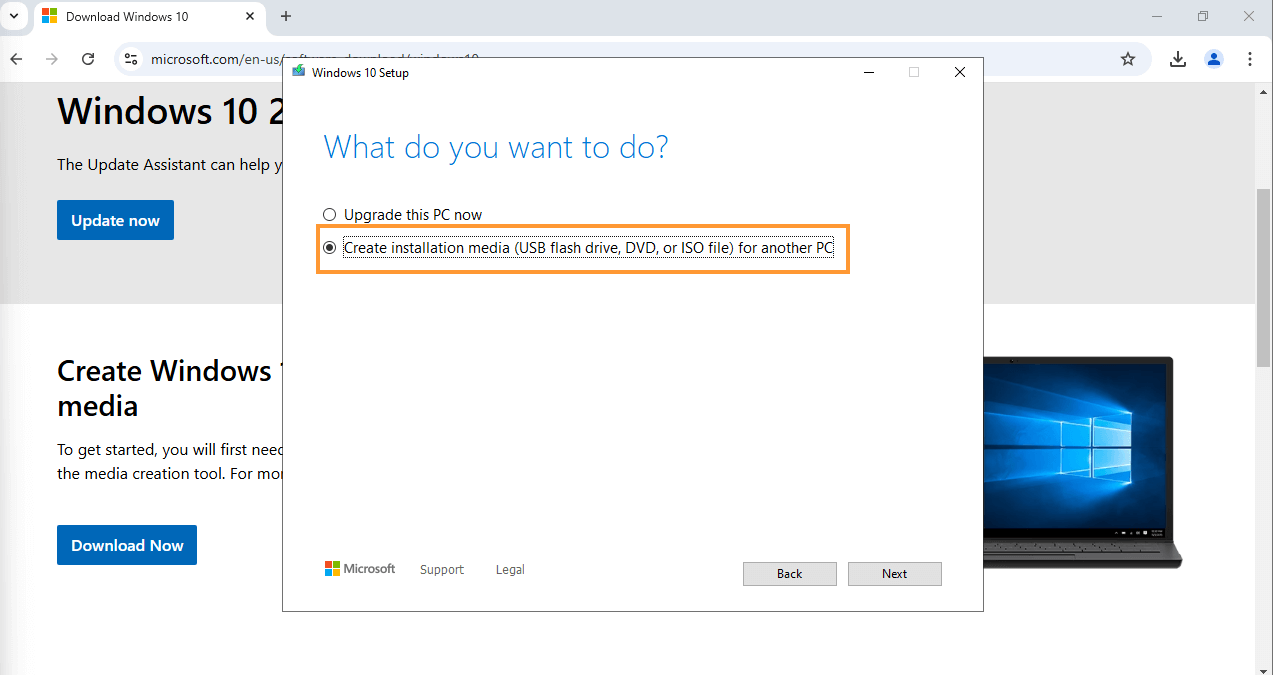
- Click Next to continue.
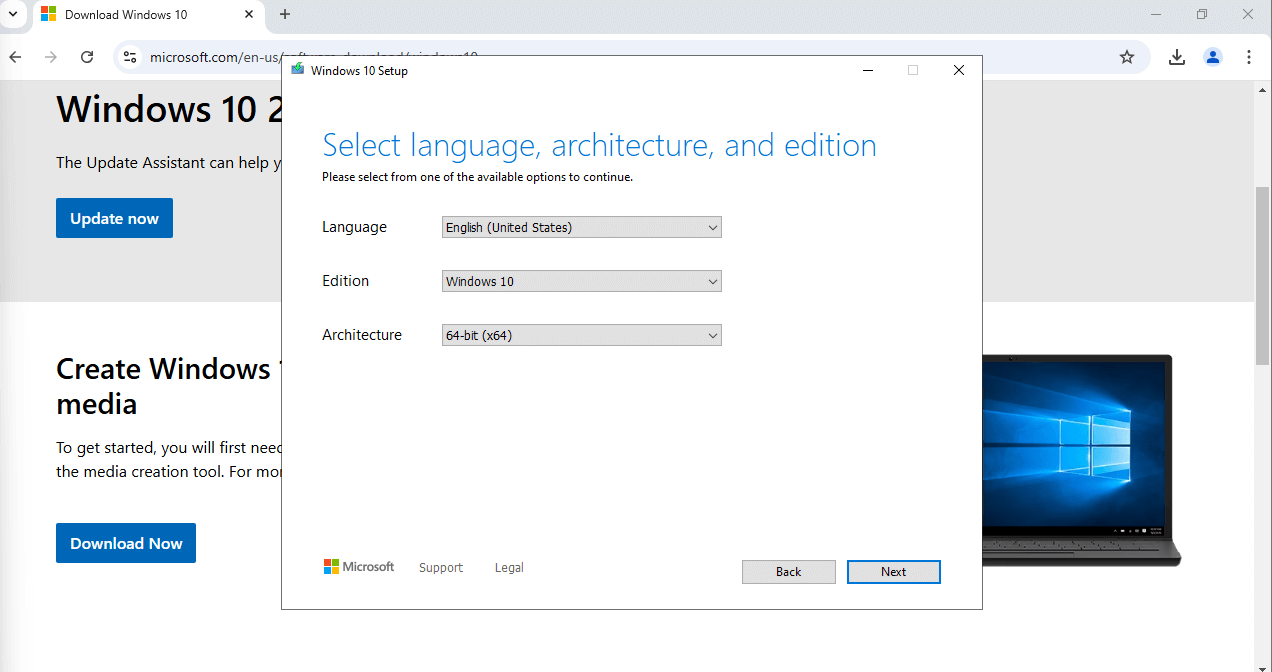
- On the following screen, choose ISO file and click Next to proceed.

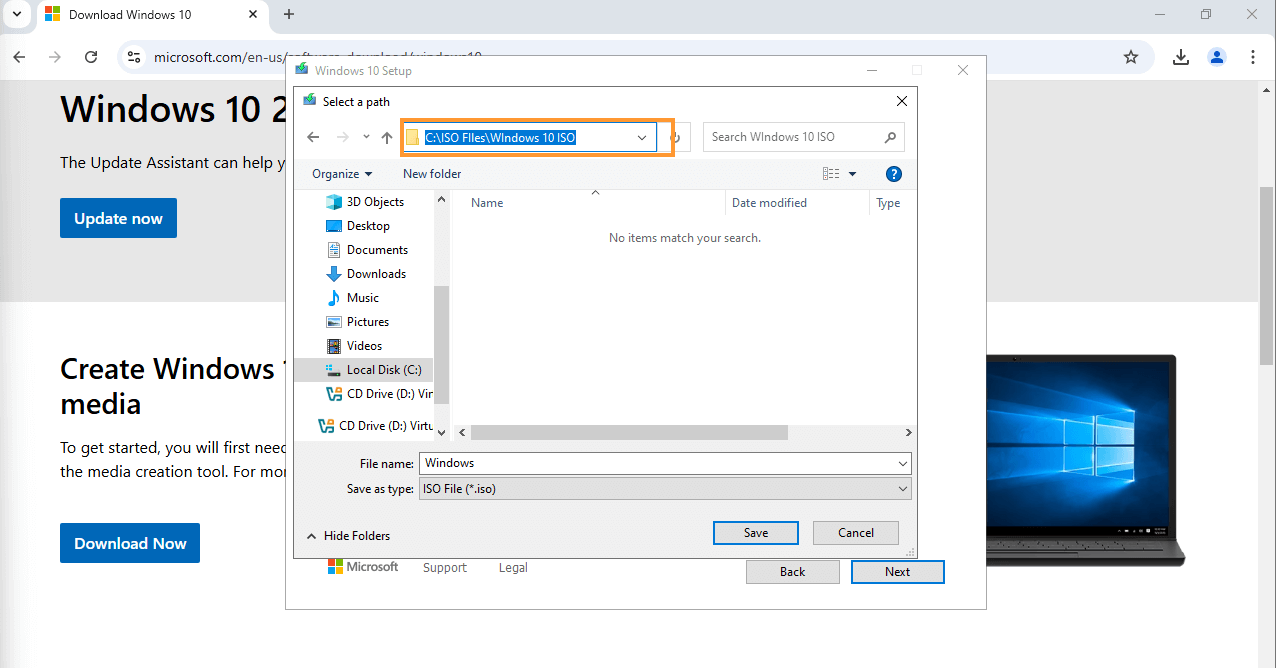
- When prompted to select the location, I highly recommend organizing your ISO files for future use:
- Create a folder called “ISO Files” on your computer.
- Inside this folder, create subfolders for each specific ISO (e.g., “Windows 10 ISO,” “Windows 11 ISO,” “Kali Linux,” “Windows Server 2022,” etc.). This will keep your ISO files neatly organized and easy to locate.
- After selecting the folder, click Save to start downloading the ISO file for Windows 10.
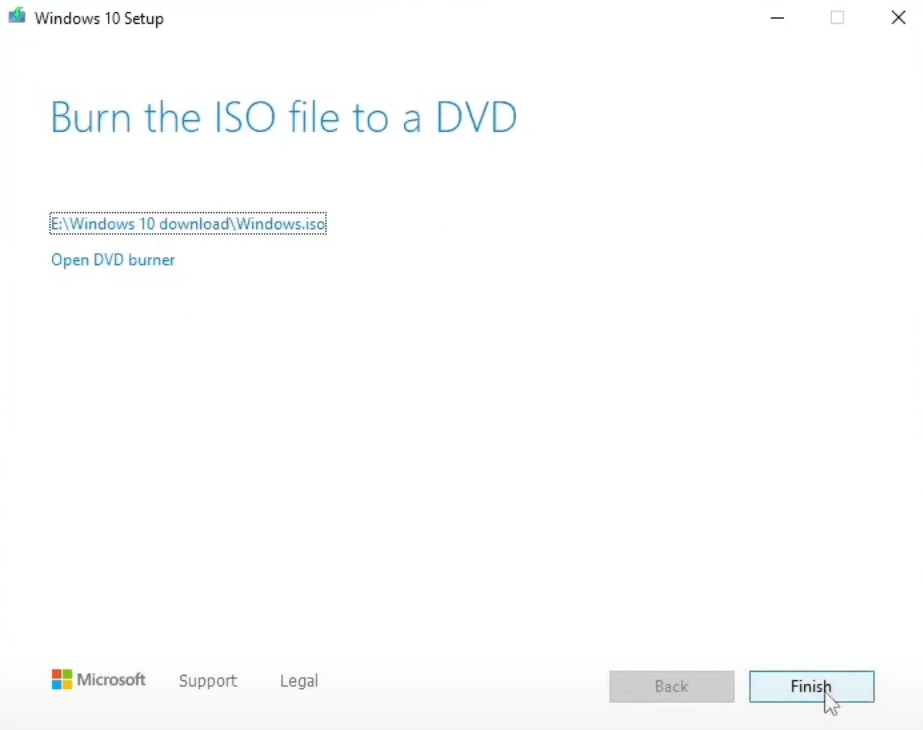
- Once the ISO file is downloaded, click Finish to close the Media Creation Tool.
Configuring the Virtual Machine
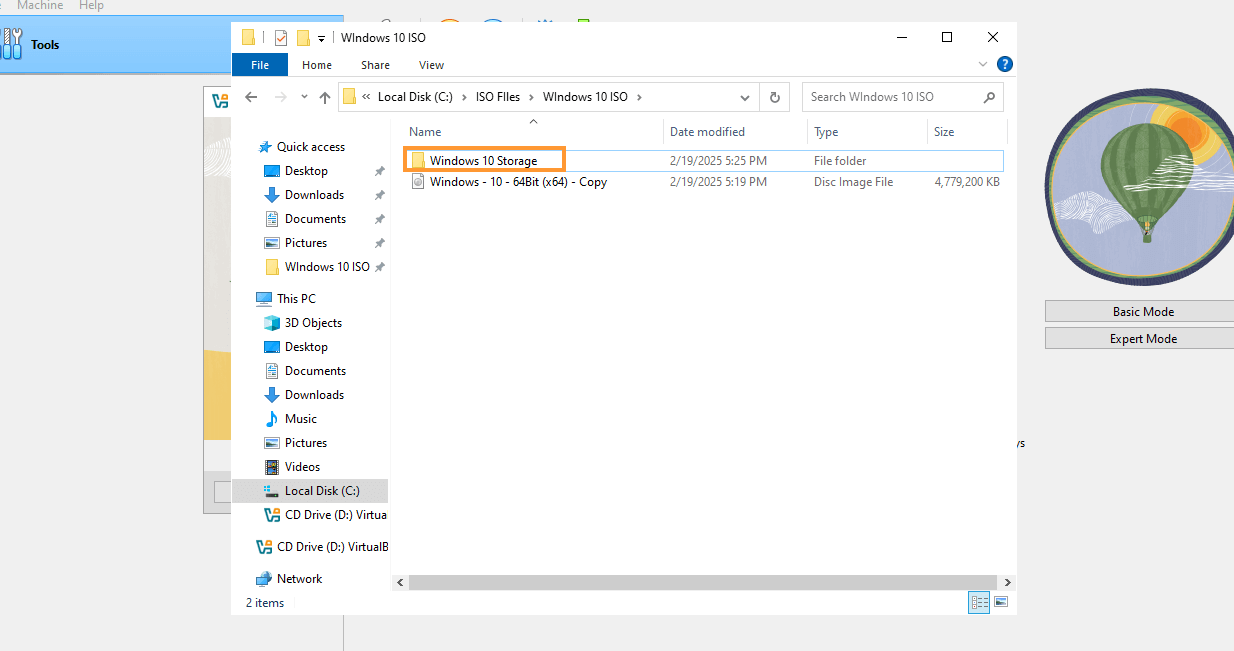
Step 3: Create a Folder for Windows 10 Storage
- Go back to the Windows 10 ISO file you downloaded earlier.
- Create a new folder called “Windows 10 Storage”. This folder will store all the files related to this Windows 10 VM. Keeping everything organized like this will make it easier to find and manage in the future.
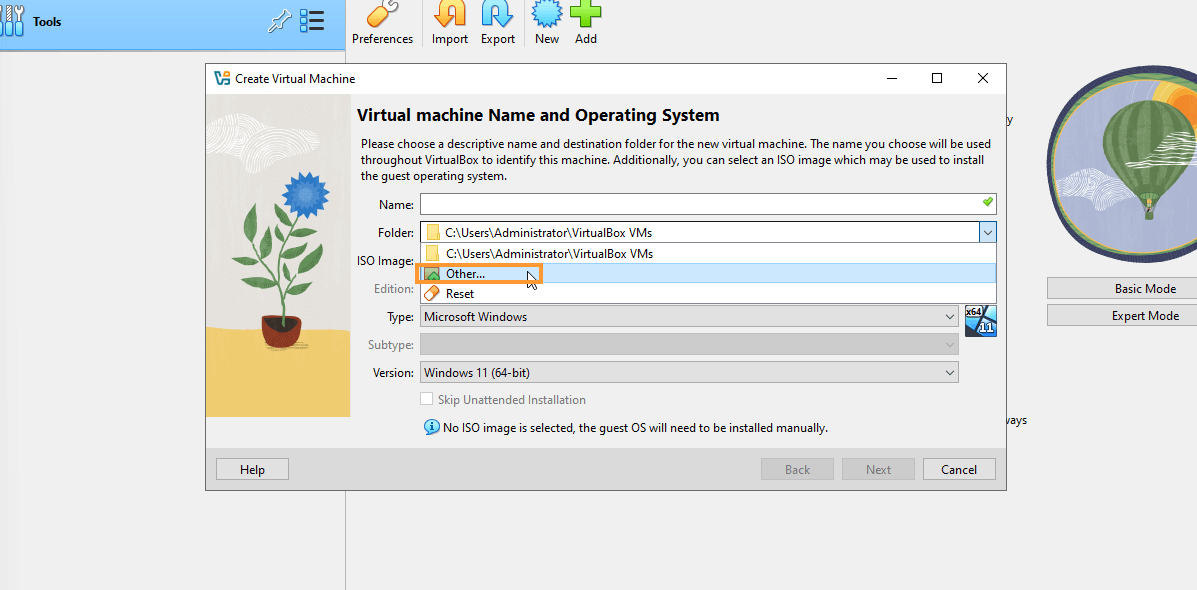
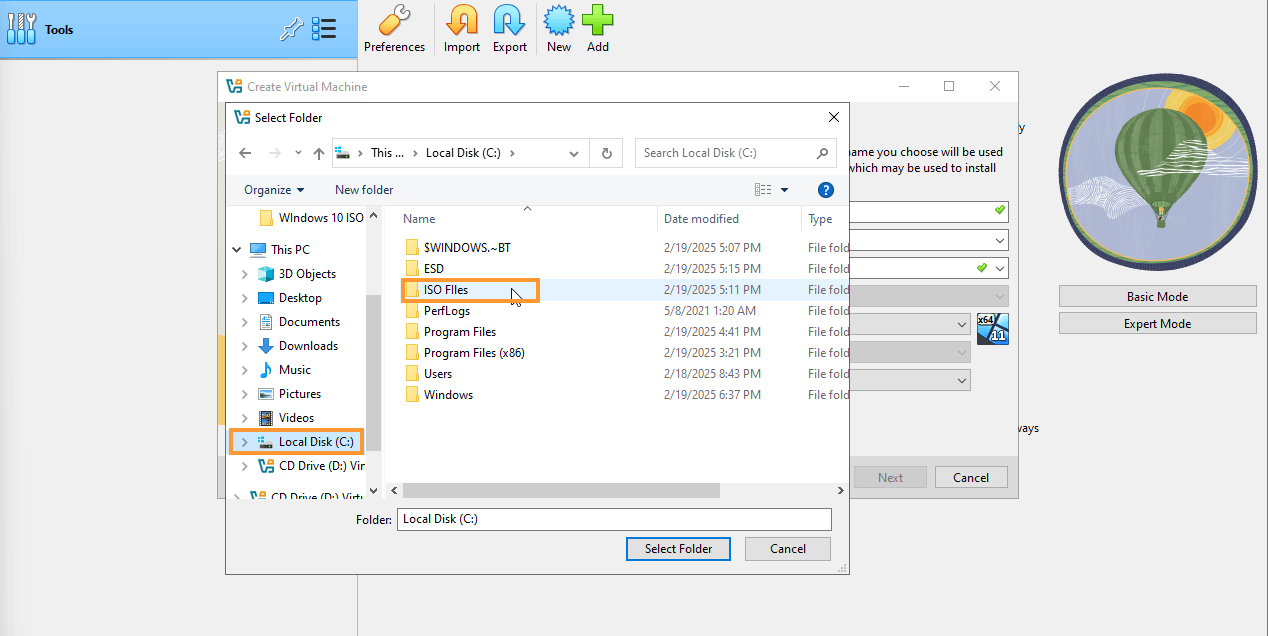
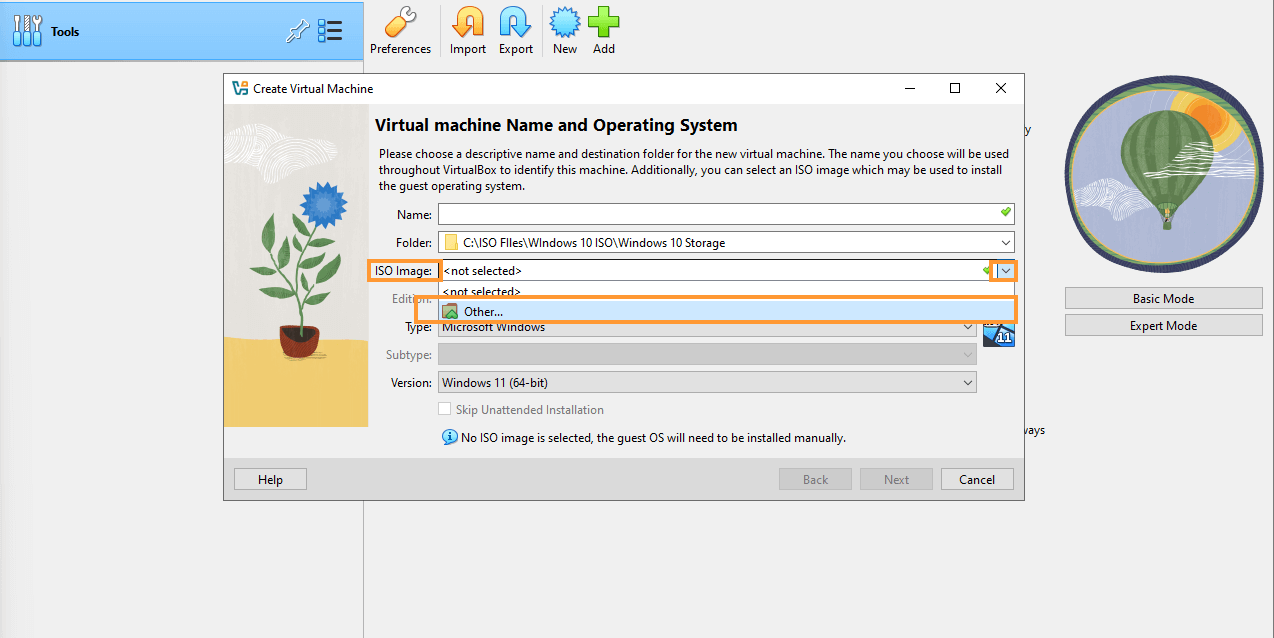
- Click on Other to browse your system for the newly created Windows 10 Storage folder.
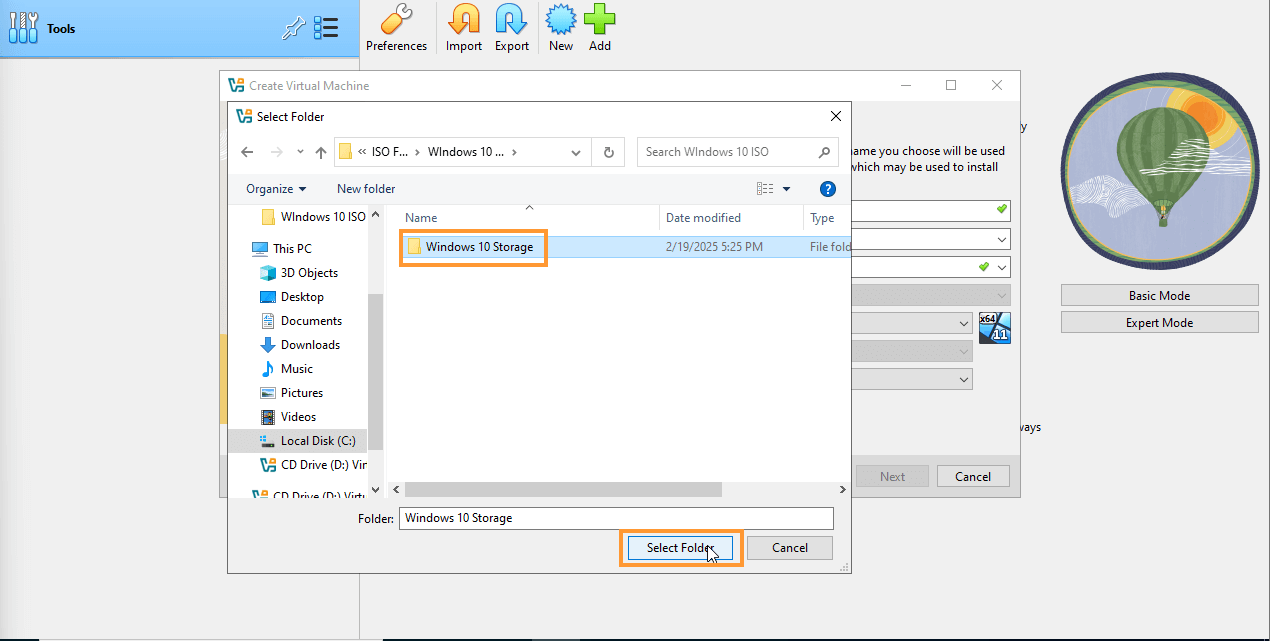
- Once you’ve selected the folder, click Select Folder.
- After selecting the storage folder, you’ll need to select the ISO file.
- Click on the arrow next to the ISO file selection field, then click on Other again to browse for the ISO.
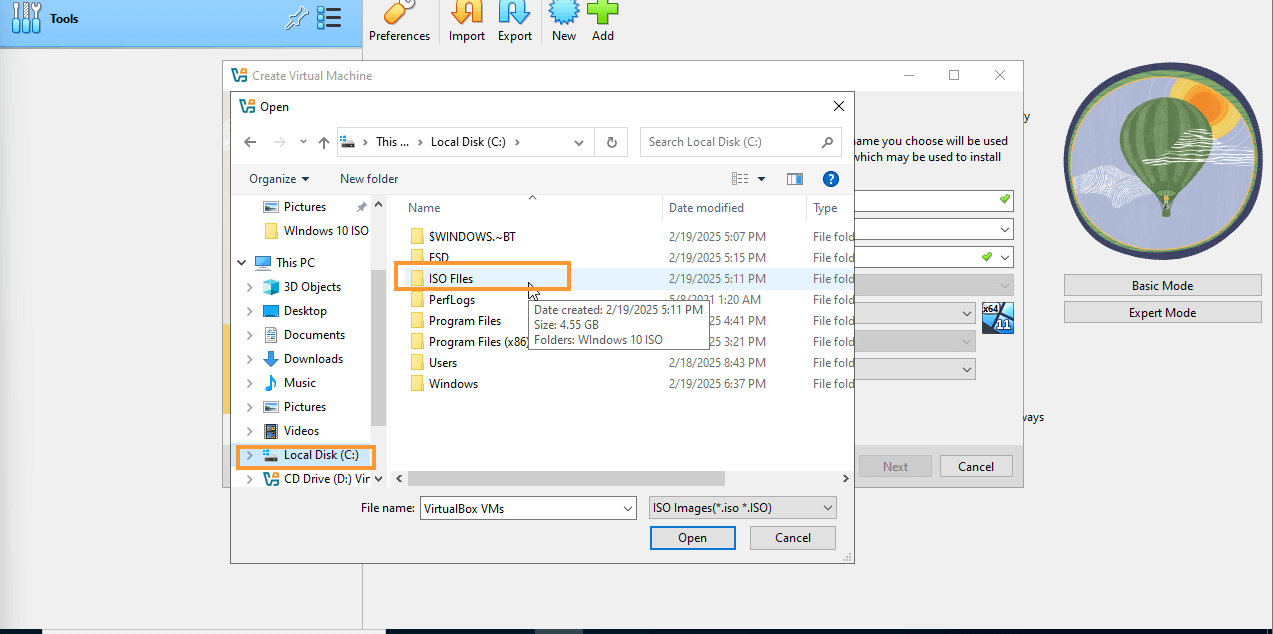
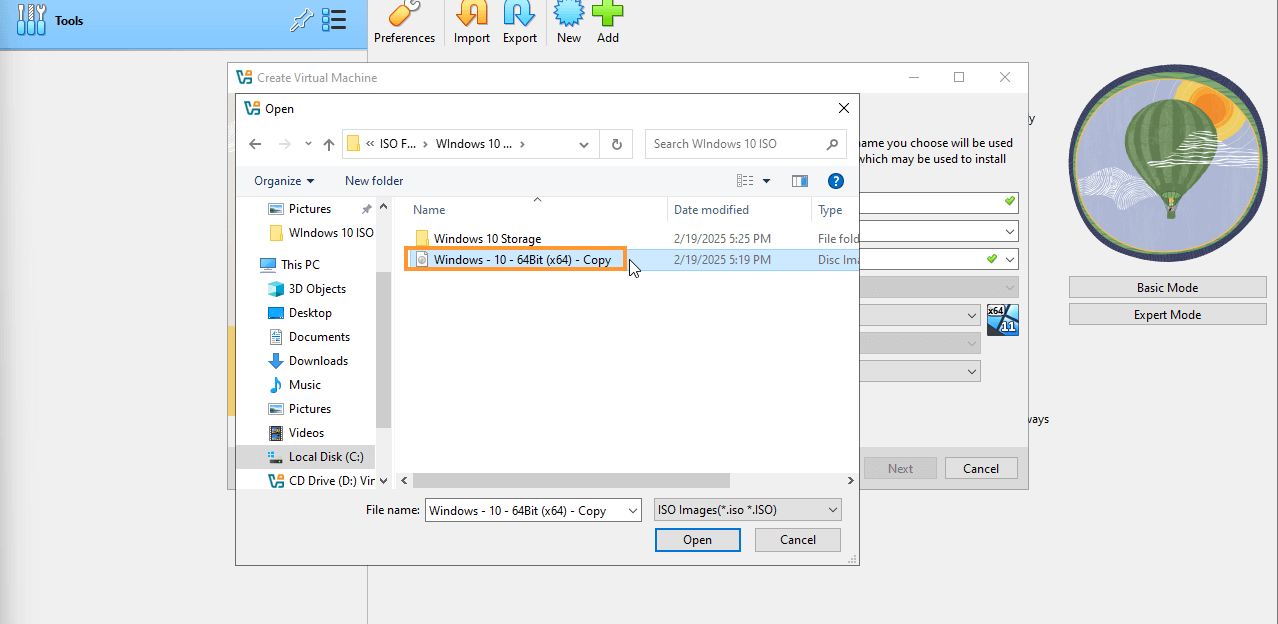
- Locate the Windows 10 ISO file and click Open.
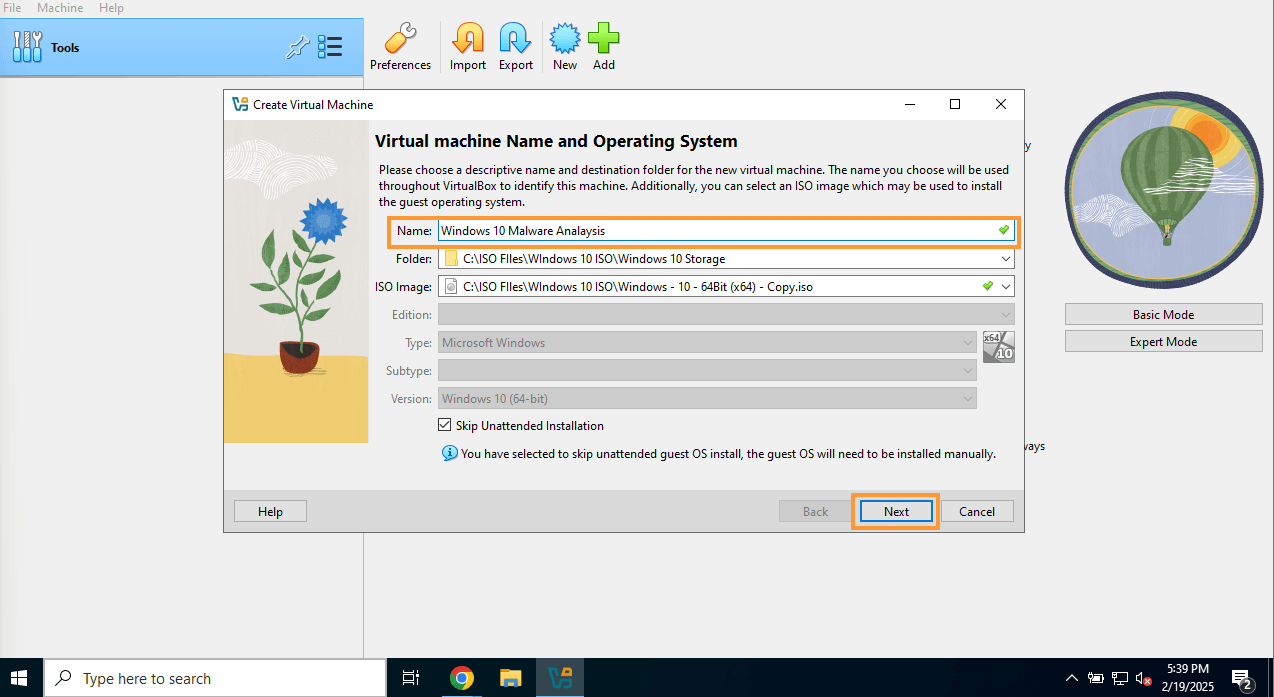
- In the next prompt, select “Skip unattended installation” to proceed with the installation without any interruptions.
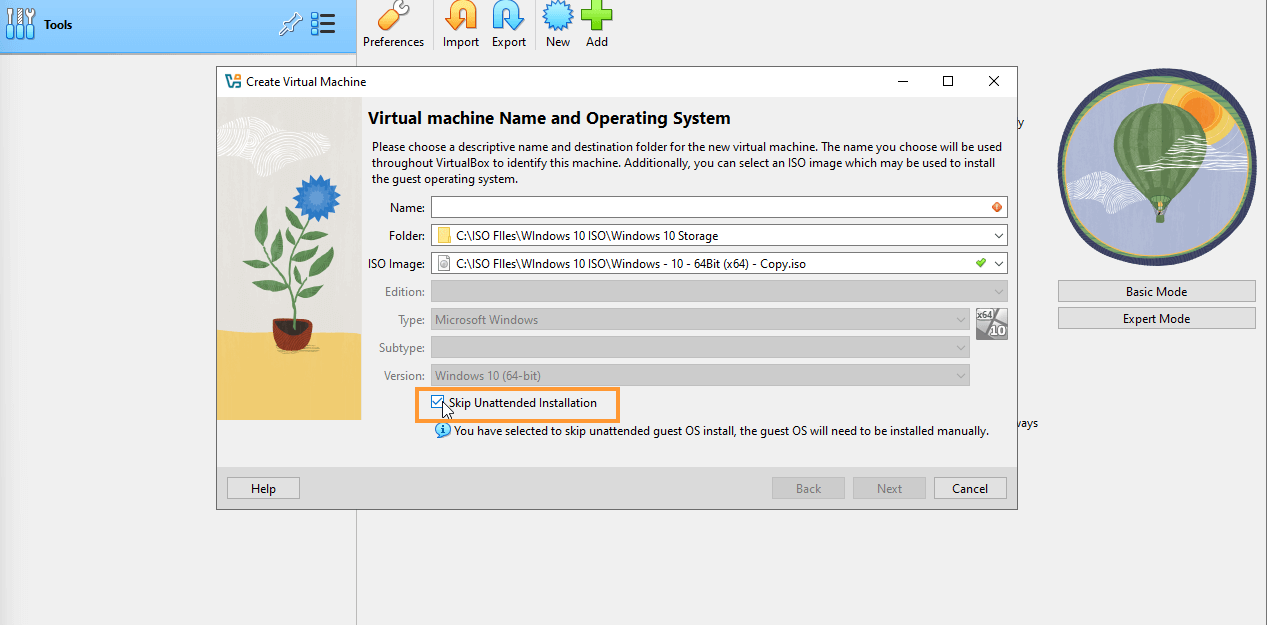
- You’ll now be asked to name the VM. For clarity, name it something like “Windows 10 Malware Analysis”. The reason for this specific name is to avoid issues when changing the folder settings after naming the VM. If you attempt to change the folder after naming the VM, it might display a red warning, and you’ll need to rename the VM. To avoid this, it’s best to set the name as you want it right from the start.
- After naming the VM, click Next to move on to configuring the hardware.
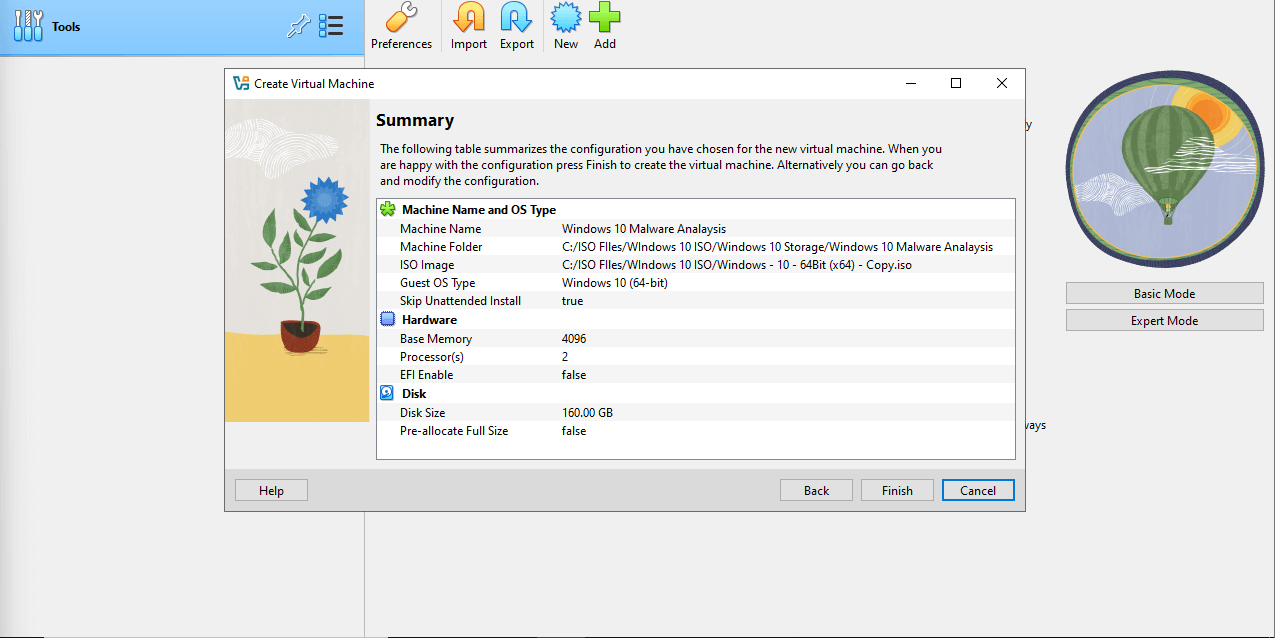
- For the RAM, set it to at least 4GB (4096MB). To calculate the MB equivalent, multiply 1024 by the amount of RAM (e.g., 4GB = 4096MB).

- For storage, choose 160GB as the size. While 80GB will work, 160GB is recommended for flexibility. The disk will be dynamic, meaning it will only use the space that is being occupied by the virtual machine.
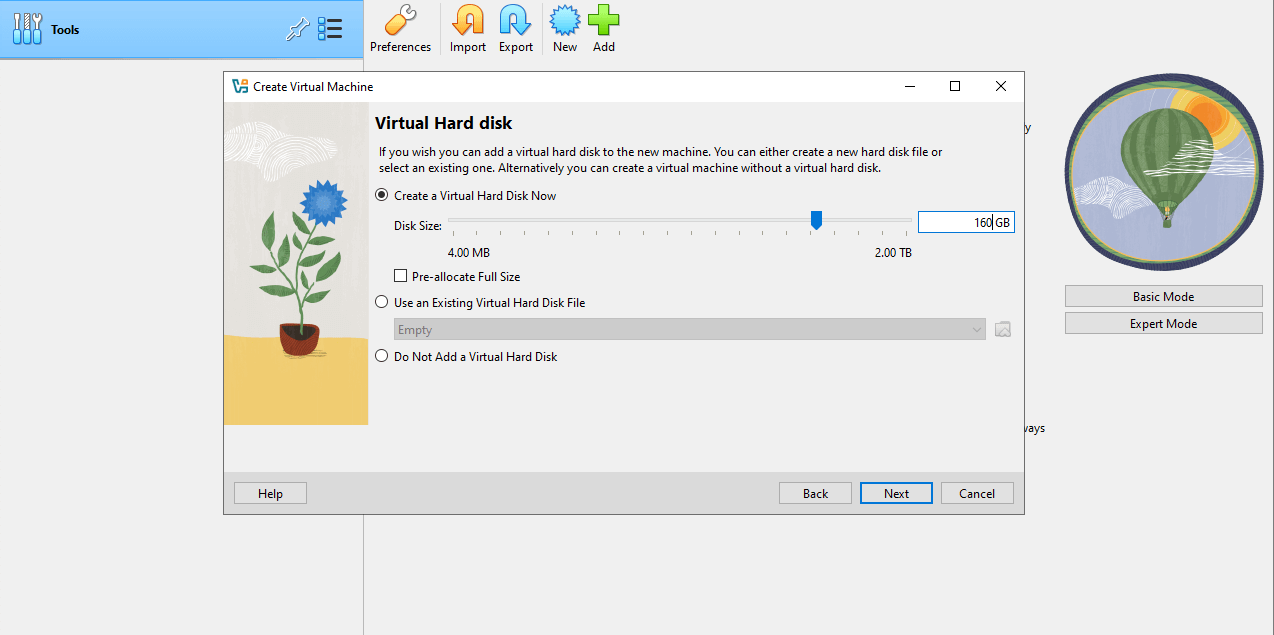
- Click Next, review your settings, and then click Finish.
Step 4: Configure VM Settings Before Start
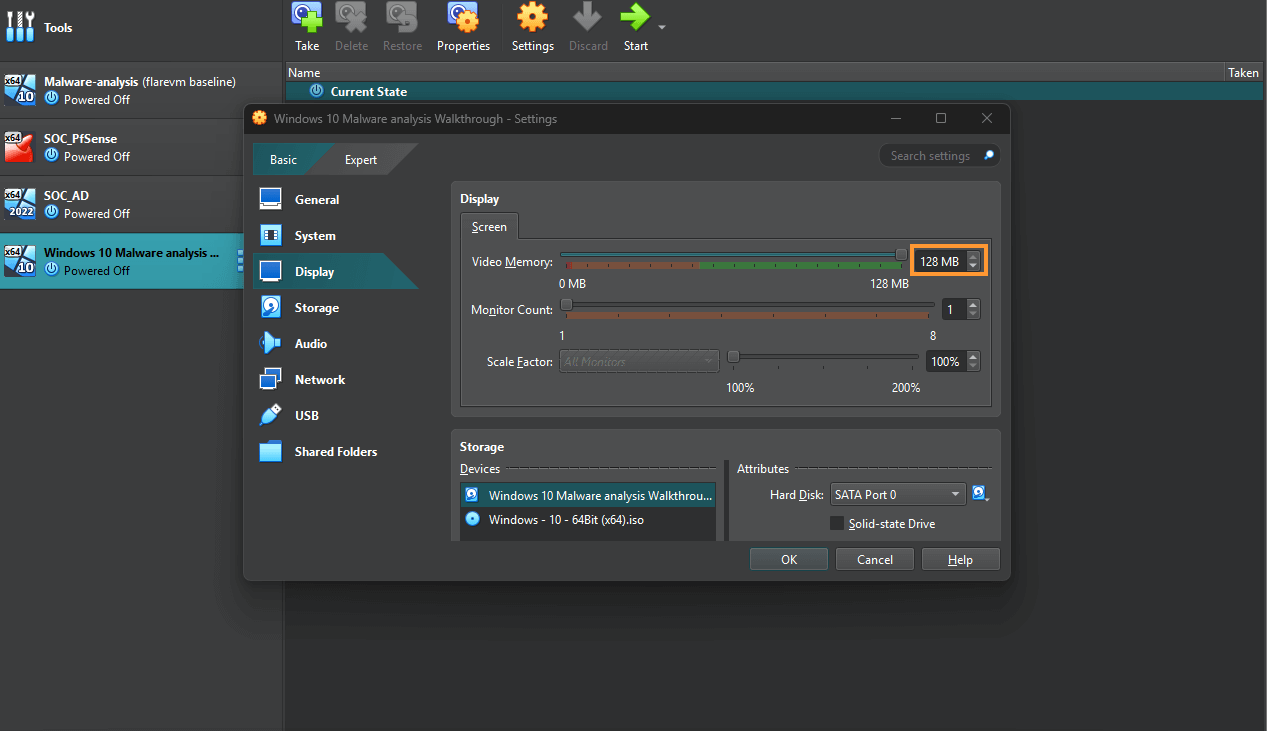
- Adjust Display Settings:
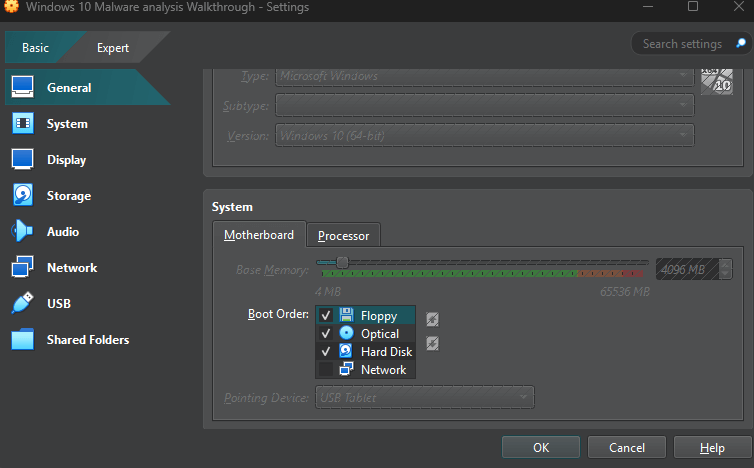
- Click the yellow gear icon (Settings) and go to Display.
- Max out the video memory to ensure a smooth visual experience during installation.
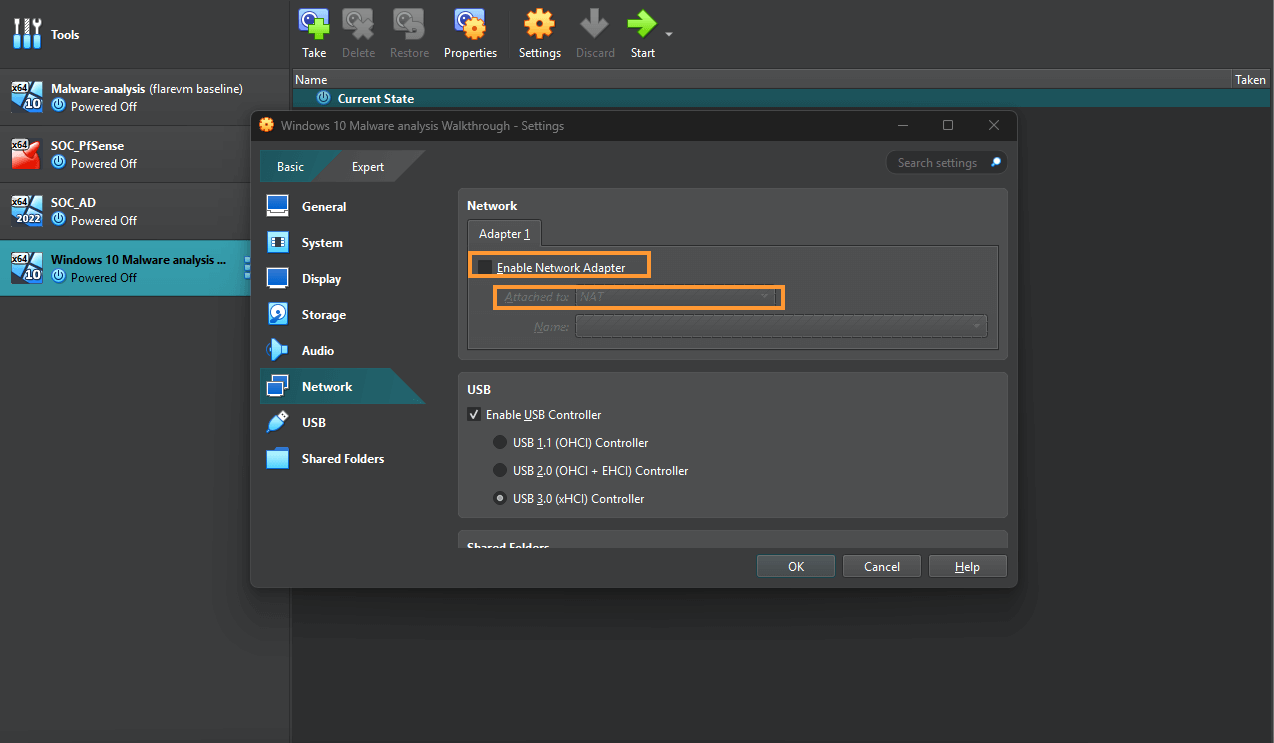
- Disable Network Adapter:
- For now, disable the network adapter to bypass the Windows setup screens asking for a Microsoft account. This allows for a quicker setup process.
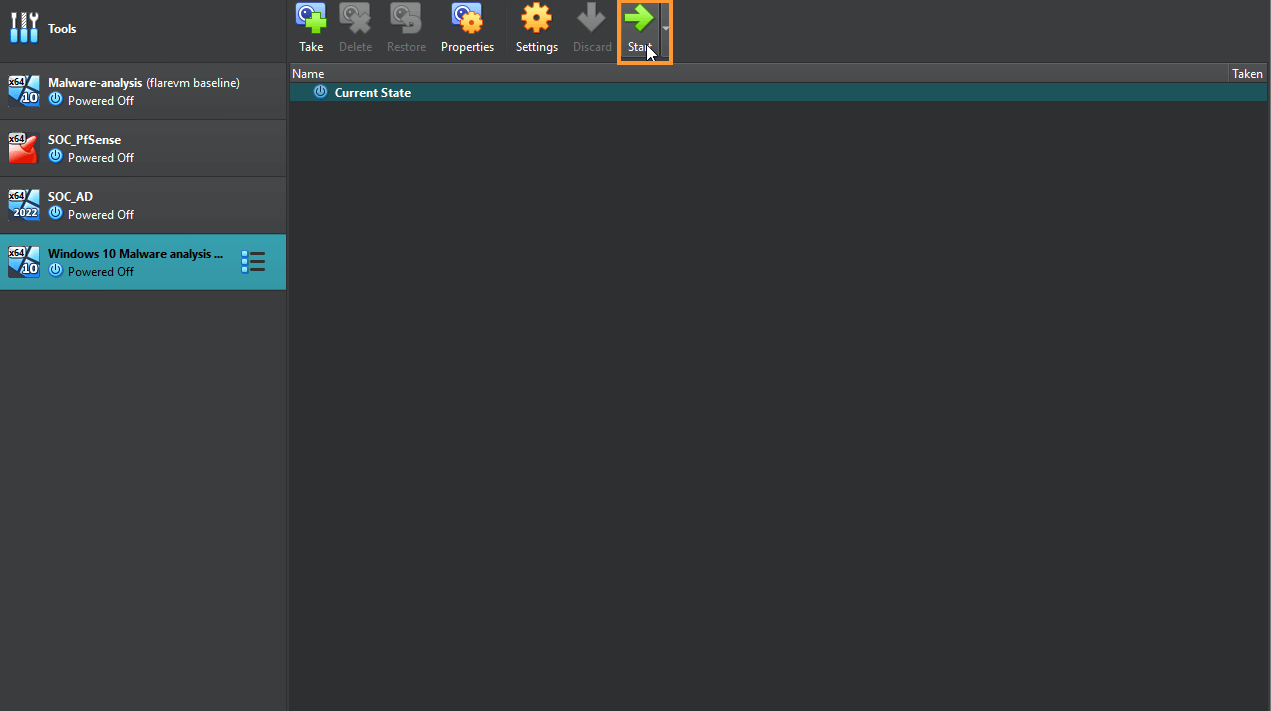
Step 5: Start the Installation Process
- Start the VM:
- Click Start to begin the installation process.
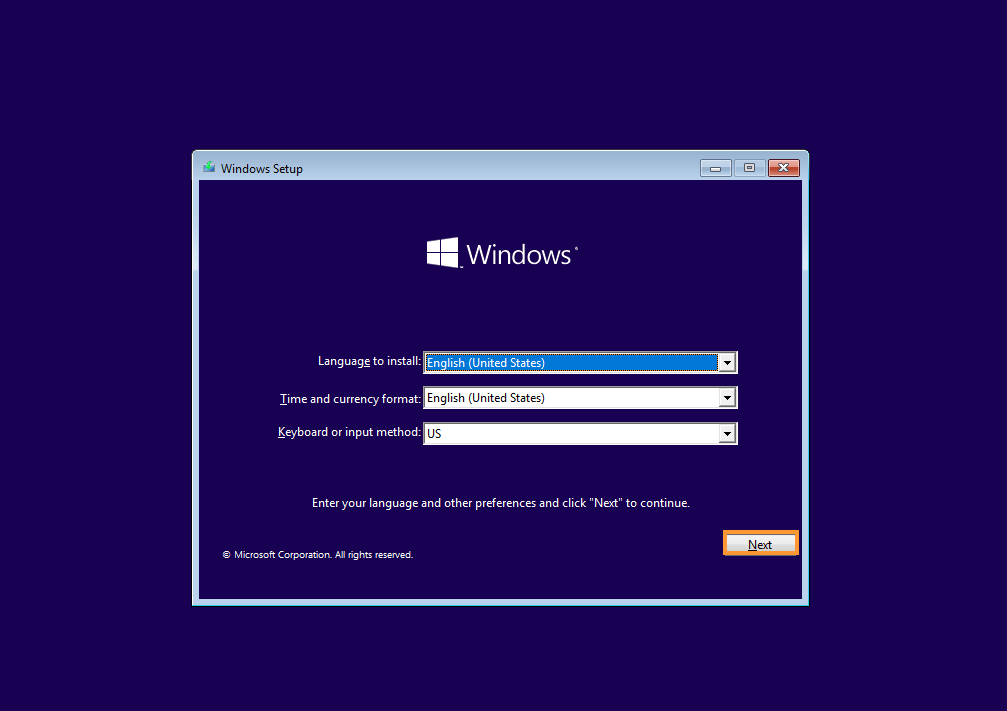
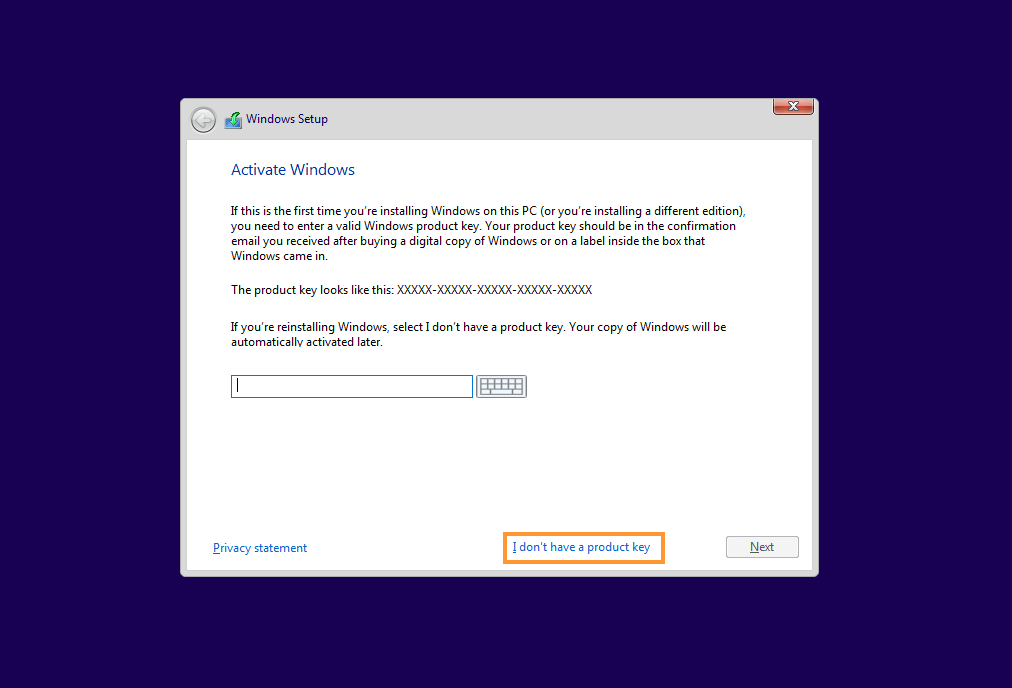
- Follow the Windows Installation Wizard:
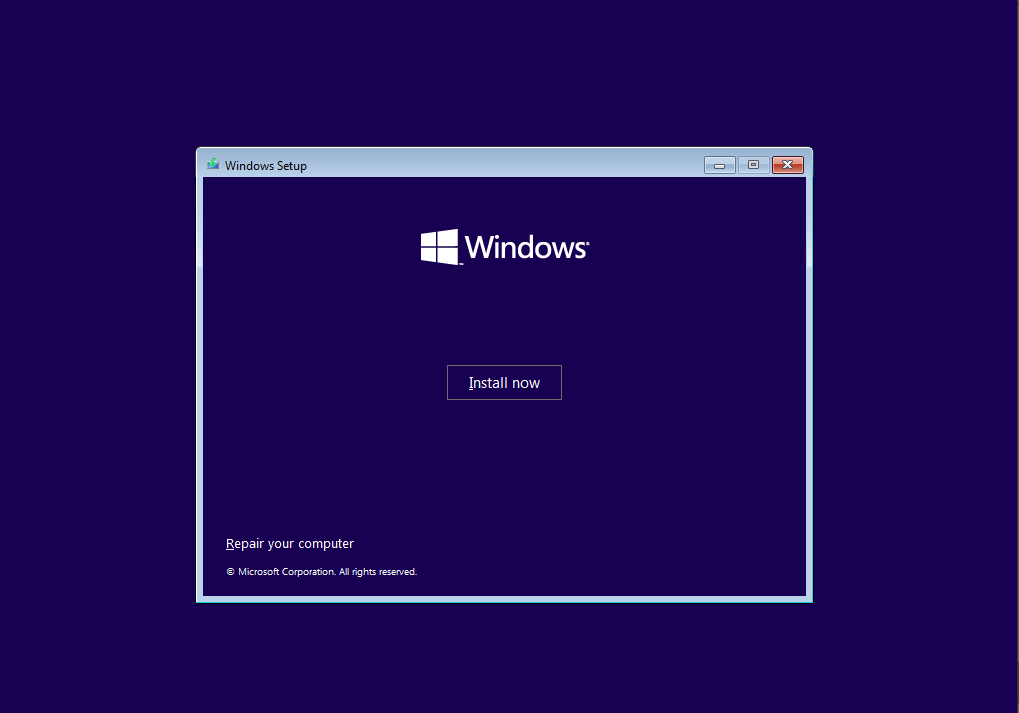
- Choose “I don’t have a product key” when prompted.
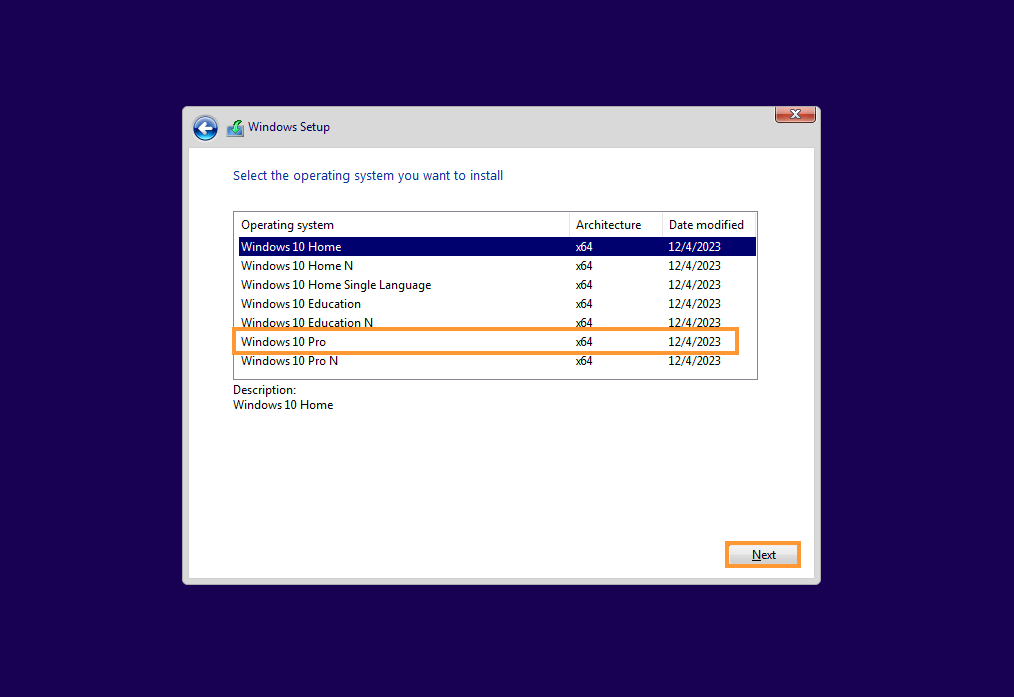
- Select Windows 10 Pro and click Next.
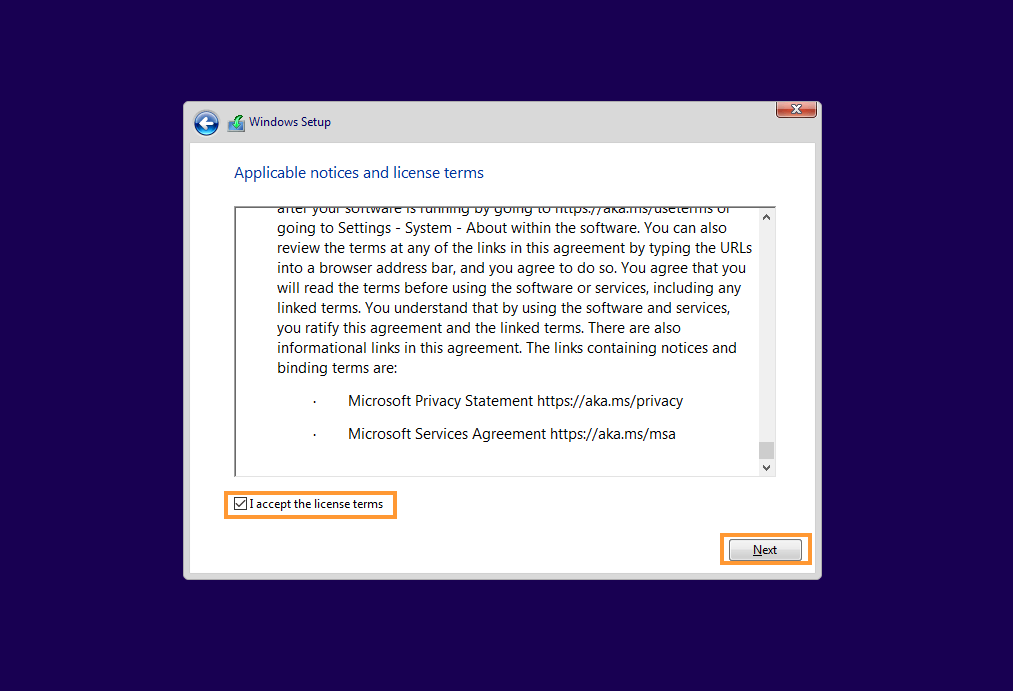
- Accept the license terms and click Next.
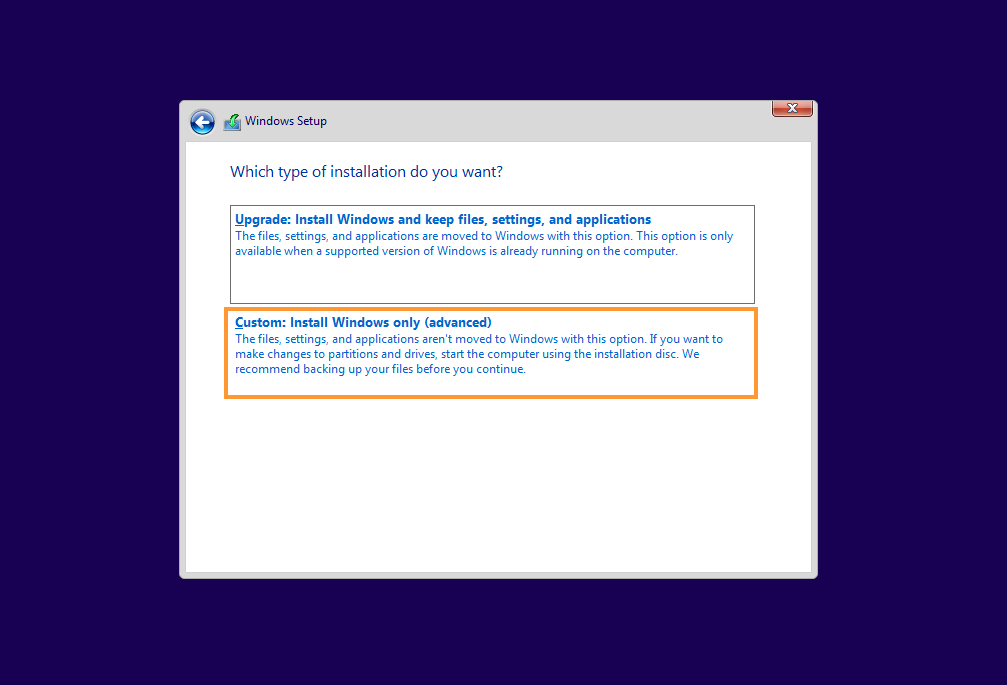
- Choose Custom Install.
- Select Drive and Partition:
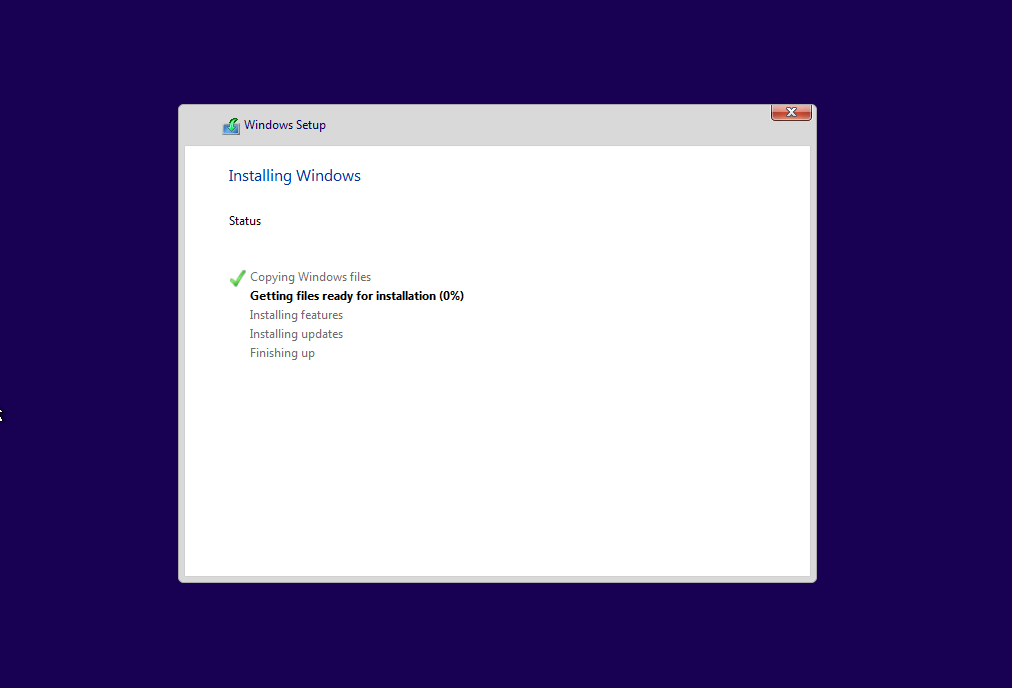
- Make sure Drive 0 is selected for installation and click Next.
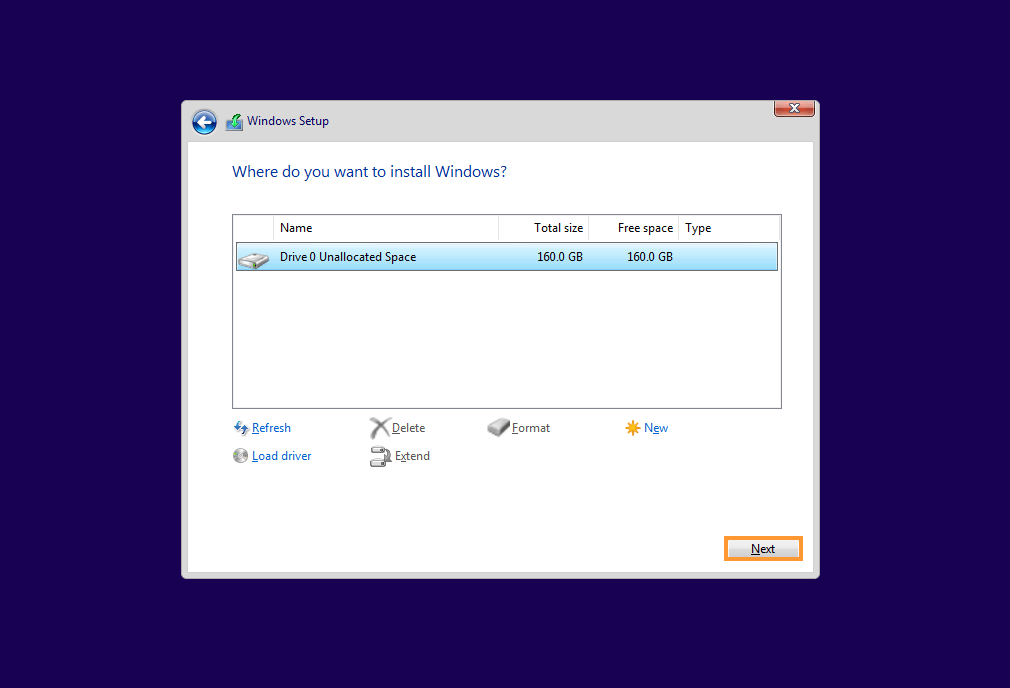
- Wait for the installation to finish. This can take between 5 to 60 minutes.
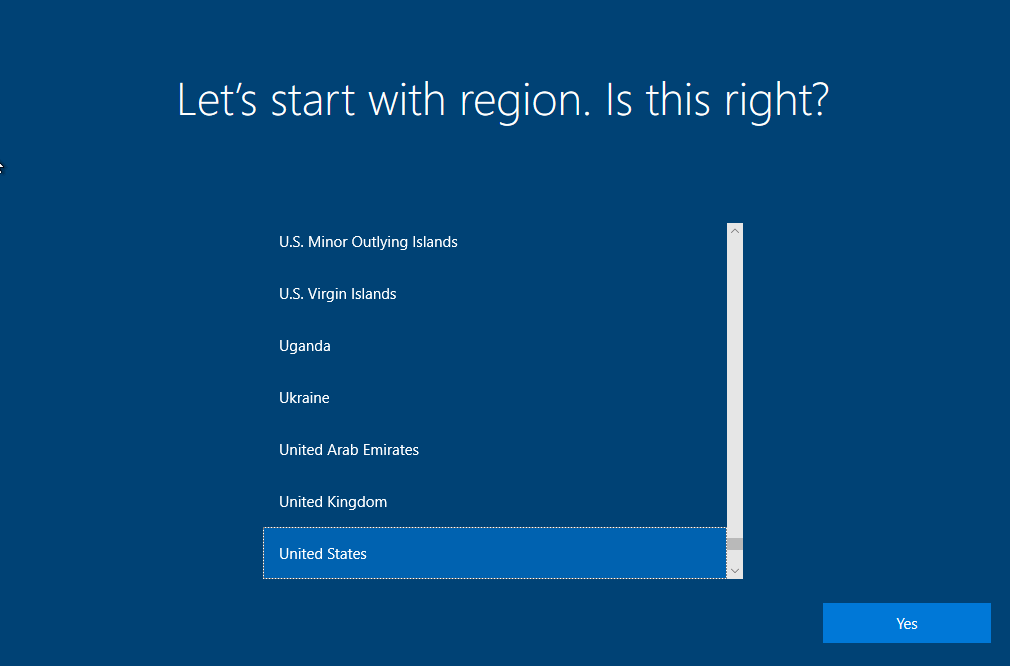
Step 6: Complete Windows Setup
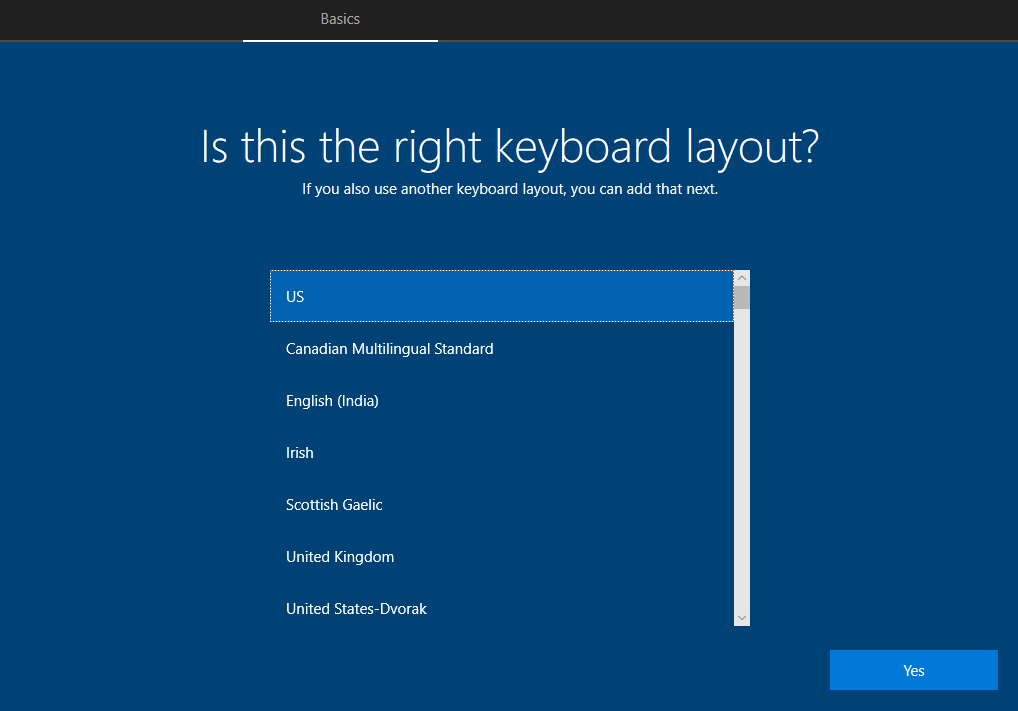
- Select Region and Keyboard Layout:
- After the installation, choose your region and preferred keyboard layout.
- Skip Internet Connection:
- When prompted for internet, select I don’t have internet.
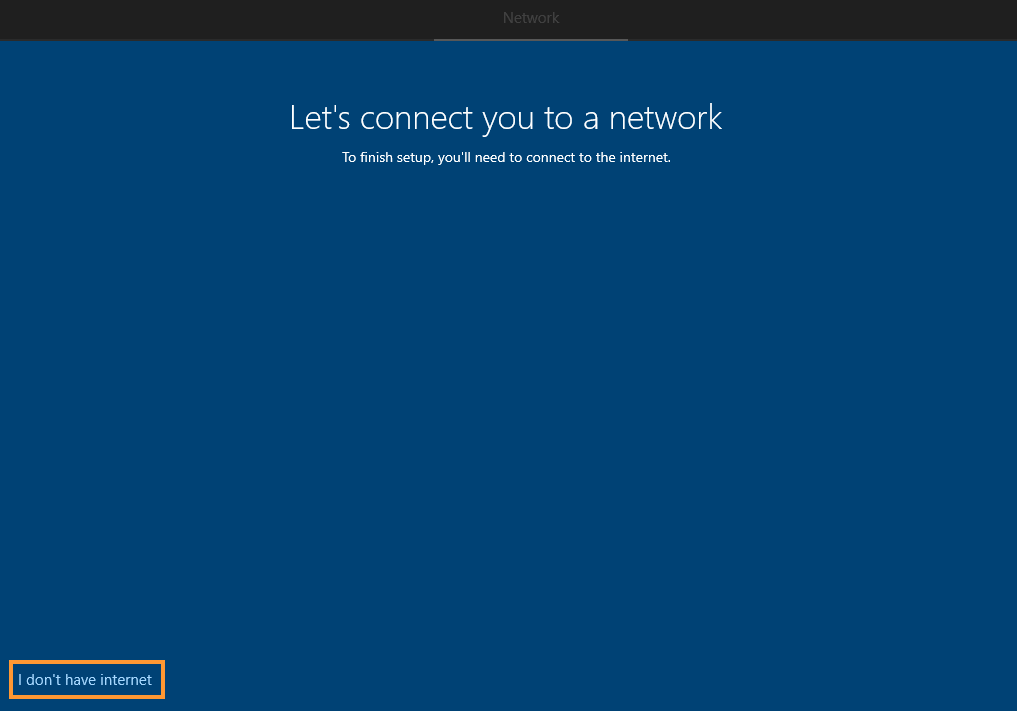
- Click Continue with limited setup to proceed with the installation.

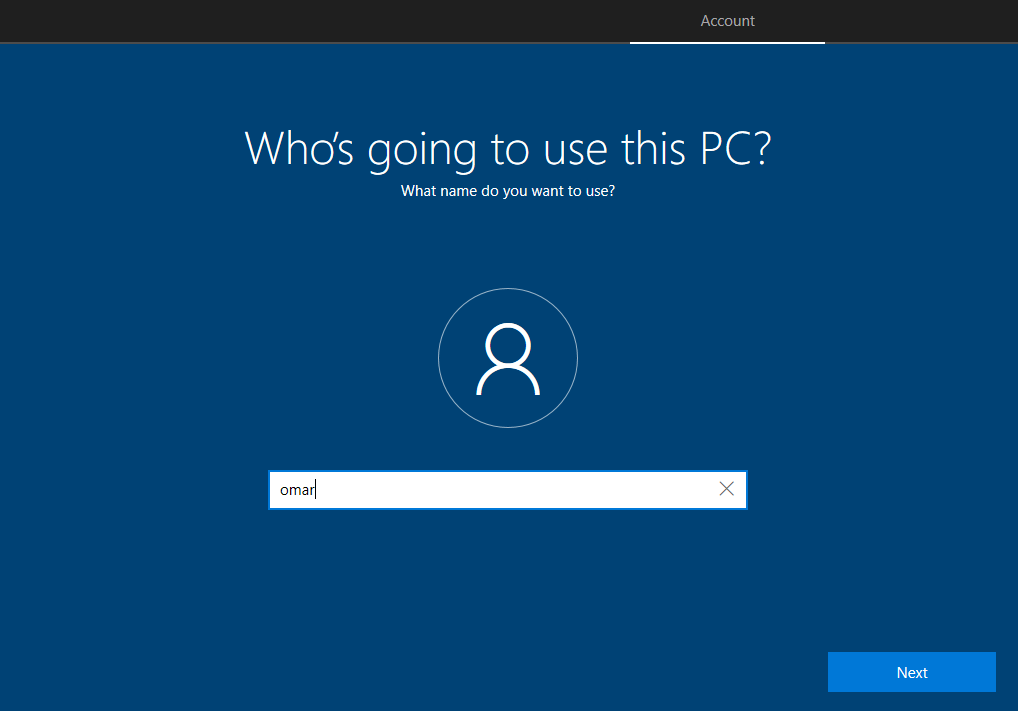
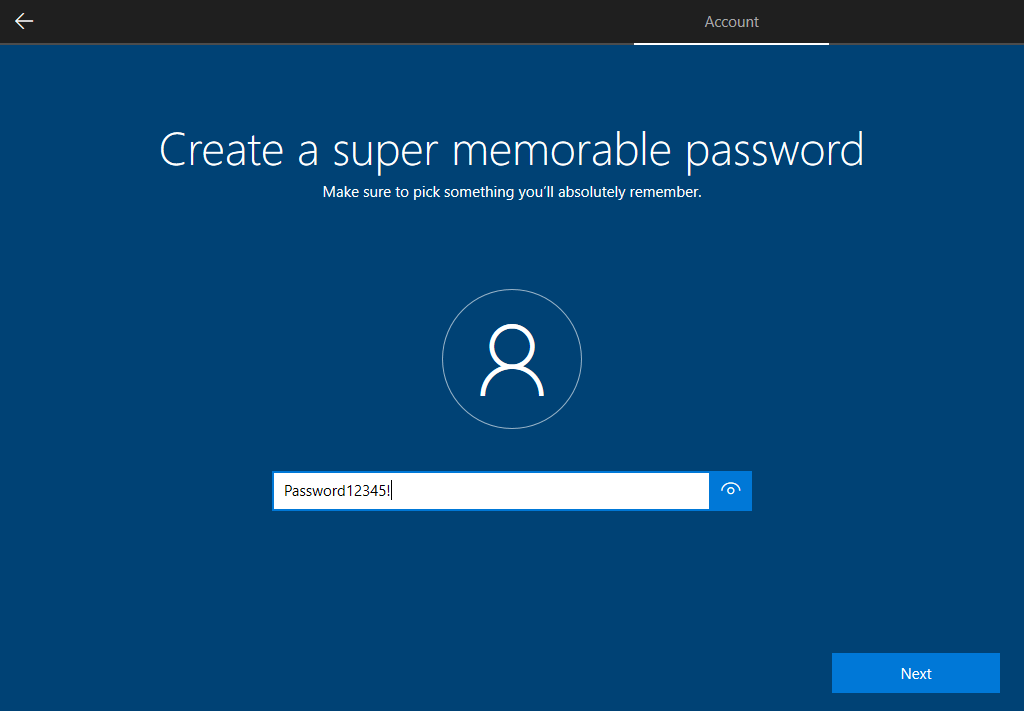
- Set Up a User Account:
- Don’t name the PC something obvious like “Malware Analysis” to avoid alerting to the VM’s purpose.
- Choose a simple name like “Omar” and create a password (e.g., “Password12345!”).
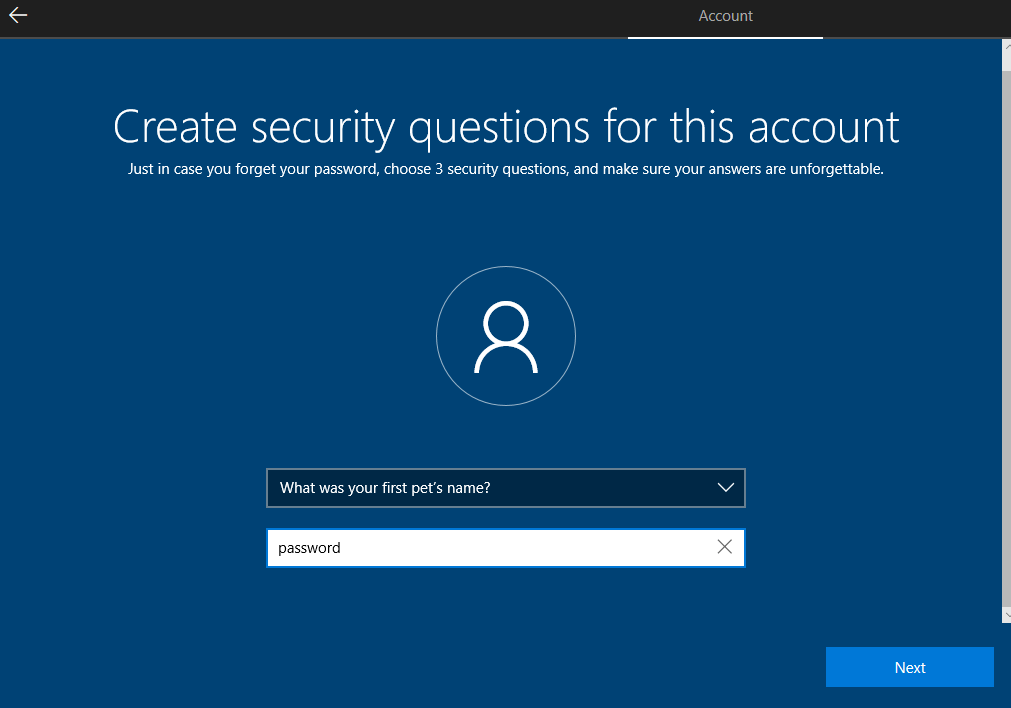
- Security Questions:
- Choose some easy security questions (e.g., “password, password1, password2”).
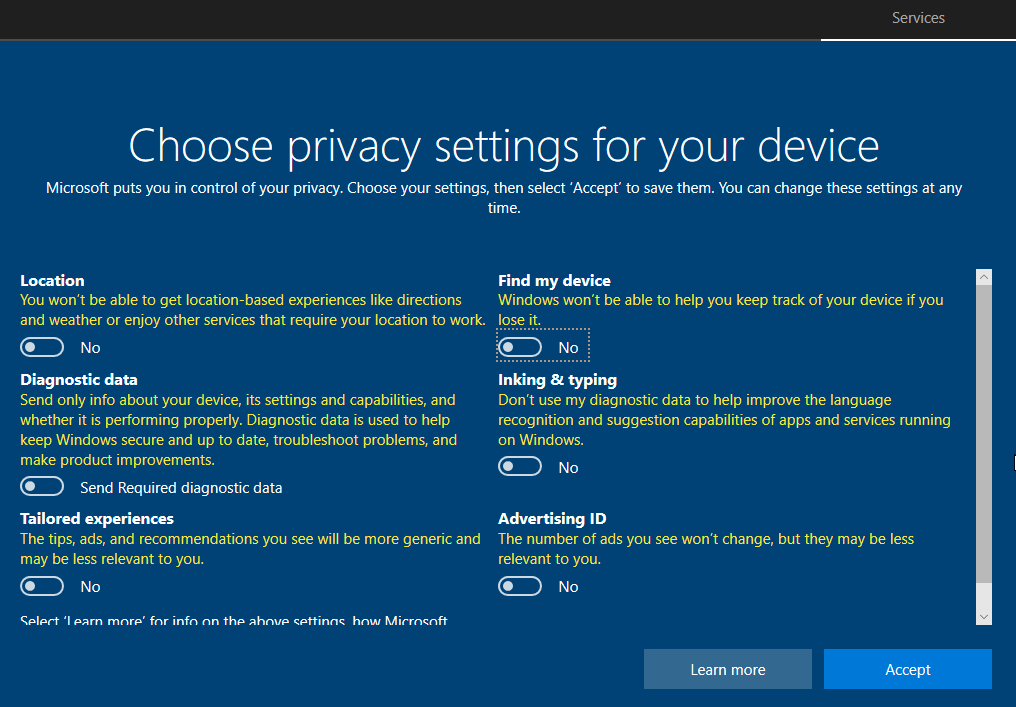
- Turn Off Privacy Settings:
- Optionally, turn off all privacy settings for a cleaner installation.
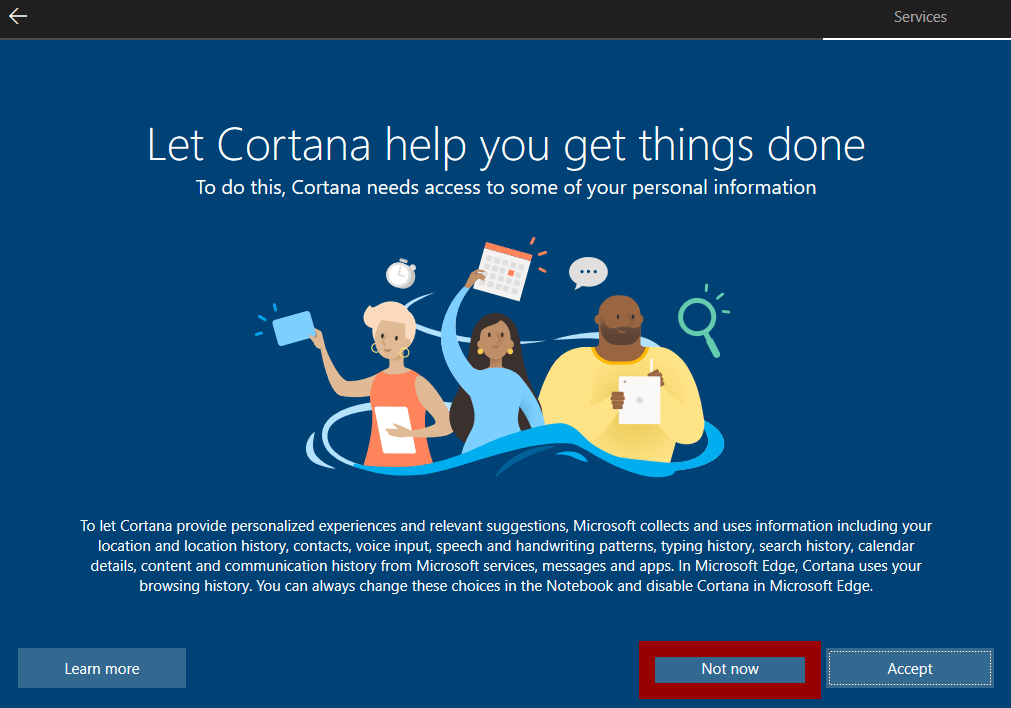
- Disable Cortana when prompted.
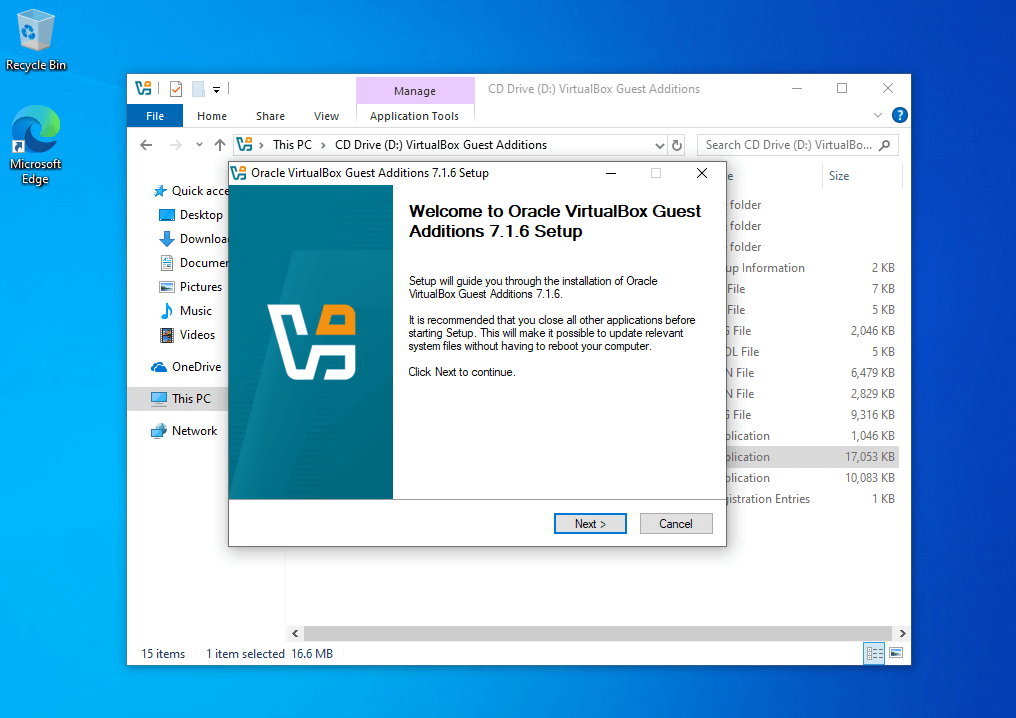
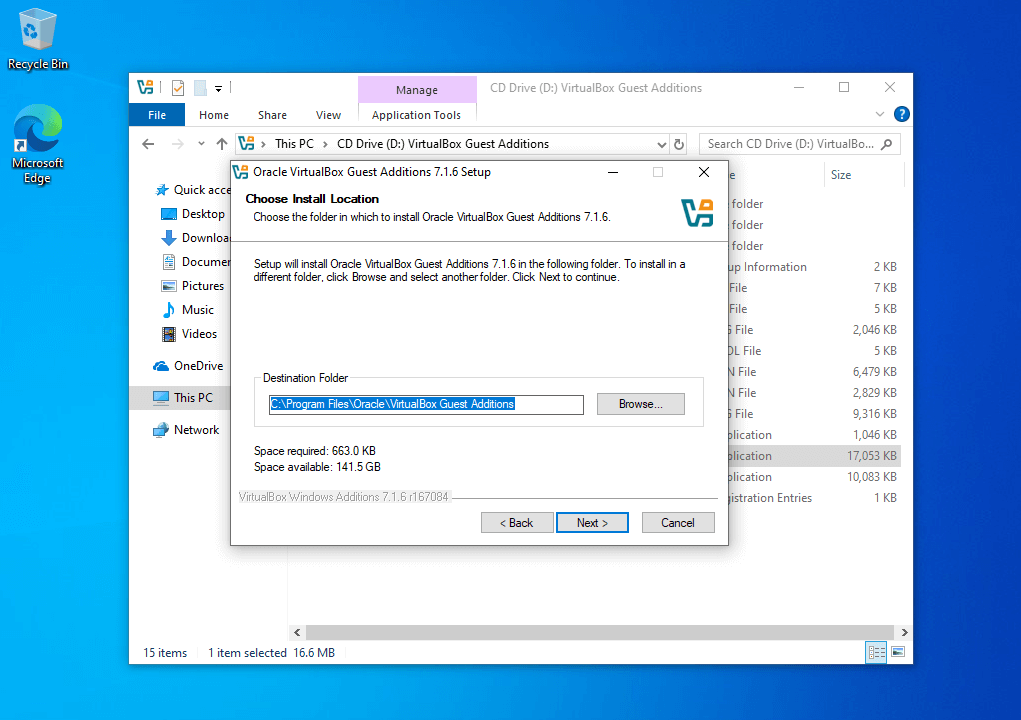
Step 7: Install Guest Additions
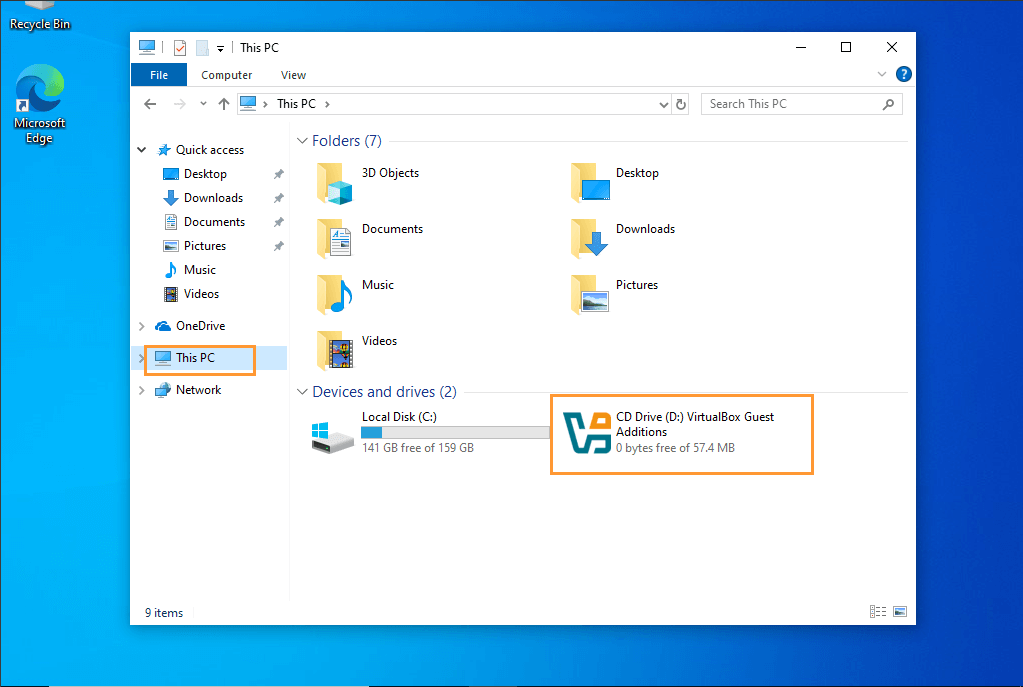
- Insert Guest Additions:
- Go to Devices > Insert Guest Additions CD Image.

- Open File Explorer, go to This PC, and double-click the CD drive.
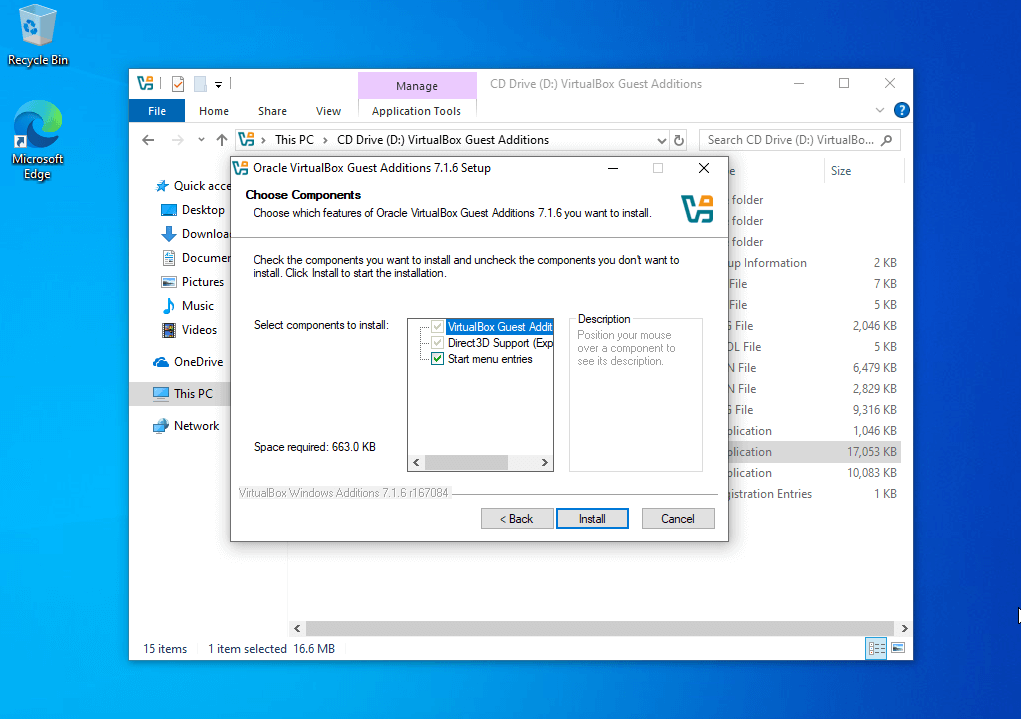
- Install the Software:
- Choose AMD64 and click Next.
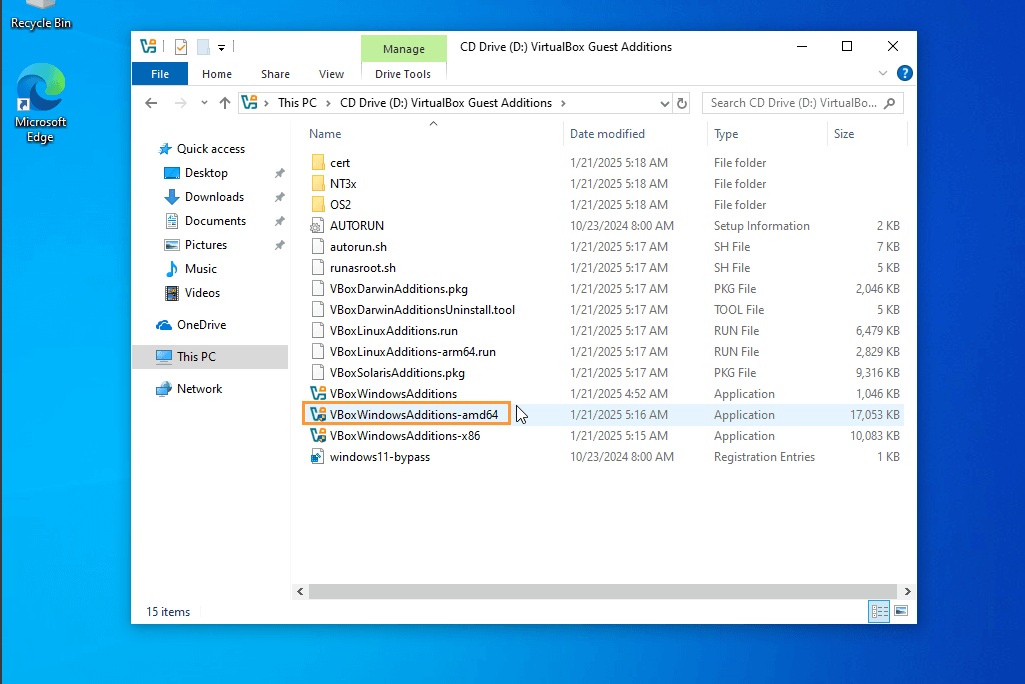
- Click Install, then choose Reboot when prompted.
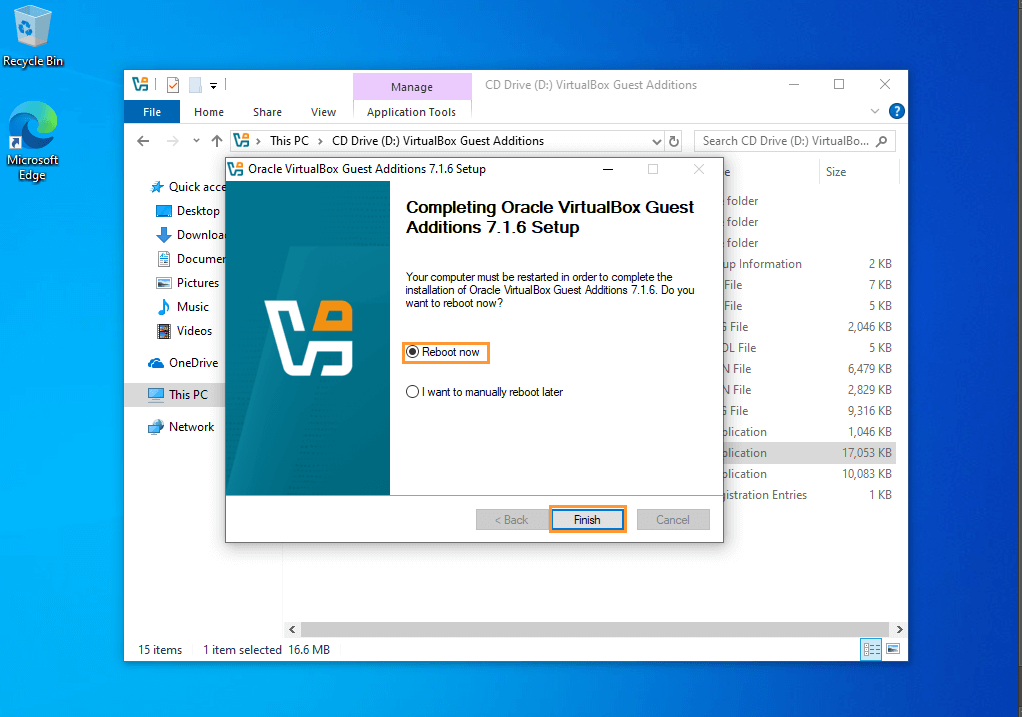
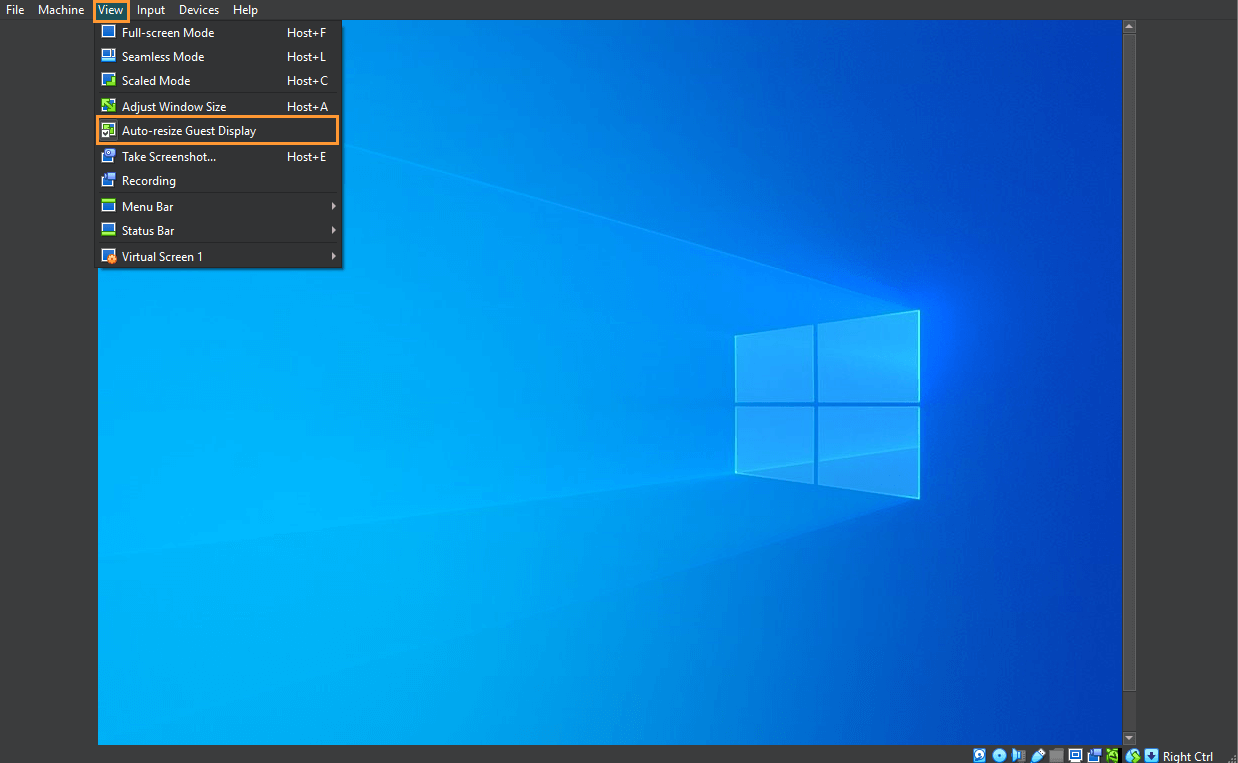
- After reboot, click Auto-resize Guest Display from the View menu to eliminate the gray borders.
Step 8: Disable Windows Defender and Updates
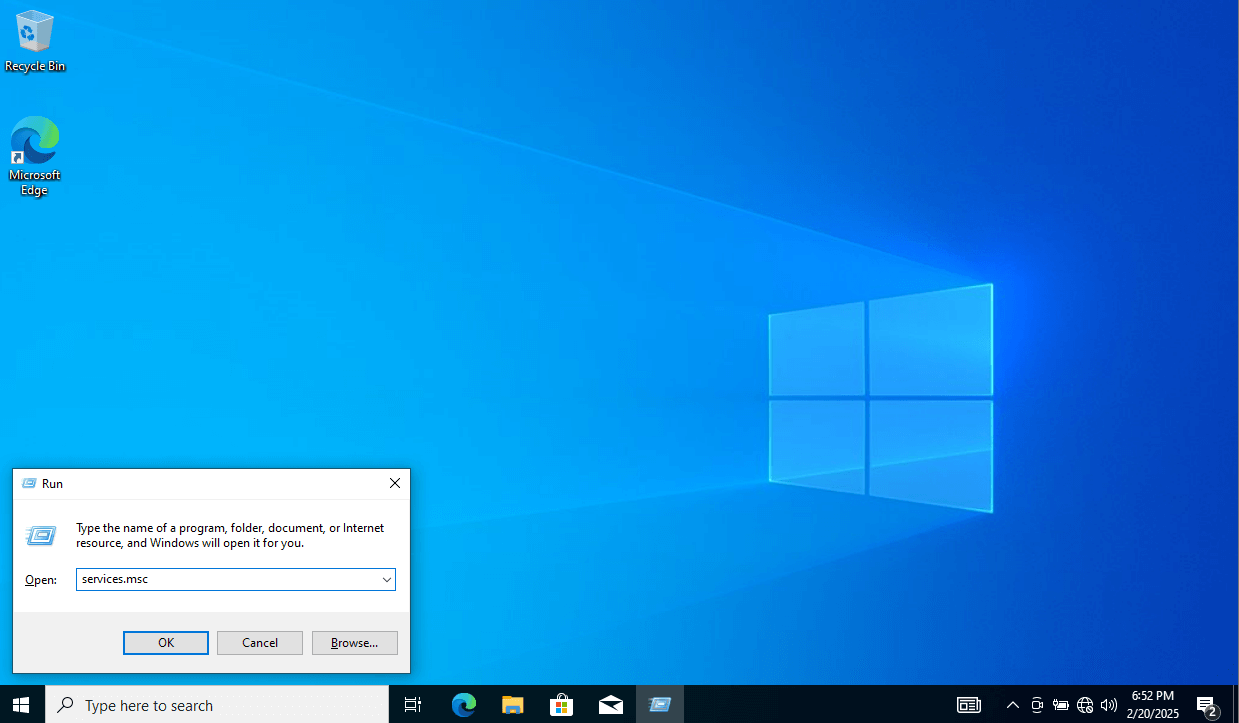
- Disable Windows Update:
- Press Windows + R, type services.msc, and press Enter.
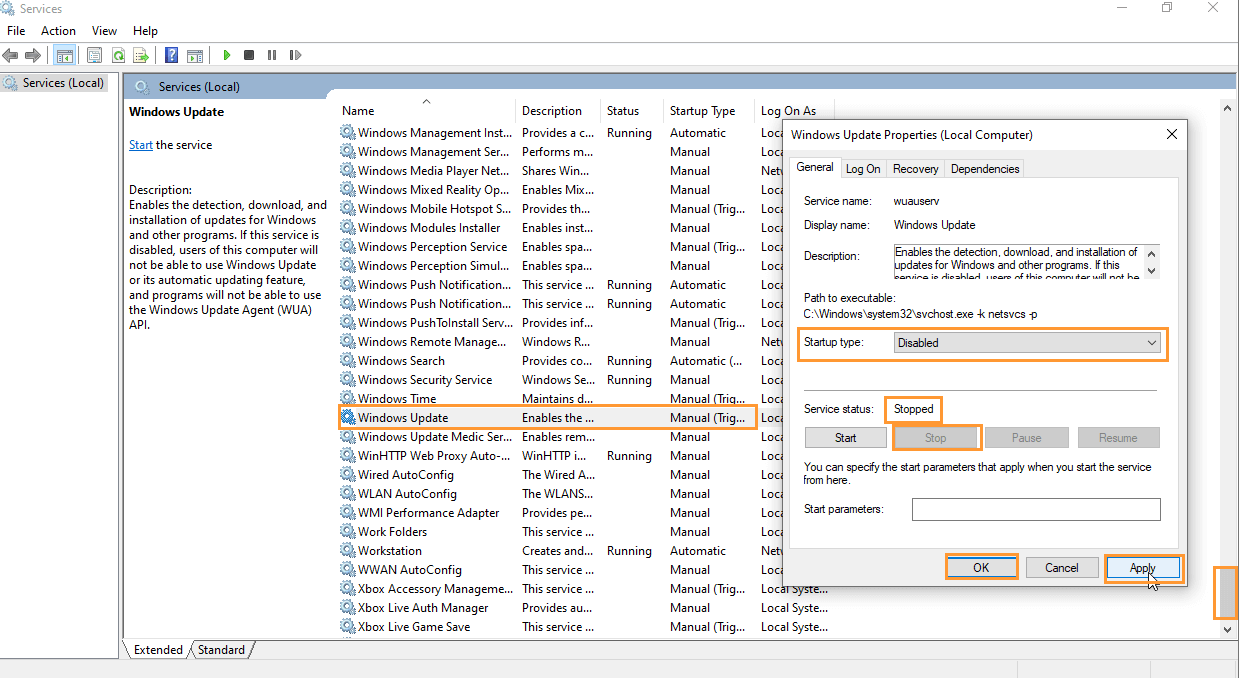
- Scroll down and double-click Windows Update. Set the Startup type to Disabled, then click Apply and OK.
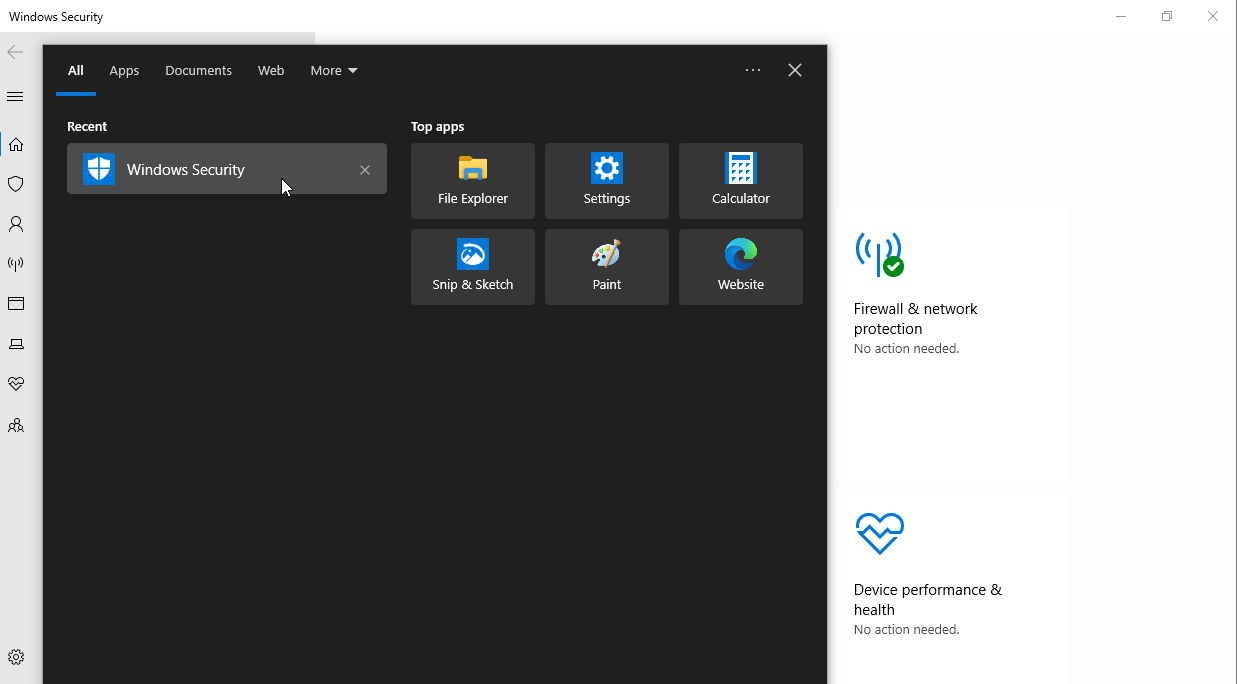
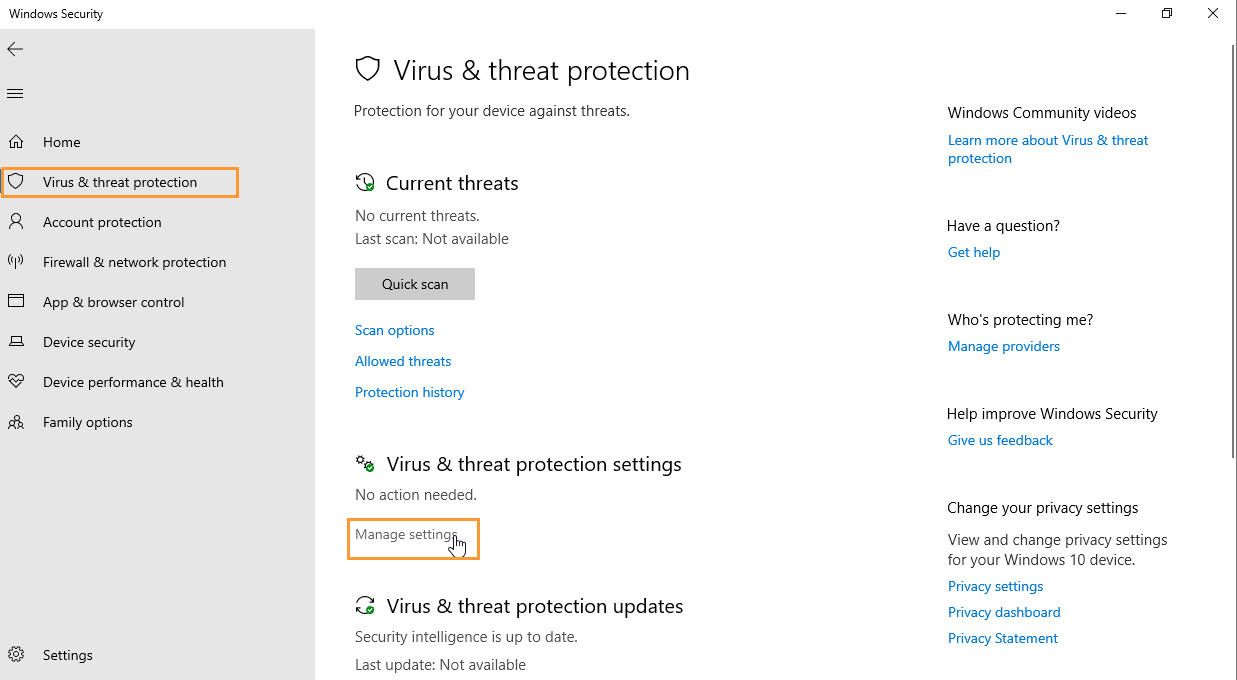
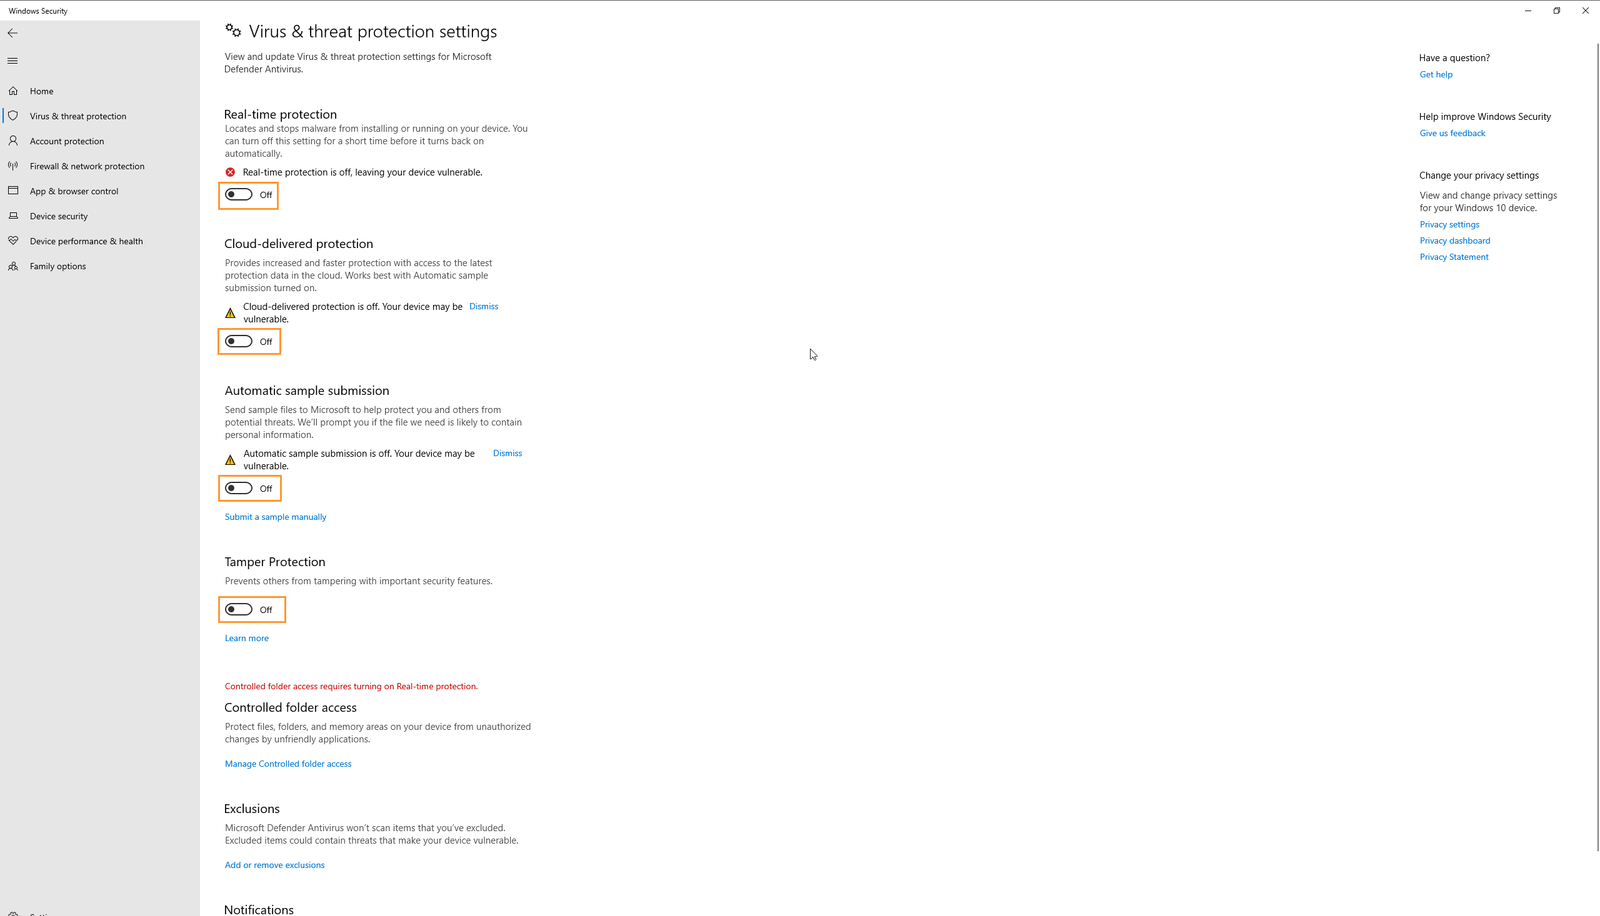
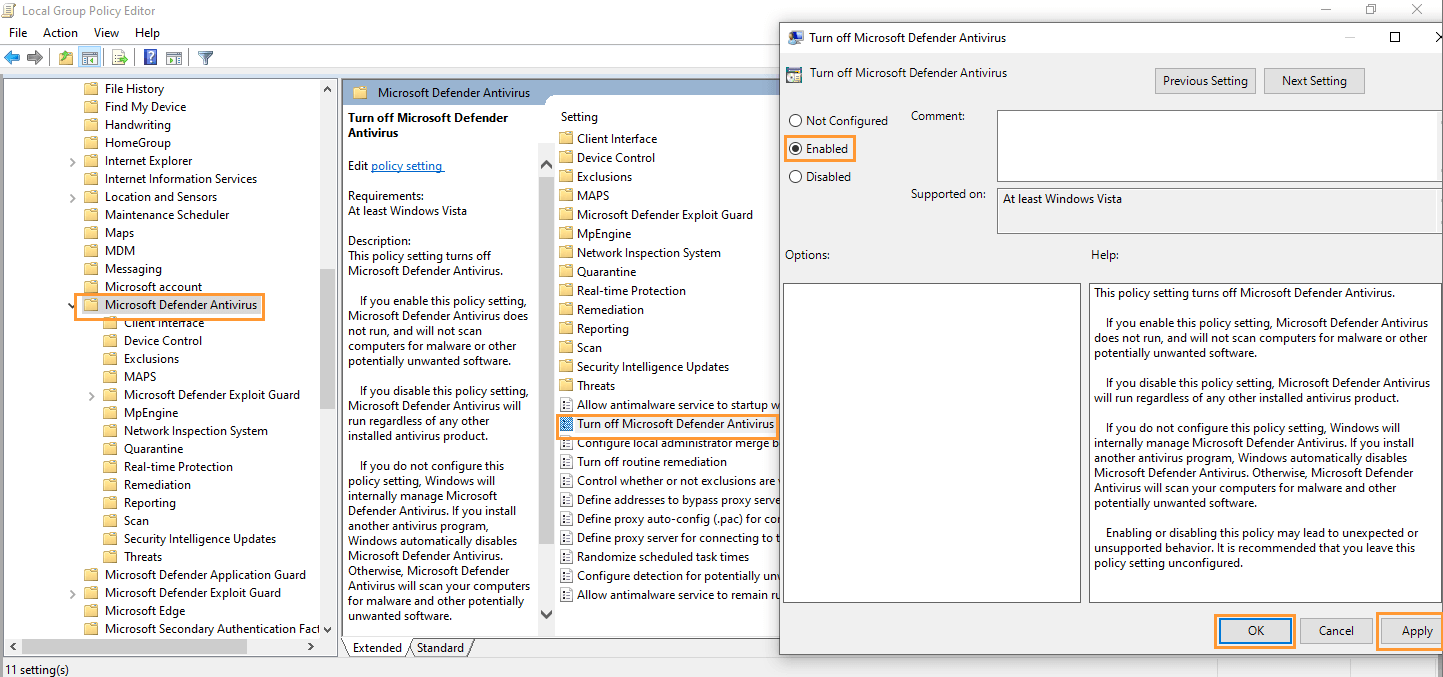
- Disable Windows Defender:
- Open the Windows Security settings and turn off Virus & Threat Protection.
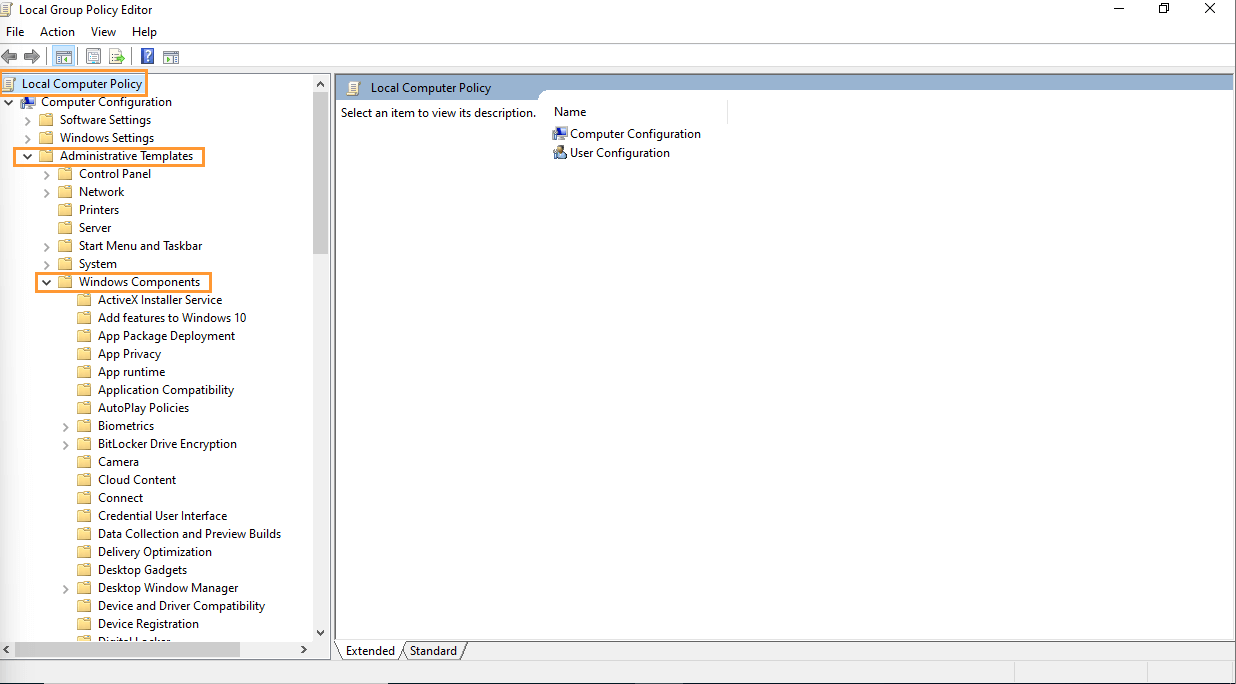
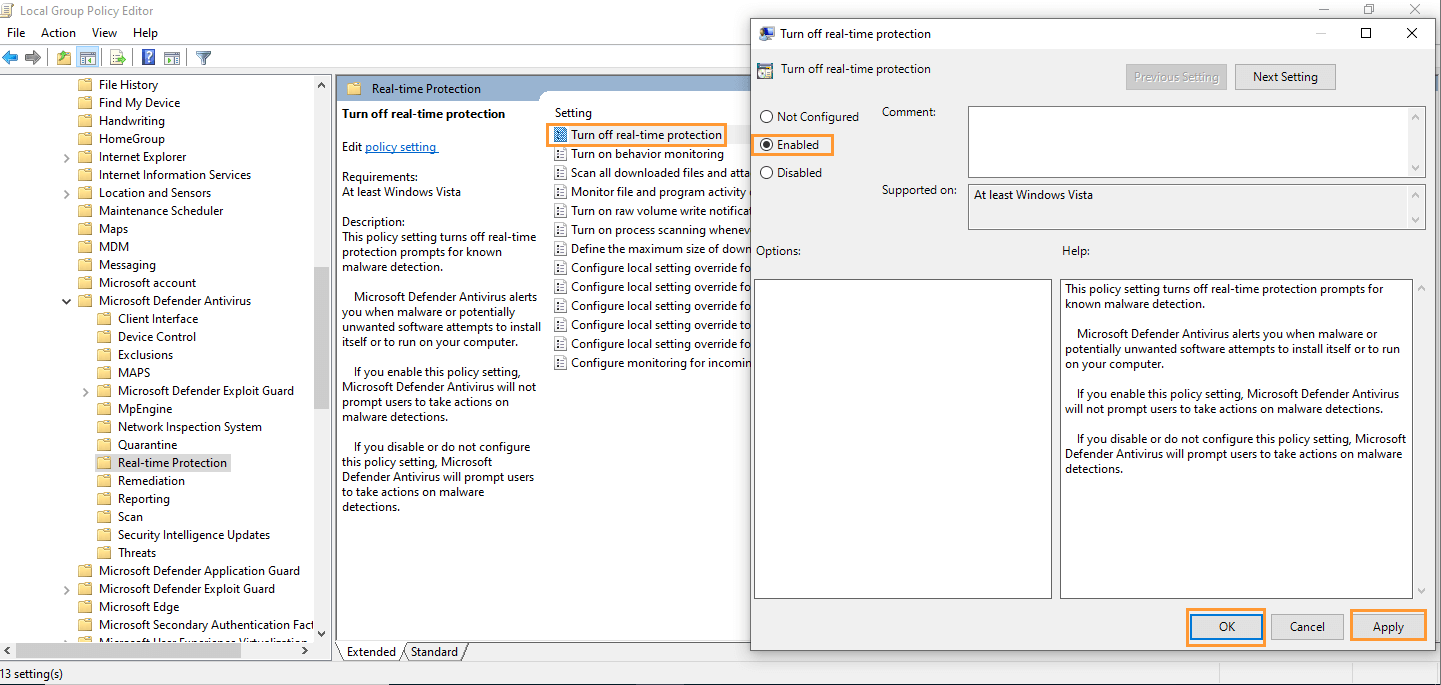
- Press Windows + R, type gpedit.msc, and disable Real-time Protection and Microsoft Defender Antivirus under Group Policy Editor.

Step 9: Adjust File Explorer Settings
- Open File Explorer:
- Click on the File Explorer icon on your taskbar or use Windows + E to open it.
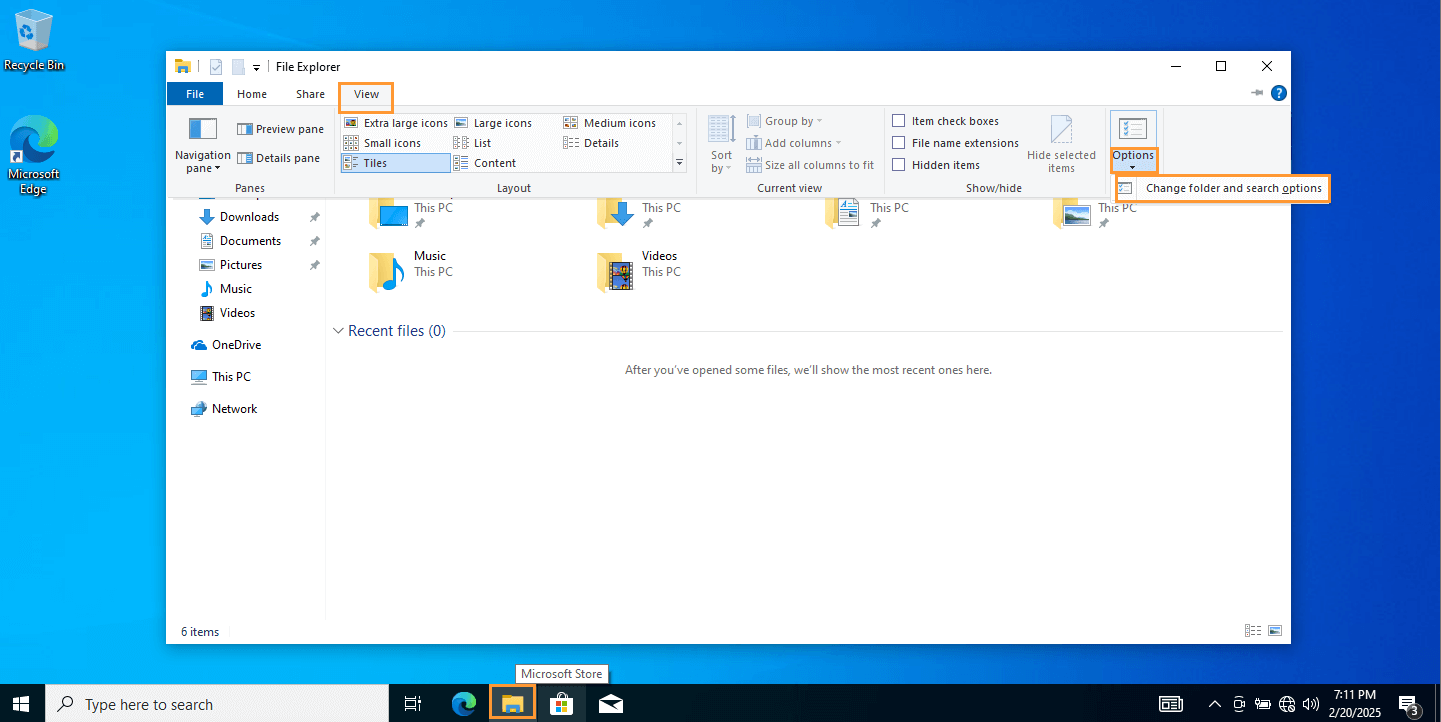
- Access Folder Options:
- In File Explorer, click on the View tab at the top.
- Click on Options and select Change folder and search options.
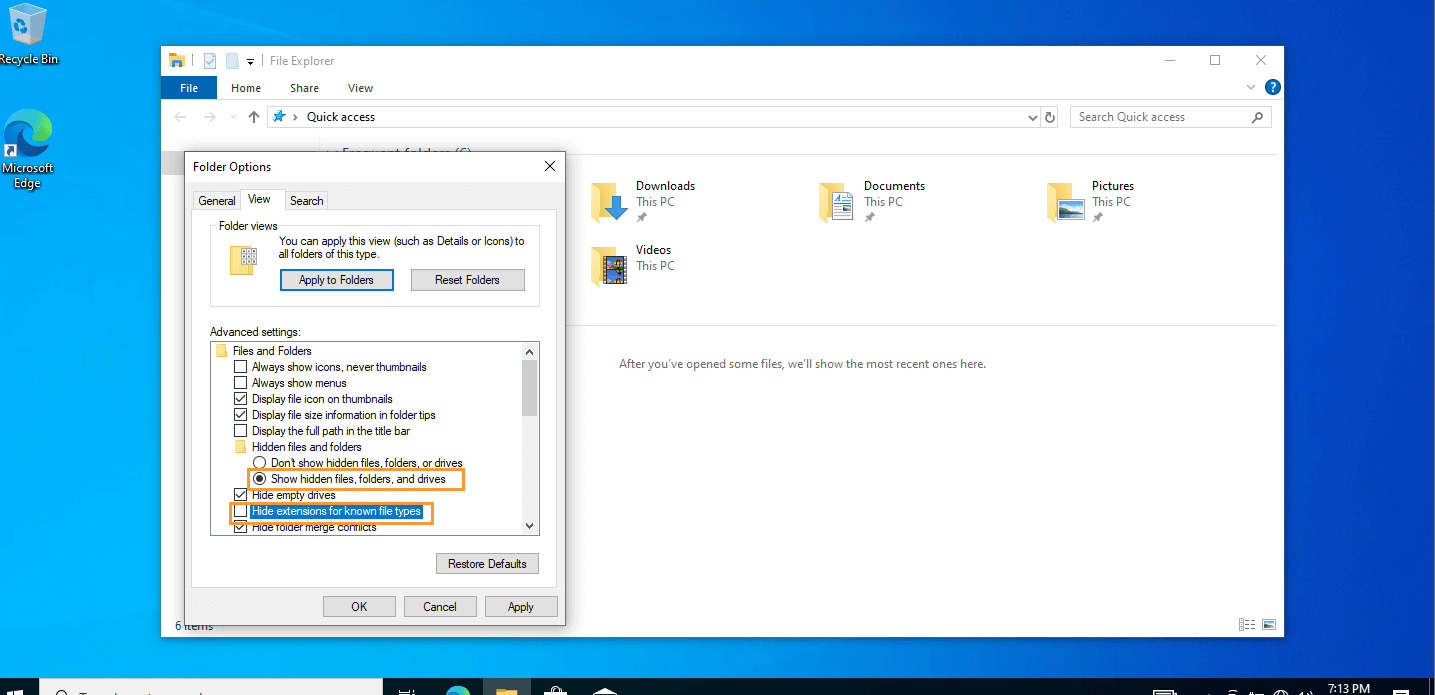
- Modify Folder View Settings:
- In the Folder Options window, switch to the View tab.
- Make sure the following settings are configured:
- Show hidden files, folders, and drives: Ensure there is a black circle next to this option (enabled).
- Hide extensions for known file types: Uncheck this option.
- Apply Changes:
- After making these changes, click Apply and then OK to save the settings.
Step 10: Create and Confirm Snapshot
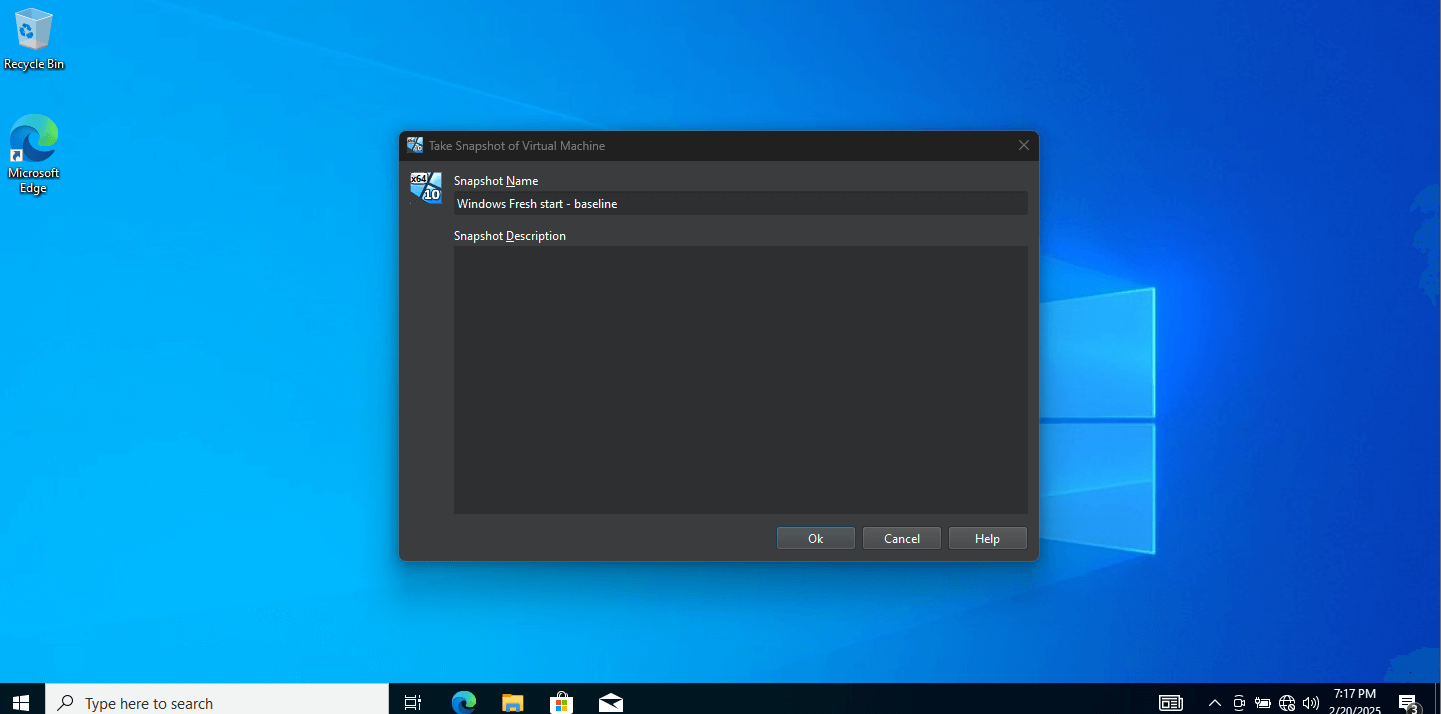
- Once everything is configured, take a snapshot of the clean state of the VM. This will allow you to revert back to this point if necessary. In VirtualBox, go to Machine > Take Snapshot
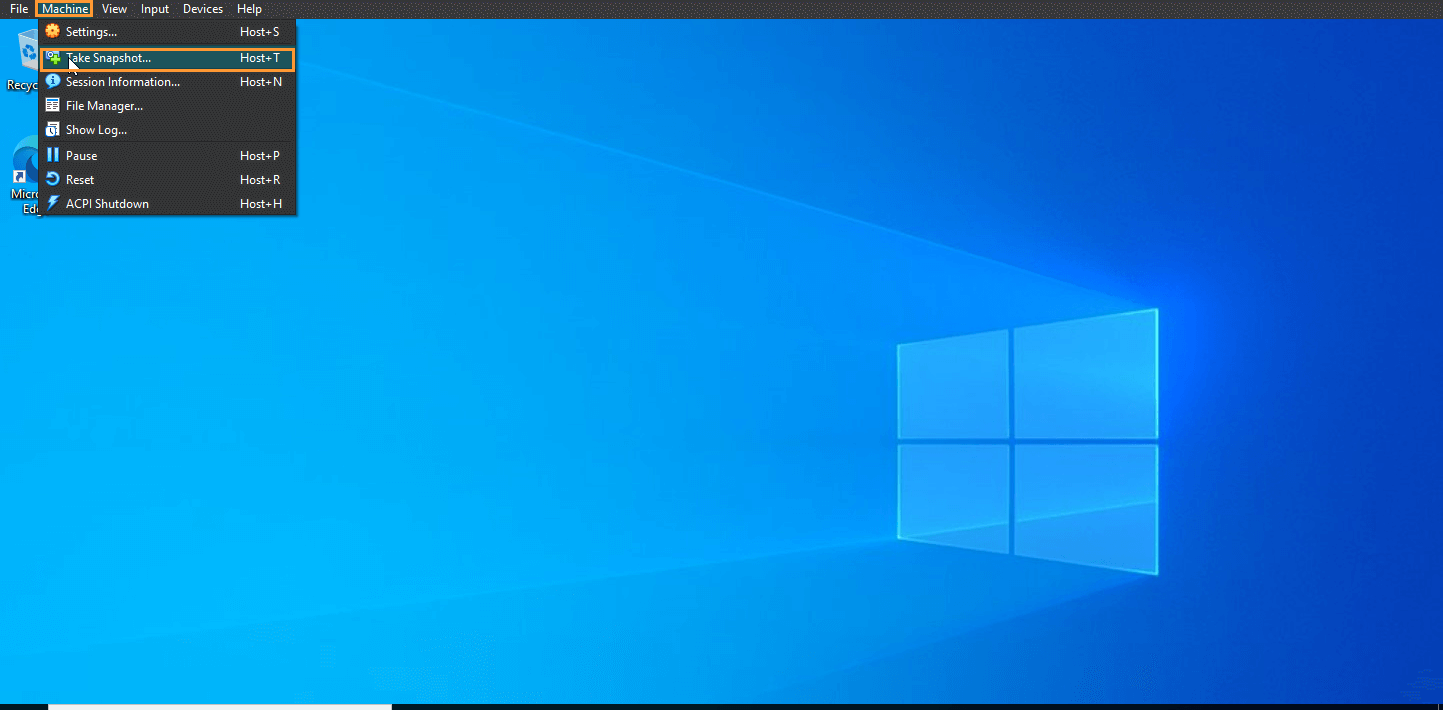
- Name it “Windows Fresh Start – Baseline”. Click OK to save the snapshot.
- Confirm the Snapshot:
- Return to VirtualBox, click the hamburger menu (three horizontal lines) to check if the snapshot is listed under Snapshots.

Flare-VM Installation
Step 11: Install Flare-VM (Initial Setup)
- Allocate Resources for the VM:
- For the Flare-VM installation, I recommend allocating at least 16GB of RAM and 1/4th of your CPU cores. For example, with 24 cores, allocate 6 cores to Flare-VM.
- If you don’t have sufficient resources, that’s fine too! I ran Flare-VM with 2 cores and 4GB of RAM, and it worked fine. However, Flare-VM will run a script that continuously installs, reboots, and installs, which works better with higher resources.
- The process is mostly dependent on internet speed since Flare-VM will need to download several packages and folders.
Step 12: Enable Network Adapter
- Turn On Network Adapter:
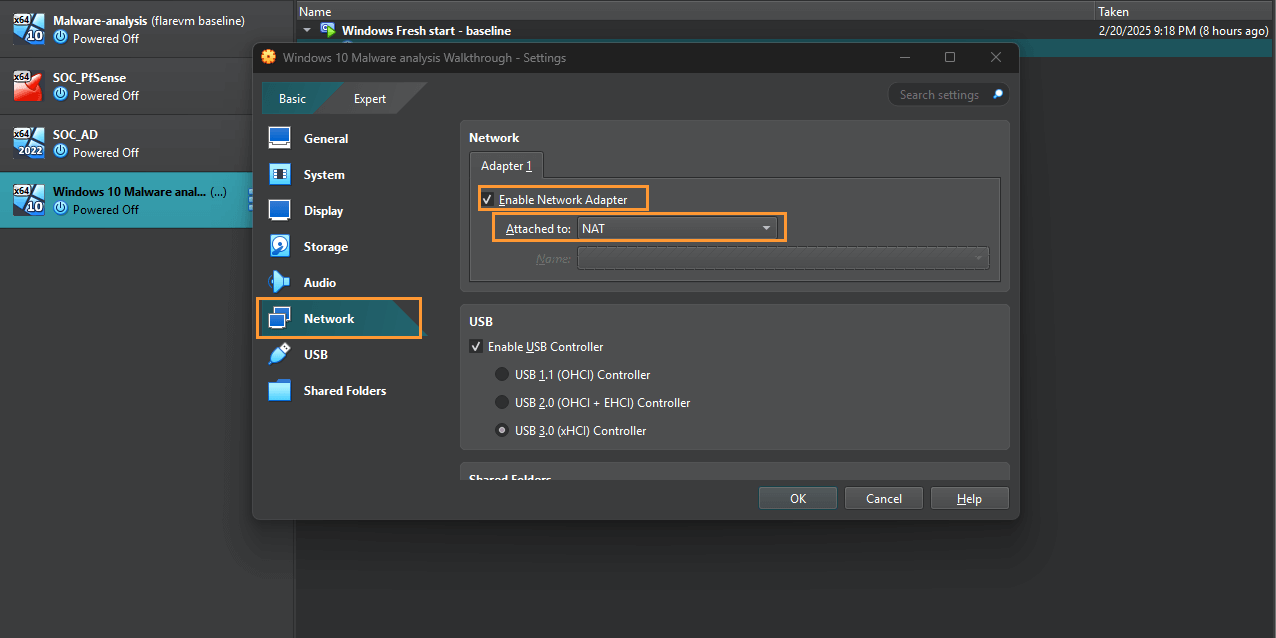
- If you remember earlier, we disabled the network adapter to bypass the Microsoft 365 account setup during installation. Now, we need to enable the network adapter so we can start downloading Flare-VM.
- Go to Settings, click on Network, and make sure the Network Adapter is enabled.
- Start the VM:
- Once the network adapter is enabled, go ahead and click Start to load up the VM.
Step 13: Download Flare-VM
- Open Your Preferred Browser:
- I assume most of you are using Chrome—I certainly did for this process! If you’re not using it already, open your browser of choice and proceed.

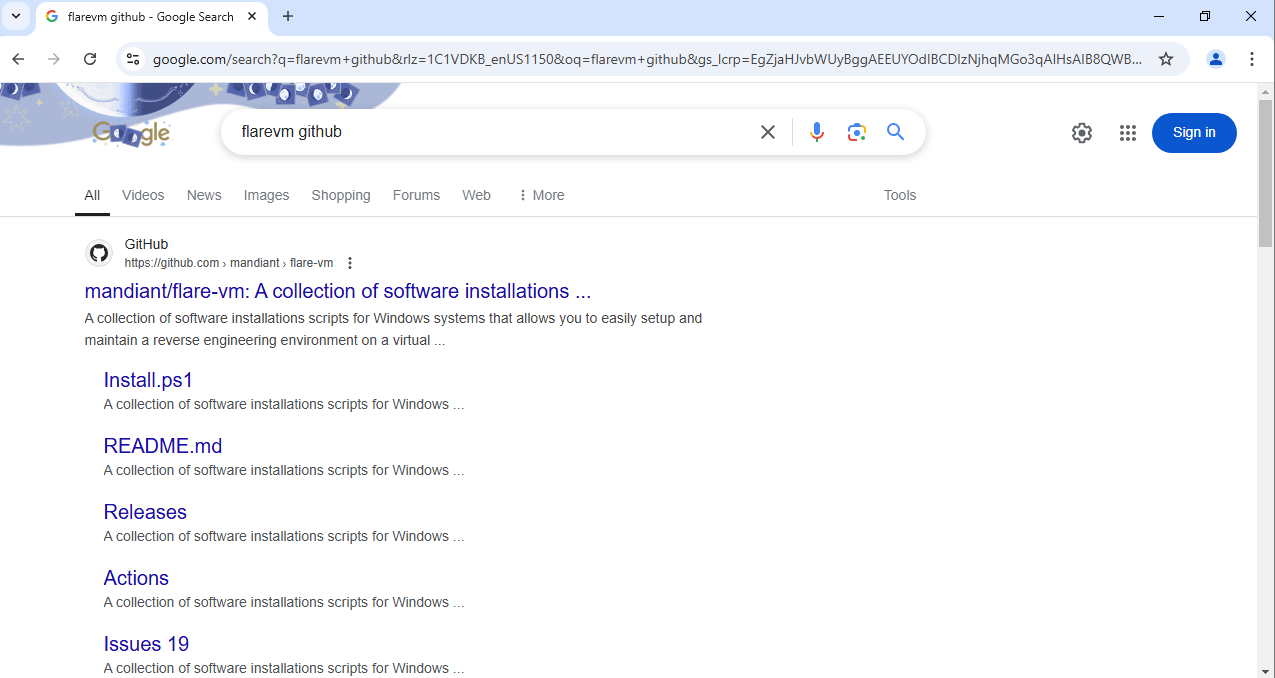
- Search for Flare-VM GitHub:
- In your browser’s search bar, type “FlareVM GitHub” and click on the first link to the official GitHub page.
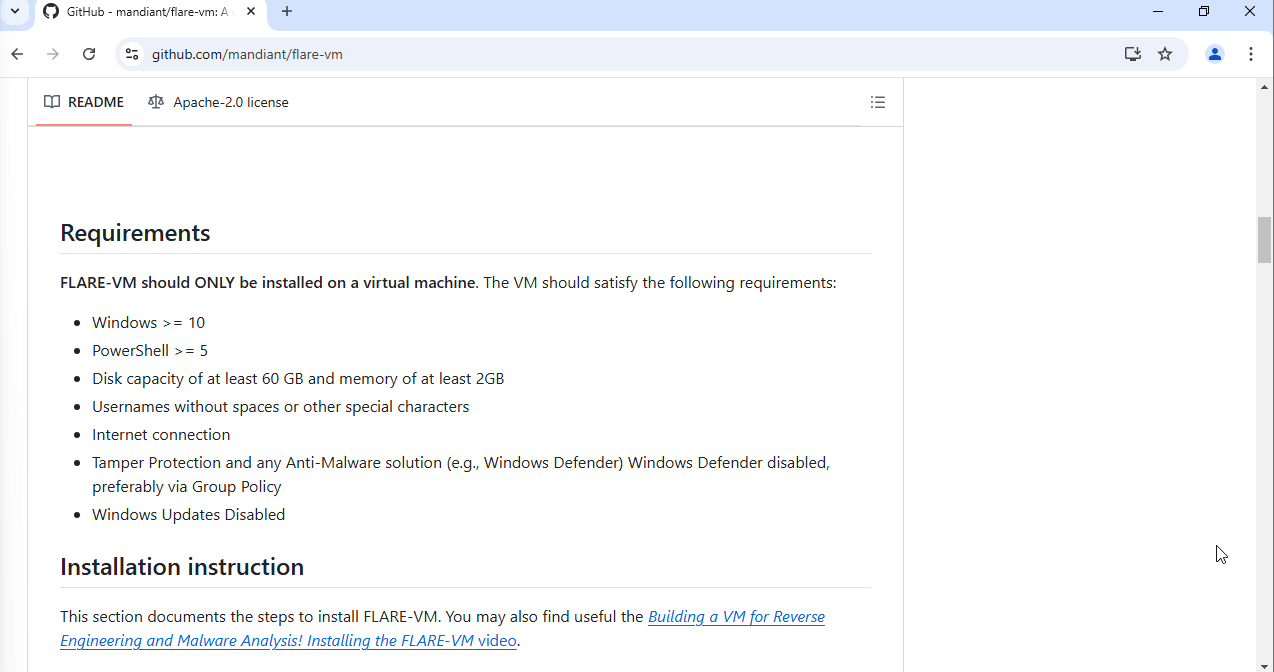
- Check Installation Requirements:
- Before proceeding, make sure everything is set up correctly for Flare-VM.
- If your username is different than the one I picked (for example, “Omar”), make sure it meets these requirements: short, simple, and no special characters or spaces. This ensures smoother script execution.
Step 14: Download and Save the Flare-VM Installation Script
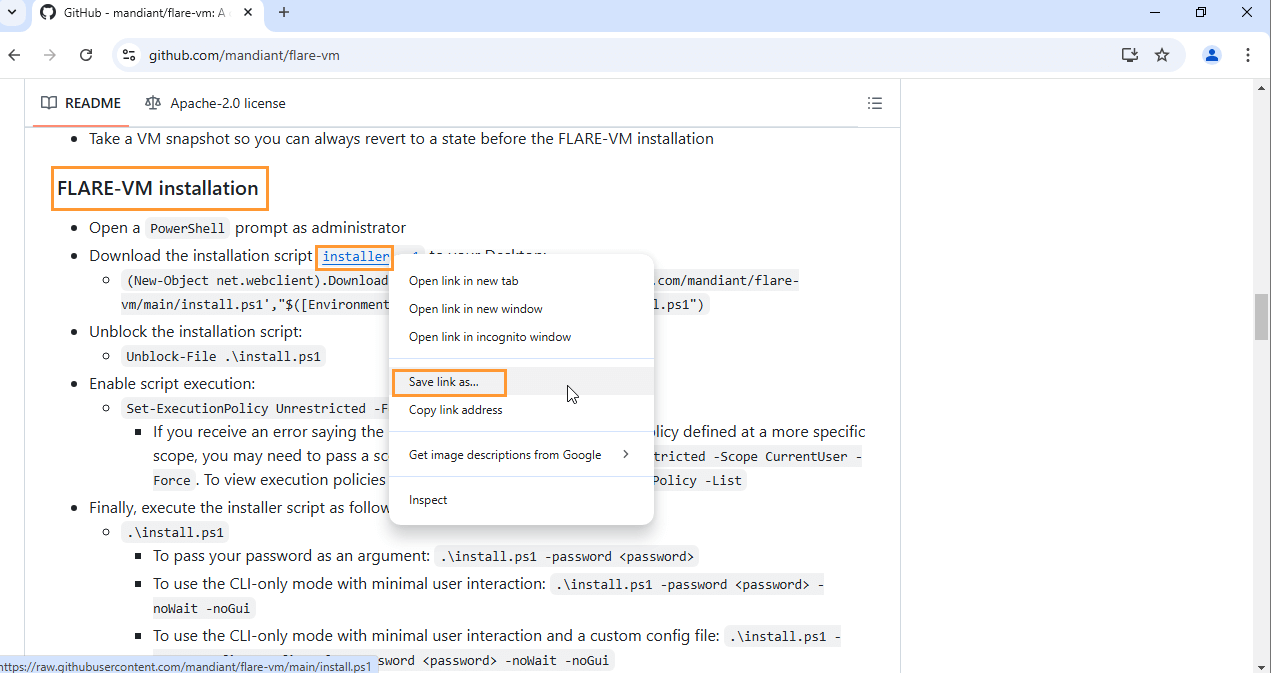
- Download the Installer Script:
- Find the “installer.ps1” file on the Flare-VM GitHub page.
- Right-click on the “installer.ps1” file link and select Save link as….
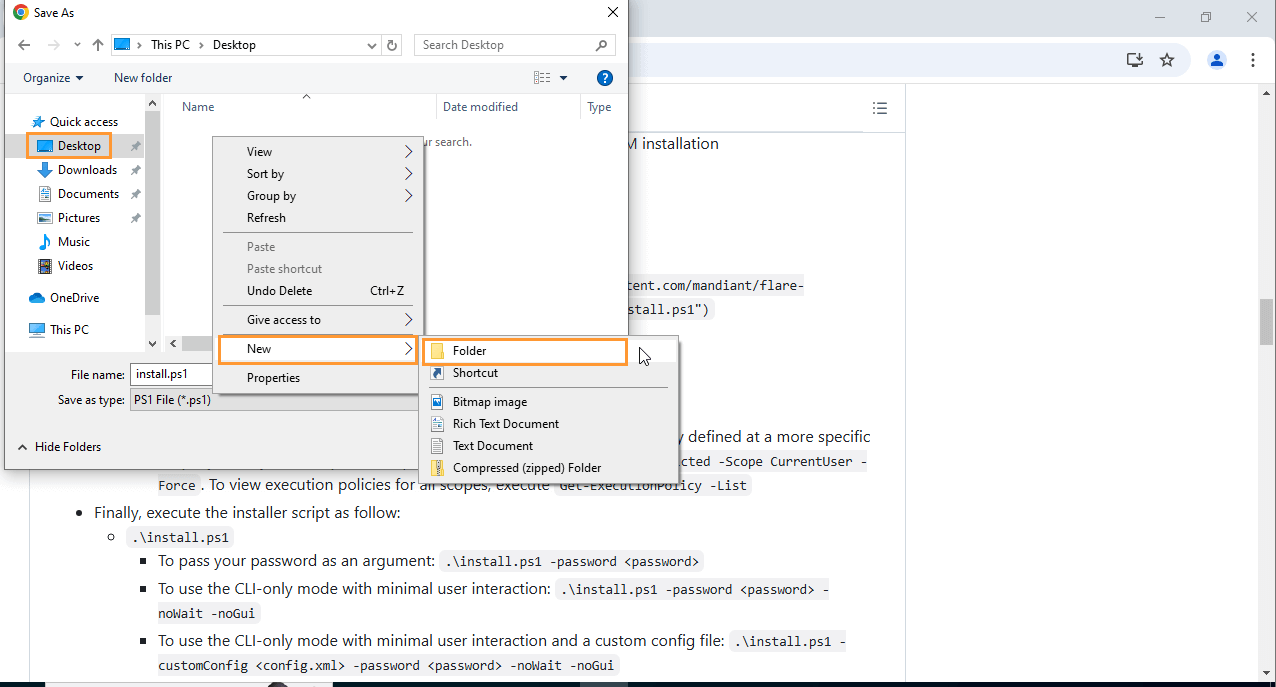
- Save the Script:
- When the pop-up window appears, select your Desktop, right-click on the white space, select New, then click Folder.
- Name the folder “Flare” and click Open.
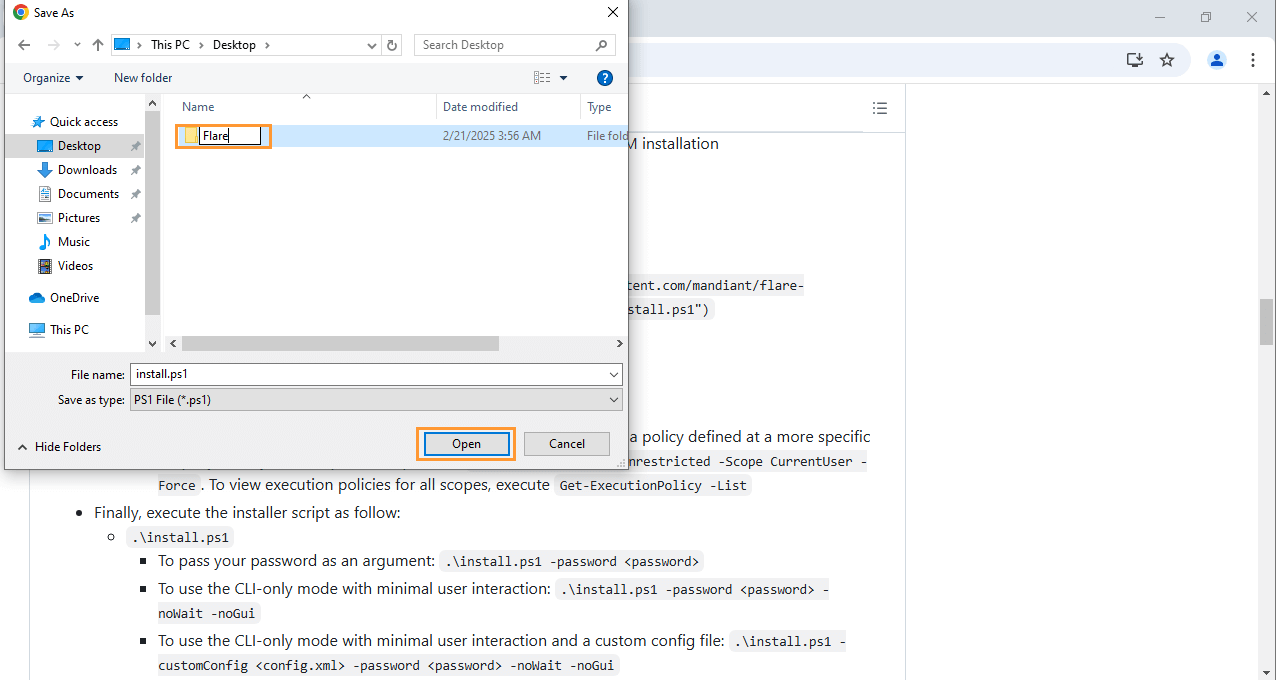
- Click Save to download the installer into the Flare folder.

Step 15: Open PowerShell as Administrator
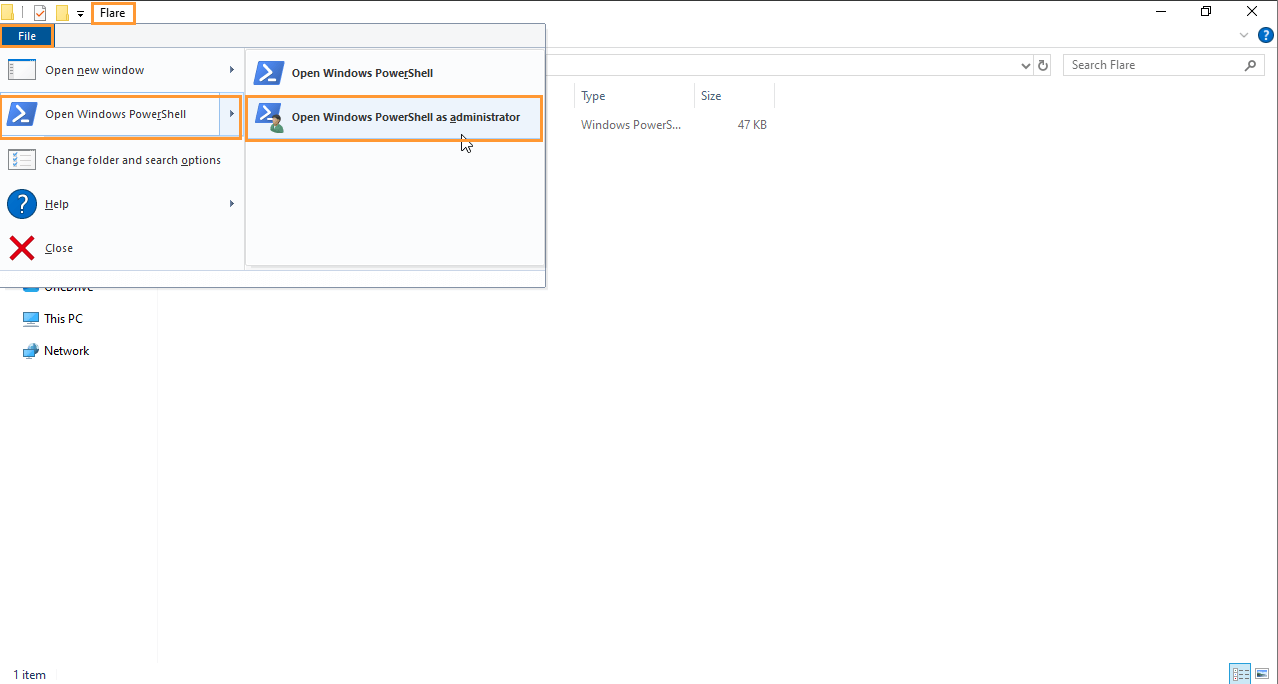
- Open PowerShell:
- Minimize the browser, go to your Flare folder, and click on File at the top left corner.
- Hover over Open Windows PowerShell and select Open Windows PowerShell as Administrator.
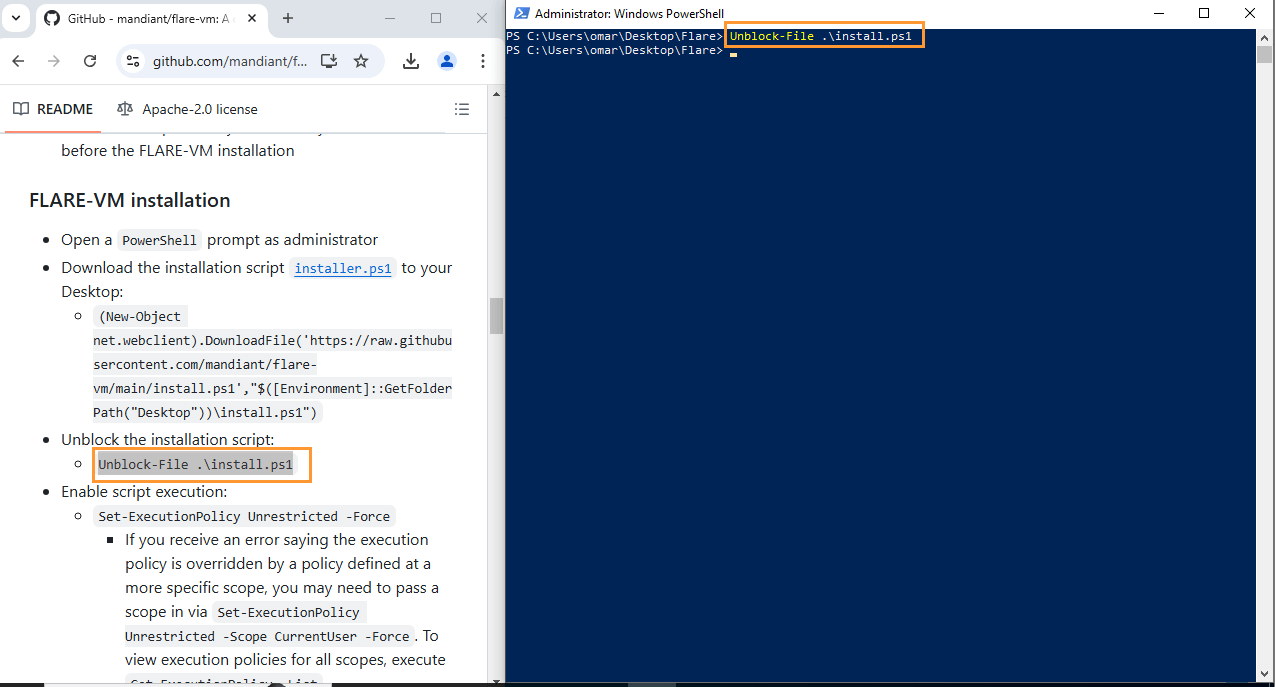
- Prepare the CLI:
- Set your browser and CLI windows as shown in the guide.
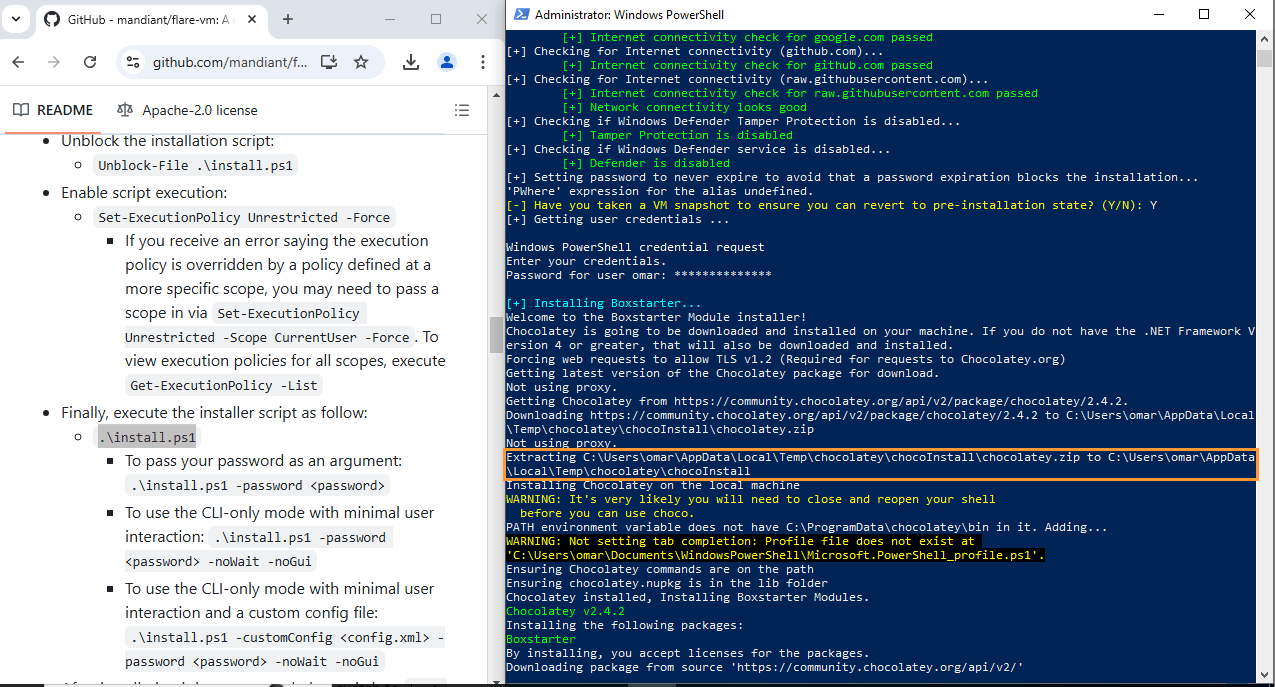
- Copy and paste the unblock the installation script into the CLI. You should see the cursor move to the next line with no output—this means the script executed correctly.
Step 16: Execute the Flare-VM Script
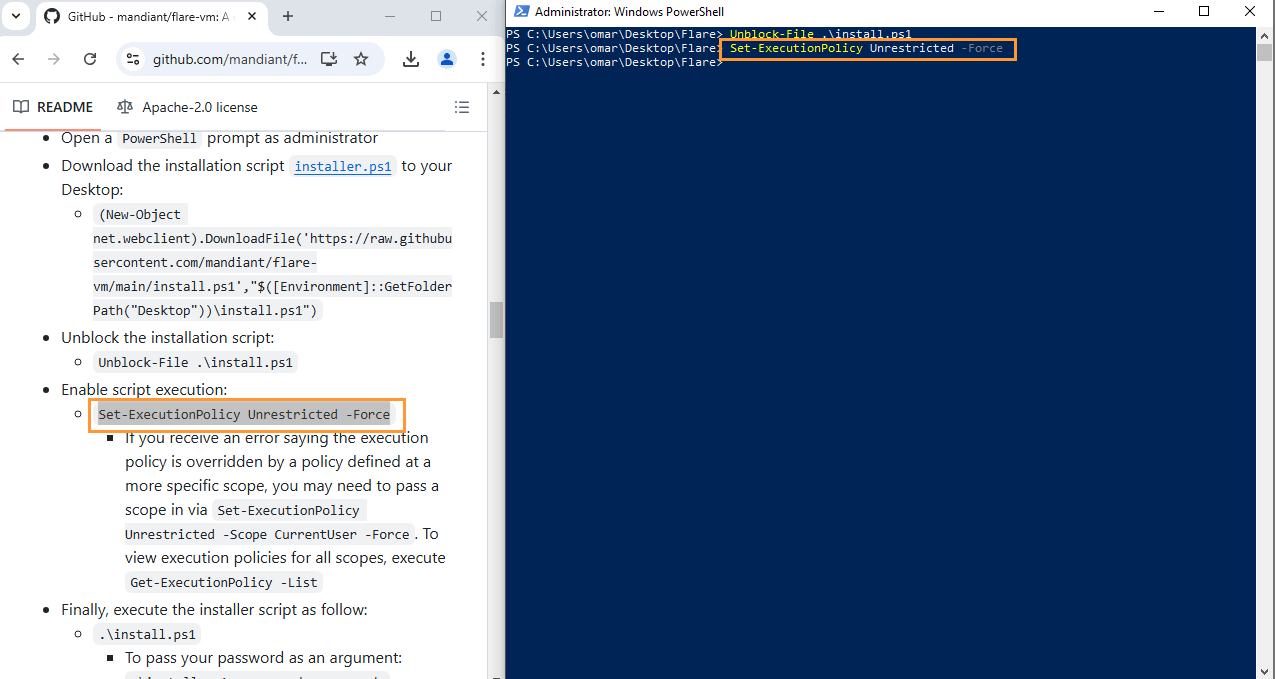
- Copy and Paste the Execution Command:
- Now copy and paste the Flare-VM execution line (make sure -Force is at the end) into PowerShell.
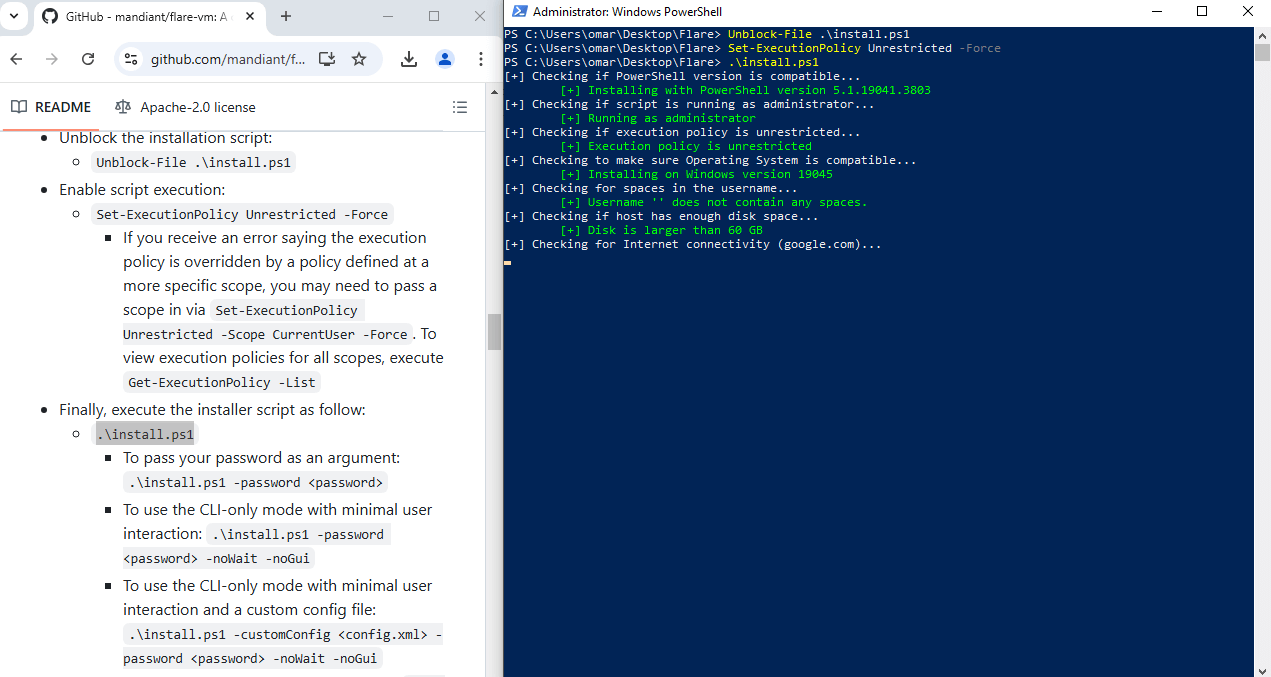
- Start Downloading Flare-VM:
- Let’s go ahead and copy and paste .\install.ps1 into the CLI. it will begin downloading Flare-VM. This process can take 3-4 hours, depending on your internet speed and VM resources.
- Important Tip:
- Flare-VM will download packages one by one, followed by a reboot and another download. This is done to prevent overloading and crashing the VM.
- Ensure Password Consistency:
- Remember the password you set for your Windows user account earlier? Make sure that the same password is used for Flare-VM, as it will need that password to install the packages correctly.
Step 18: Handling Long Wait Times and Script Hiccups
- Patience Is Key:
- You will see Chocolatey running a lot during the download process. Don’t worry—it’s normal.
- The extraction process can take a while, so use this time to do something else (e.g., watch YouTube, play games, or cook dinner).
- If the Script Stalls:
- If the script stalls during the first extraction step, give it about 5 minutes. If it still hasn’t progressed, try pressing Enter, then Space, followed by Enter again to kickstart the process.
Step 19: Complete Installation and Verify Progress
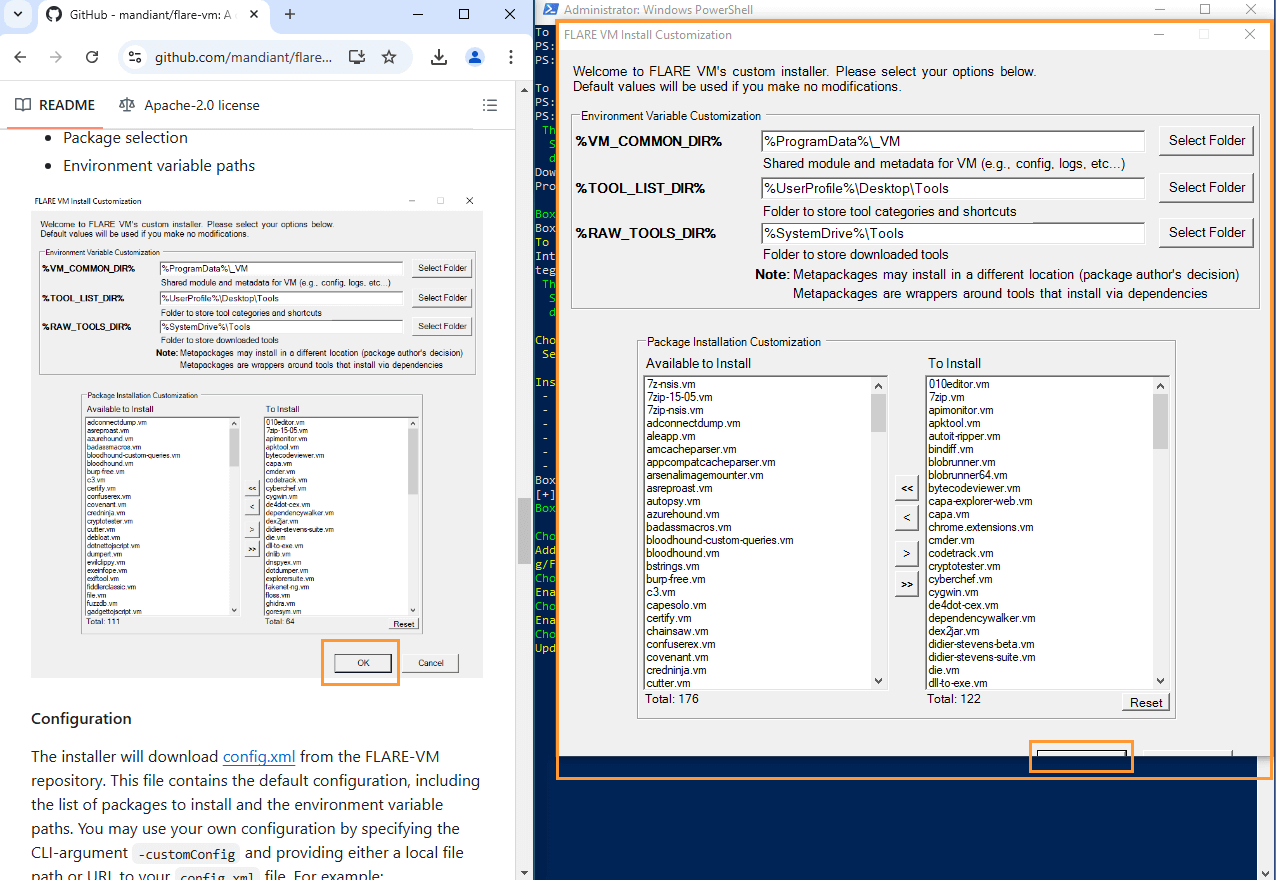
- Resizing Issues:
- If the installation window is cut off or if you can’t find the button at the bottom, try resizing your window. The button should appear after this.
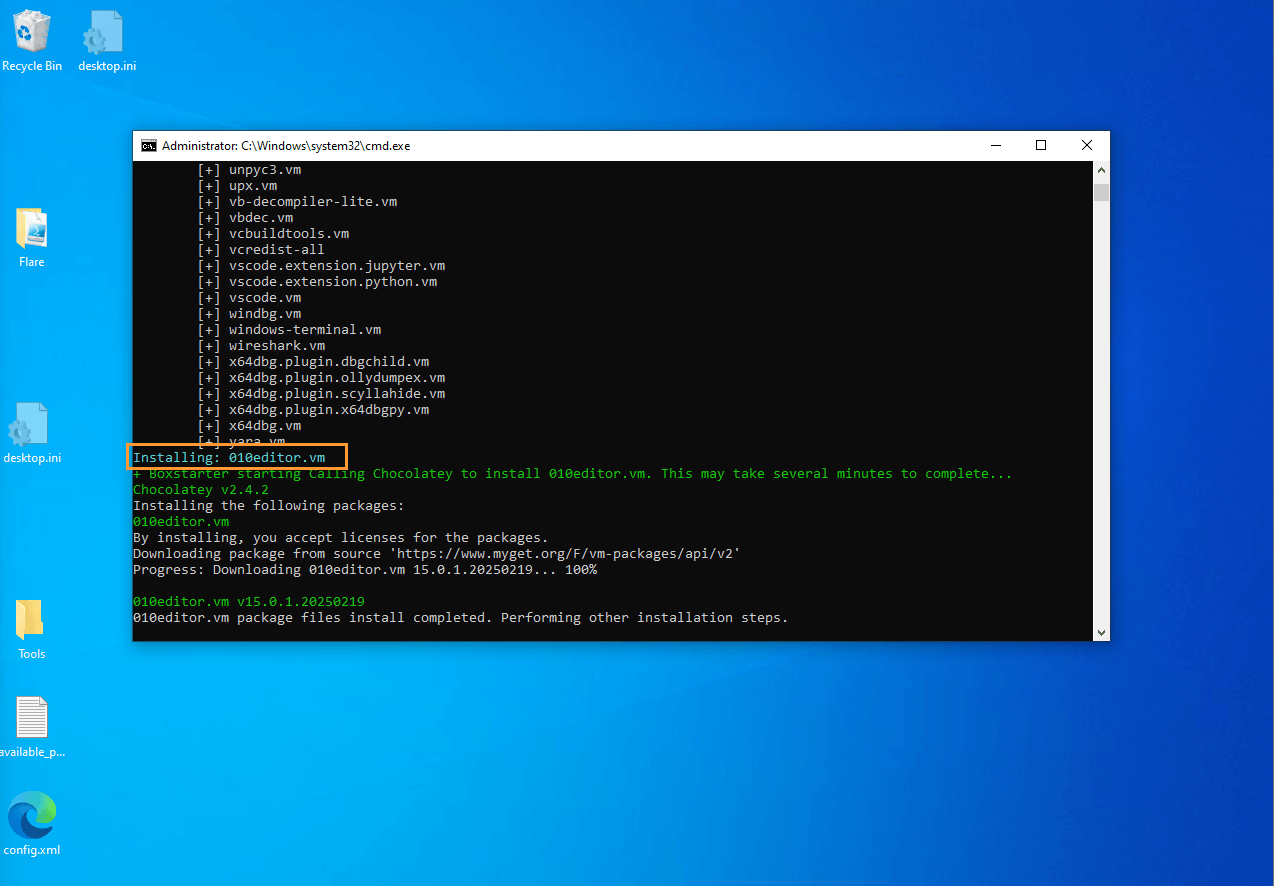
- Wait for the First Restart:
- Flare-VM will automatically restart and log you in. Don’t interfere with this process; once you see the teal “Installing: X” message, it’s safe to leave your machine alone.
Step 20: Save the Log File
- Save Installation Log:
- After the installation finishes, a text file containing all the installation logs will be generated.
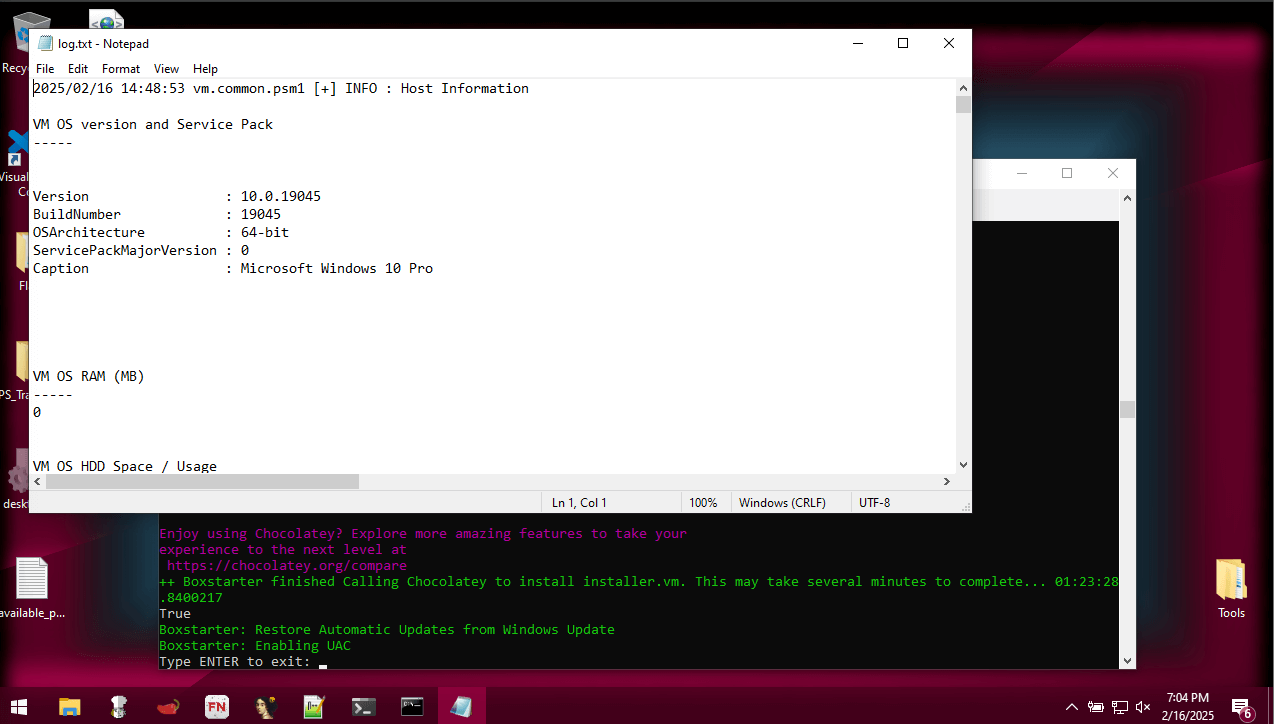
- Save this file to your Desktop and name it “flarevm-log”.
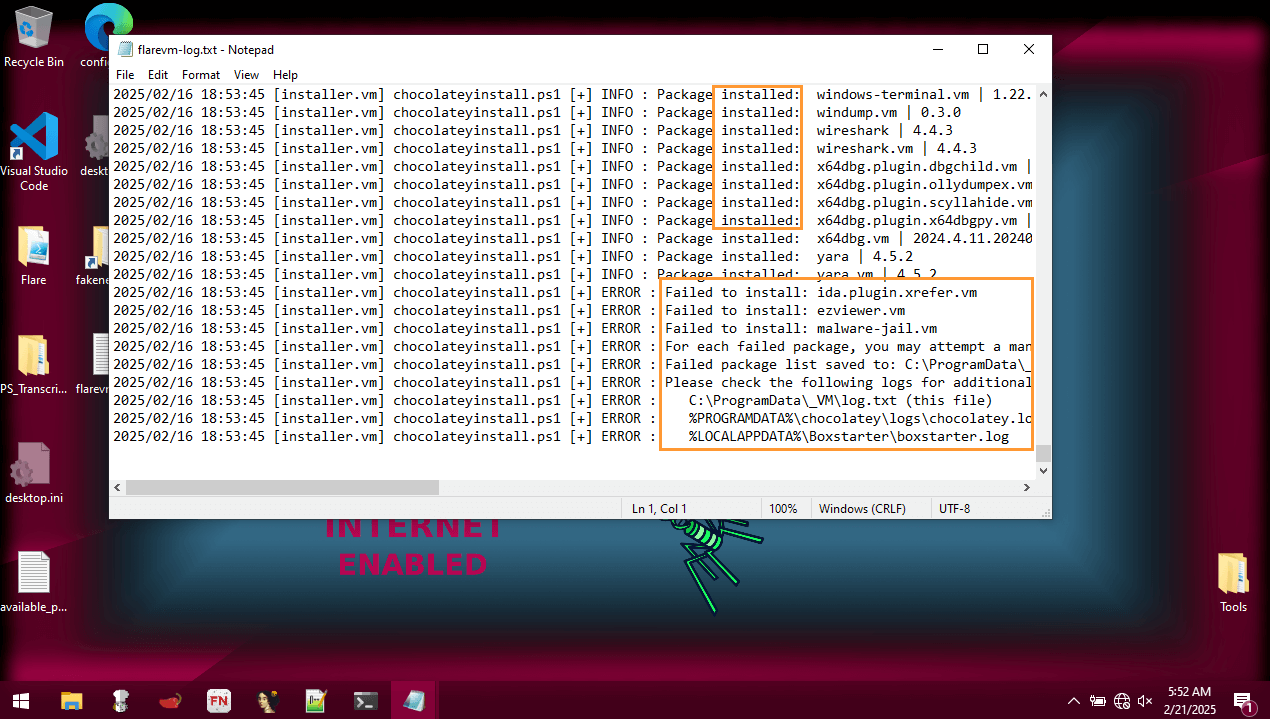
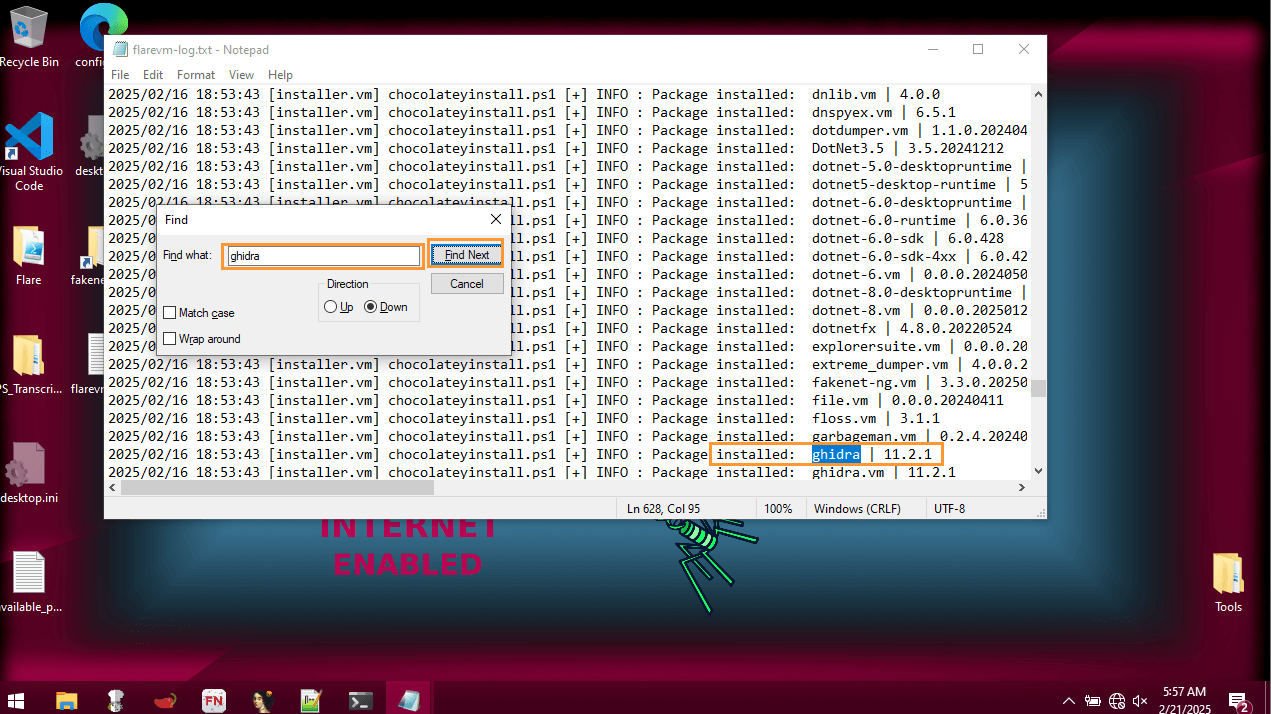
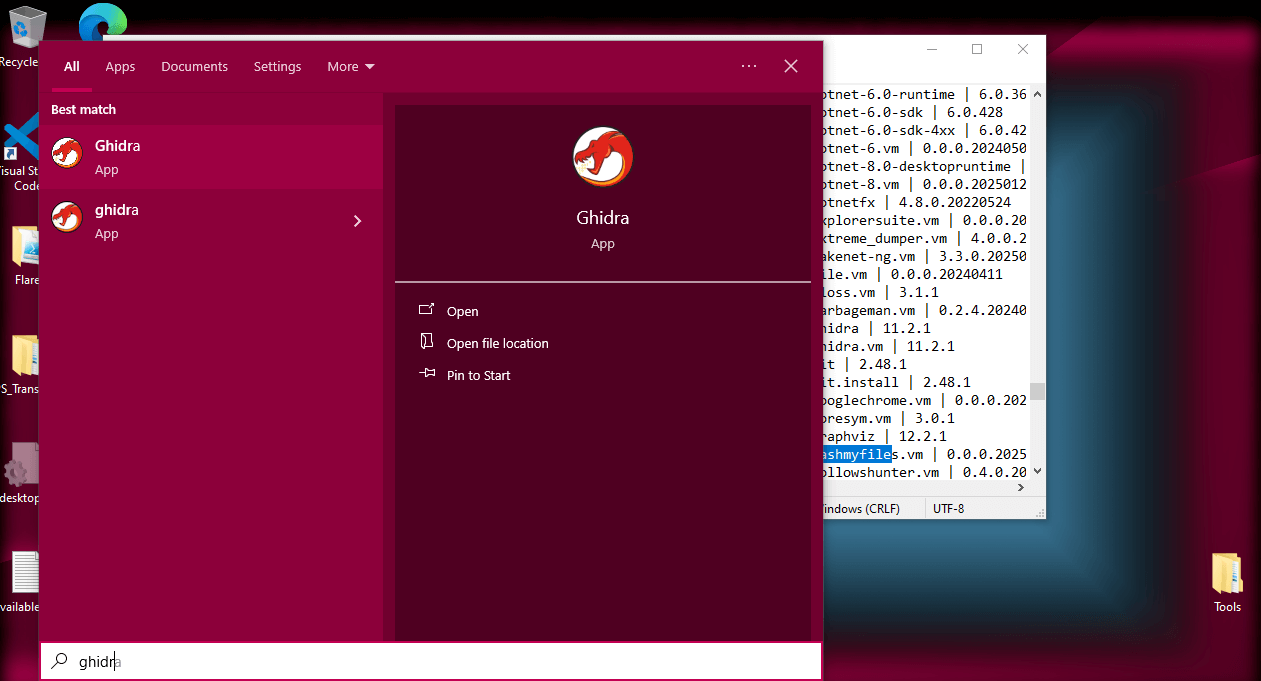
- Check for Required Packages:
- Open the flarevm-log file and press Ctrl + F to search for these four packages: FakeNet, HashMyFile, Regshot, and Ghidra.
- If any of these packages are missing, you will need to manually install them using the provided links:
Step 21: Take a Snapshot of Your Installation
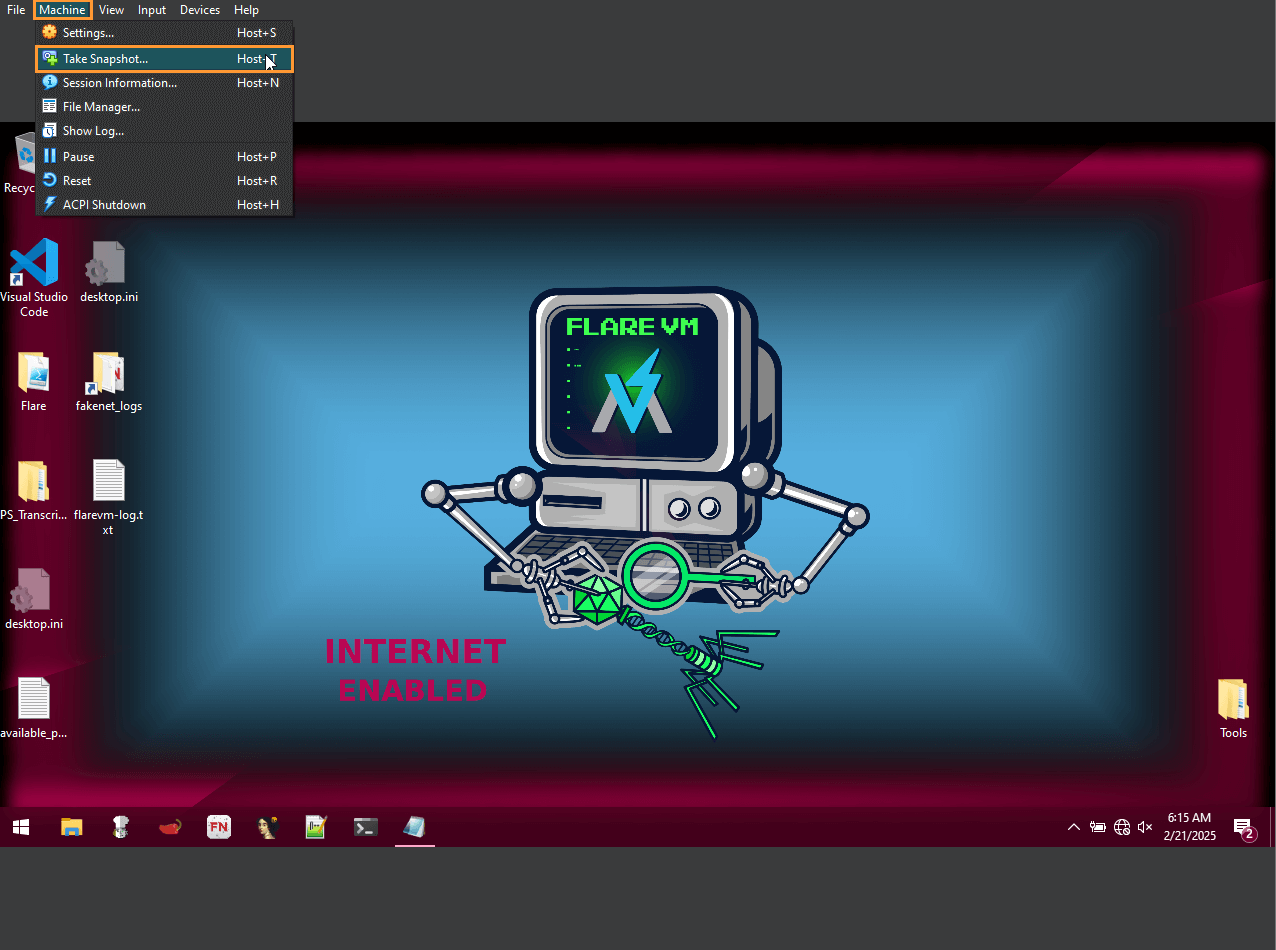
- Create a Snapshot:
- Now that Flare-VM is installed, it’s crucial to create a snapshot. This ensures you won’t have to repeat the lengthy installation process if something goes wrong.
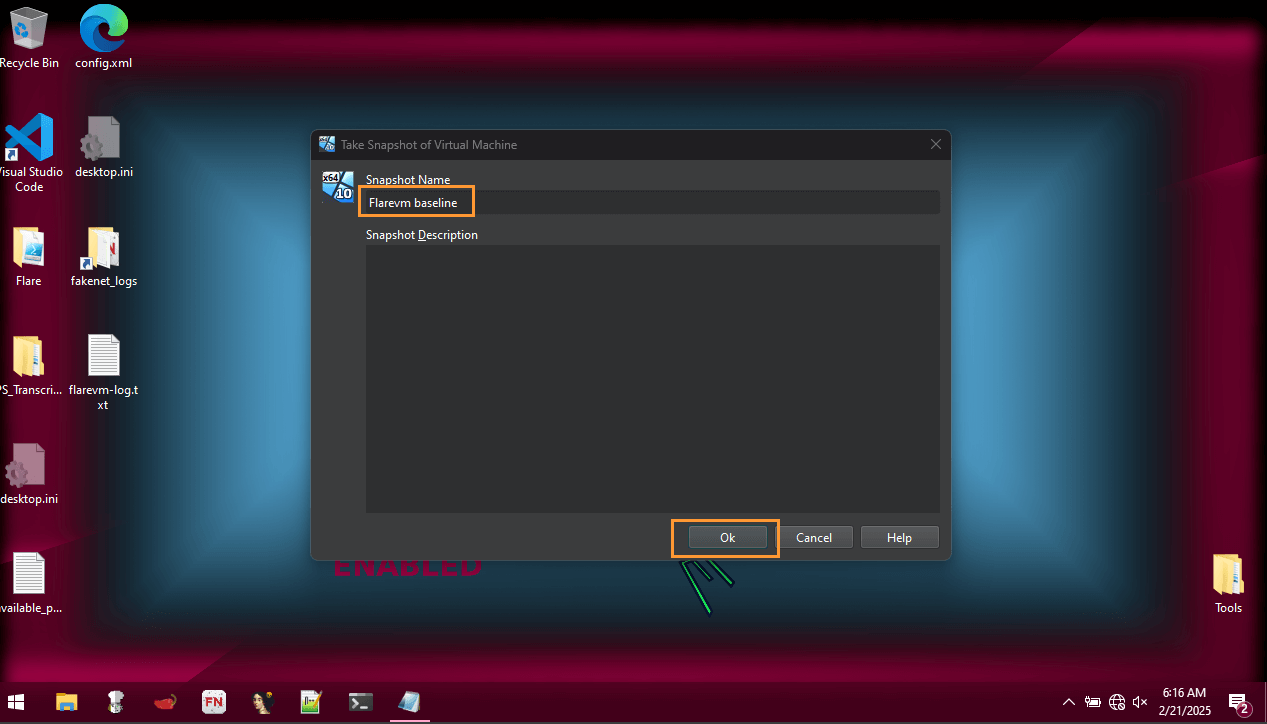
- In VirtualBox, go to Machine > Take Snapshot and name it “FlareVM Baseline”.
- Click OK to save the snapshot.
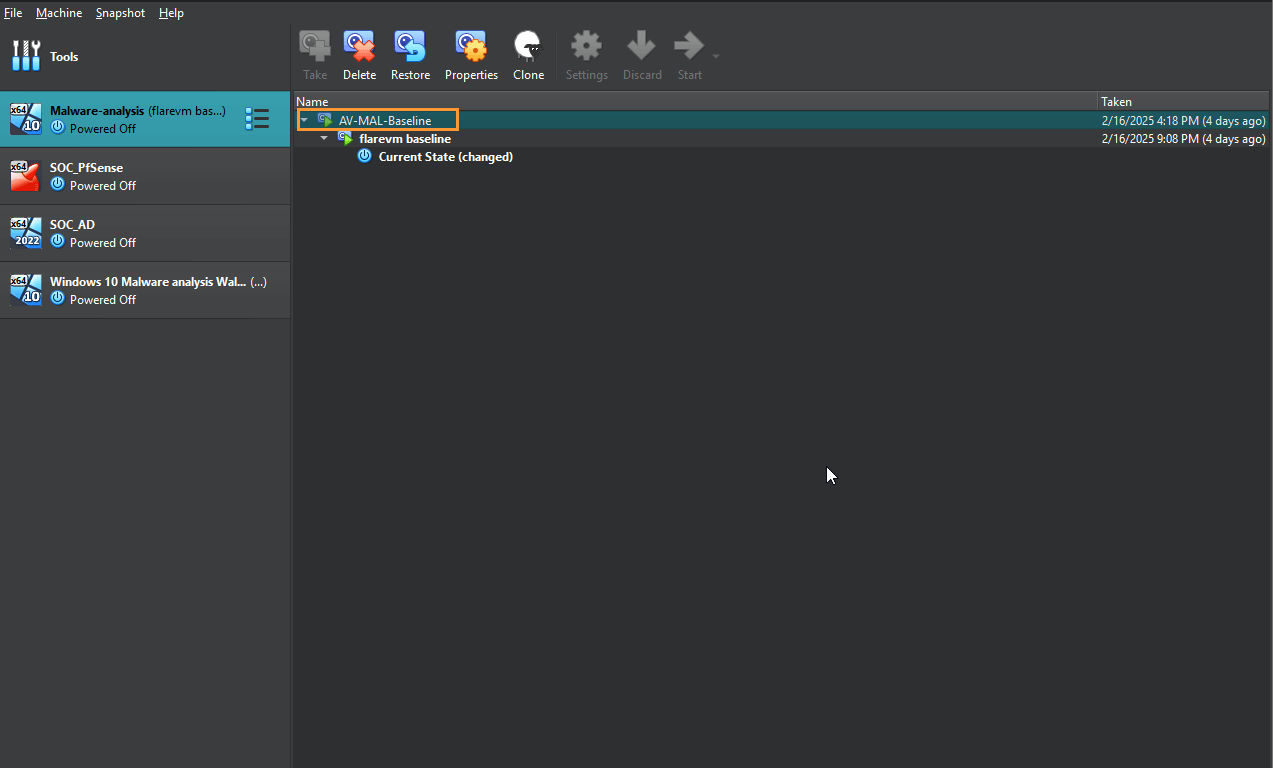
Step 22: Confirm Snapshot
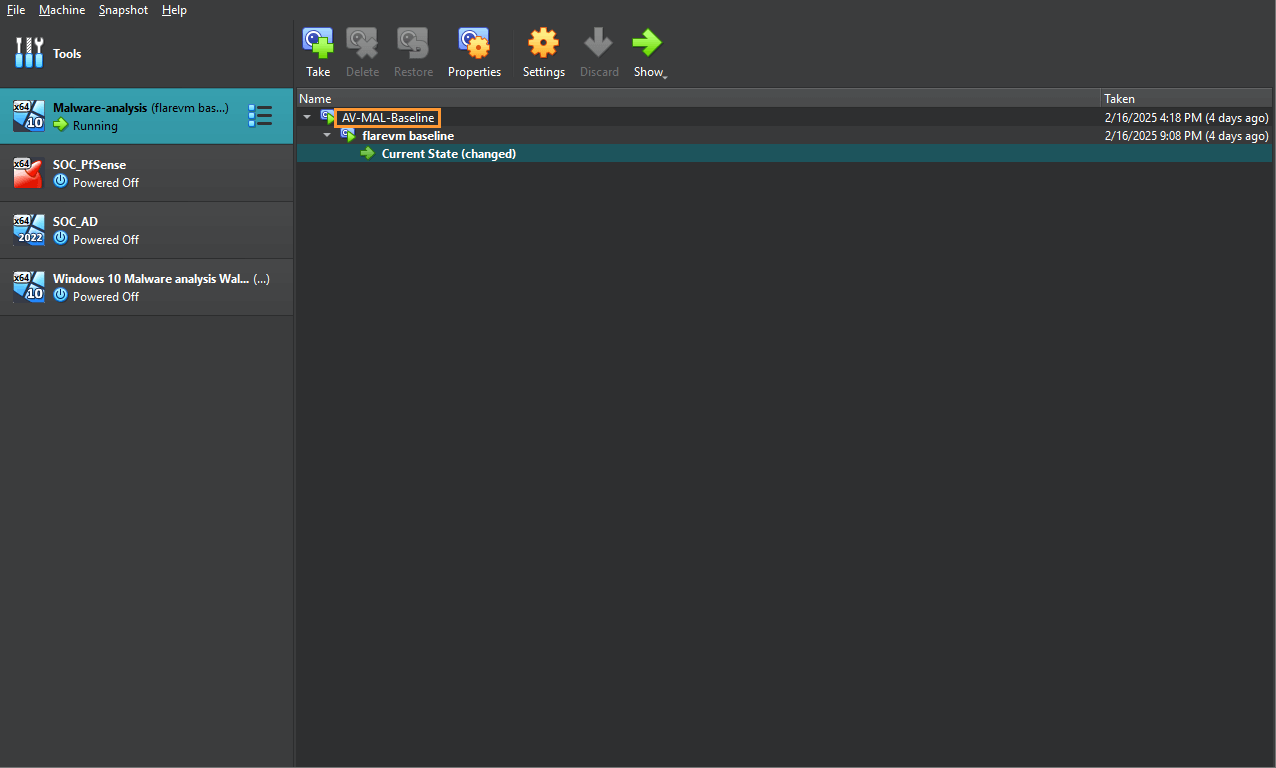
- Verify the Snapshot:
- Go back to VirtualBox, highlight your Flare-VM machine, click on the hamburger menu, and check the Snapshots section to confirm that your snapshot is listed.
Step 23: Conclusion and Final Setup Tips
- Congratulations!:
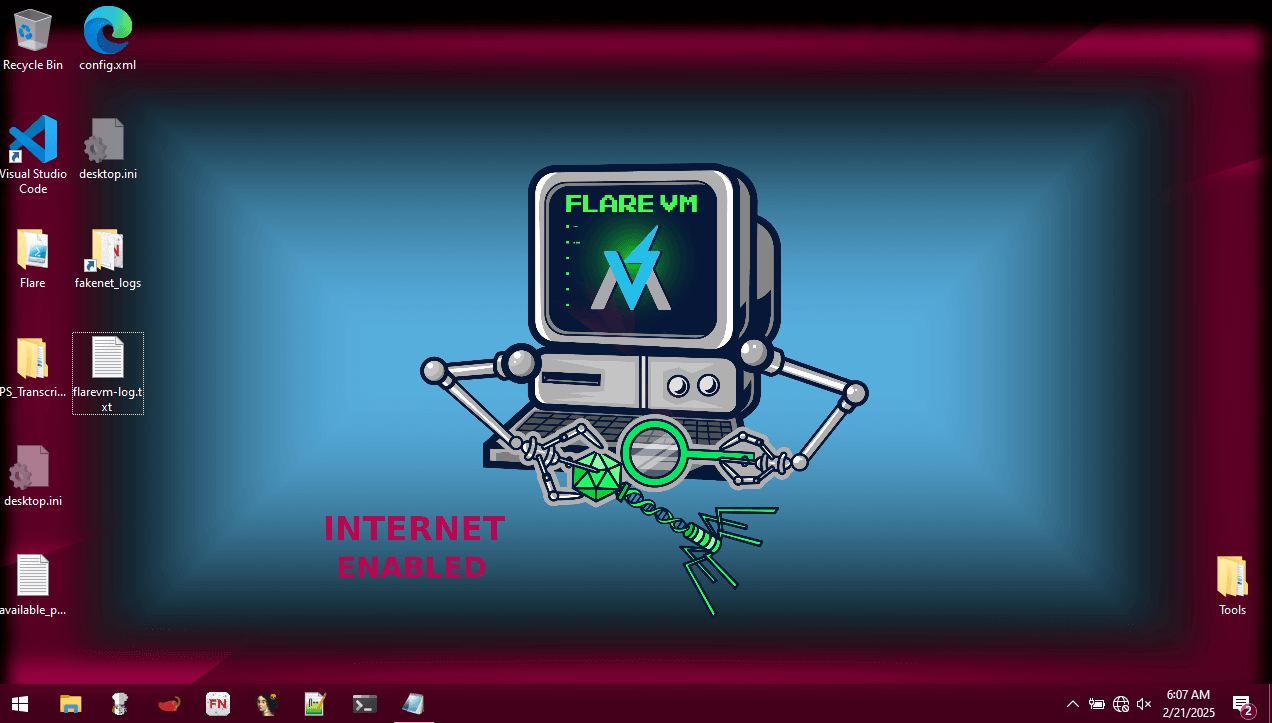
- You’ve successfully installed Flare-VM on your VM! Now, you can perform static and dynamic malware analysis anytime.
- Important Tips:
- Keep VirtualBox and Flare-VM up to date.
- Make sure your host machine has antivirus and malware protection enabled, and always keep it updated.
- Create a clean backup of your host machine to revert to in case of a malware incident.
- Isolate your network by configuring NAT for internet access during downloads, and switch to Host-Only Adapter for analysis to prevent malware from spreading.
How to Safely Run Malware in Flare-VM
This is an amazing VM to have in your arsenal because now you can do both static and dynamic malware analysis on your PC anytime you want, whether it’s for Let’sDefend labs or if you have a suspicious file and want to check if there’s malware on it. However, there are some very important tips you need to follow when running malware in the VM to keep your system secure.
1. Keep Your VM and Flare-VM Up to Date
Before diving into malware analysis, make sure your VirtualBox or whatever VM service you are using is up to date. The same goes for Flare-VM—ensure it’s updated so you have the latest tools and features available for analysis. Running outdated versions could leave you vulnerable or cause instability during the analysis process.
2. Install Anti-Virus and Anti-Malware on Your Host System
It’s crucial that your host/main PC has anti-virus/anti-malware software installed. Make sure Windows Defender (or your preferred software) is enabled and that everything on your host machine is up to date. This ensures that if malware attempts to escape from the VM, your host machine can catch it and kill the process, keeping your system secure.
3. Make a Clean Backup of Your Host System
Before you begin your malware analysis, it’s always a good idea to make a clean backup of your host machine. In case something goes wrong and malware slips past your defenses, you can easily revert to the backup and restore your host machine to a known safe state.
4. Isolate the Network
It’s important to isolate your network to prevent malware from spreading beyond the VM. Here’s how to do it:
- Go to VirtualBox:
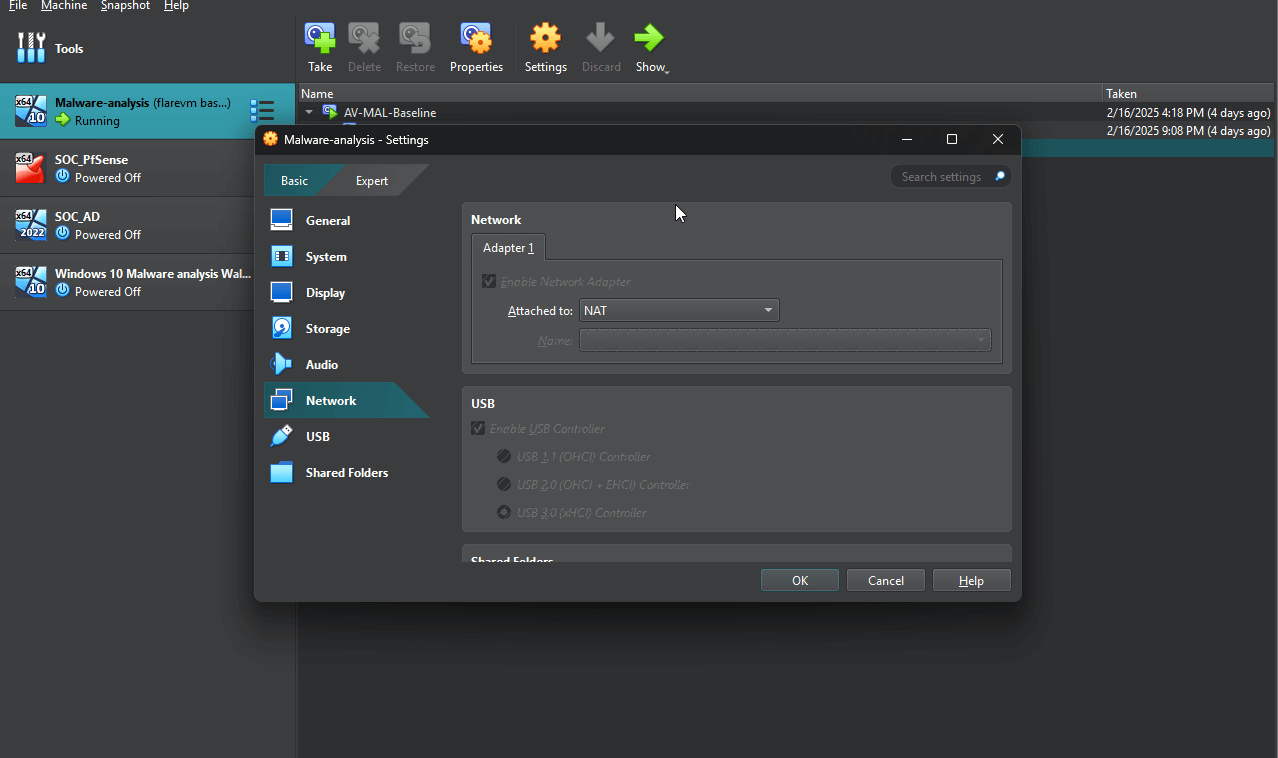
- Open VirtualBox and go to Settings > Network.
- Make sure the network is set to NAT so the VM can access the internet for a short time. This is necessary for downloading malware from sources like AnyRun.
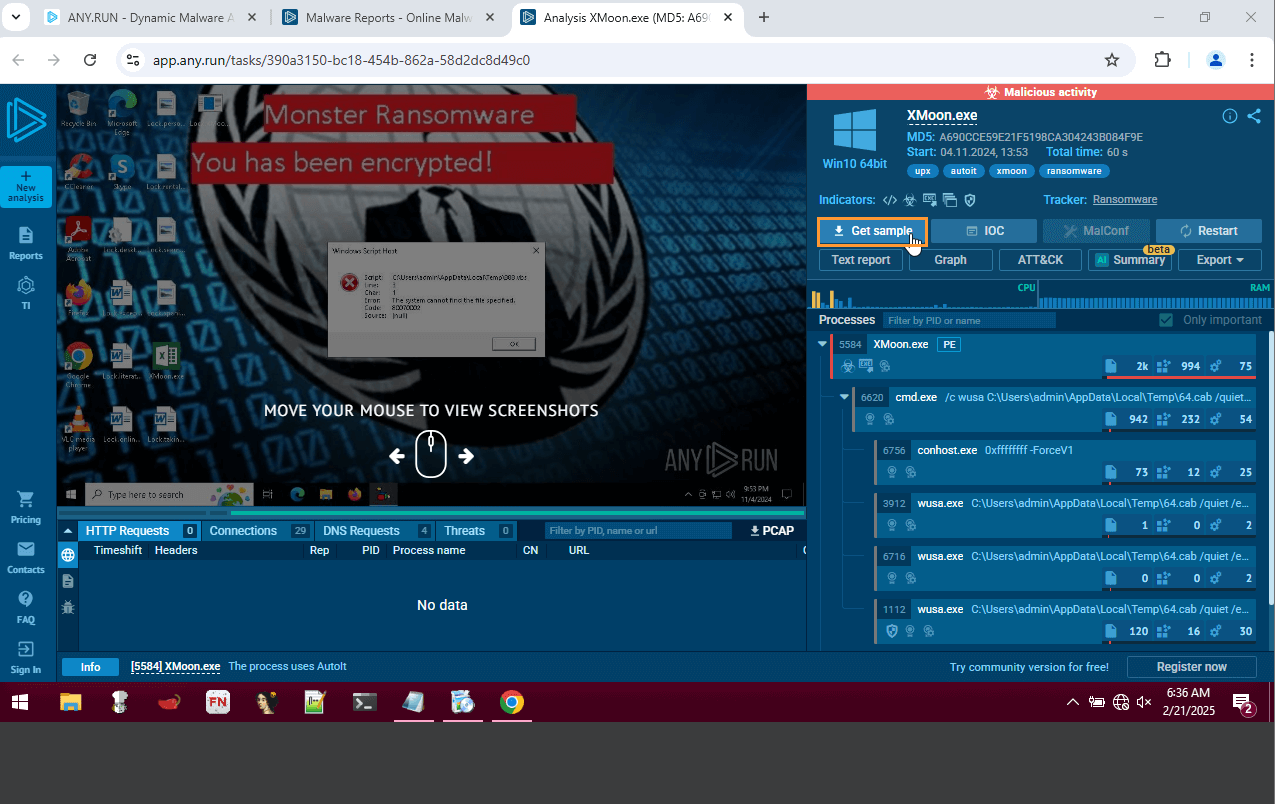
- Download the Malware Sample:
- Power up the VM and open a browser.
- Visit AnyRun, go to the Malware Analysis Report, and type in the hash of the sample you want to analyze.
- Click on Get Sample to download the file to your VM.
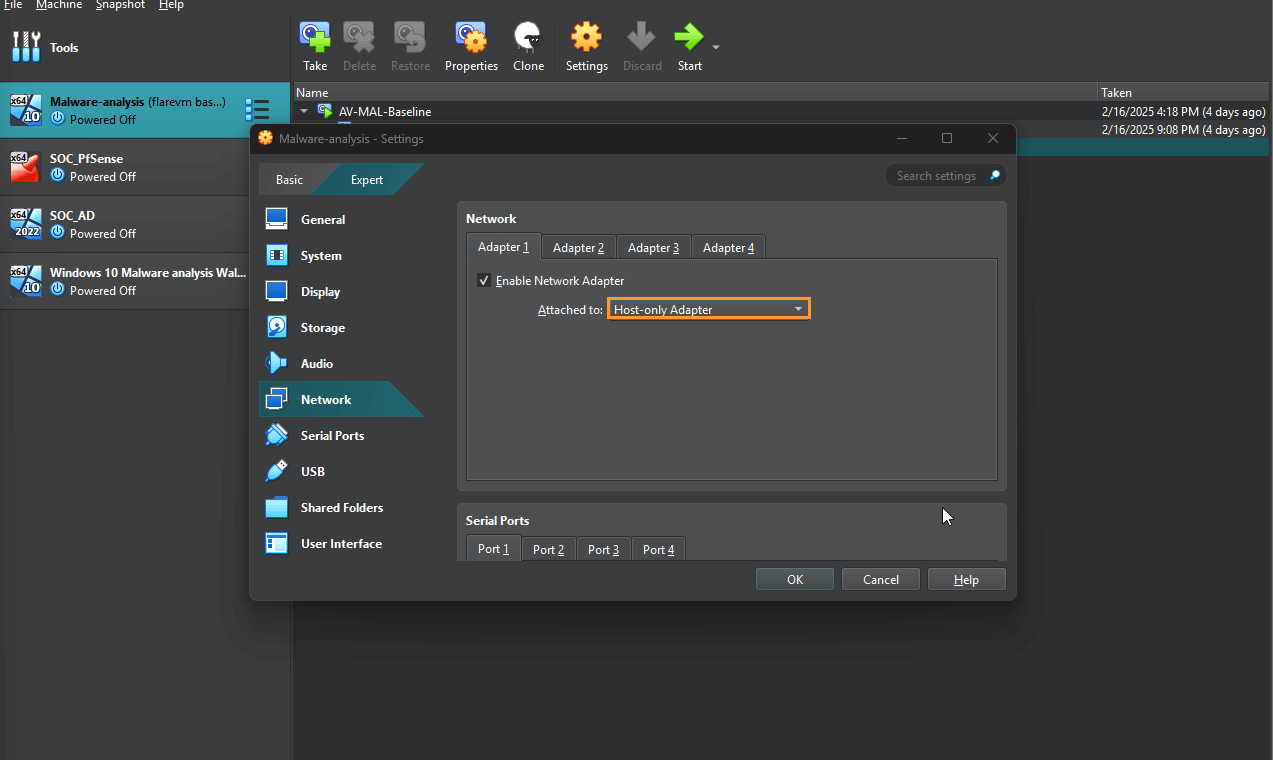
- Reconfigure the Network Adapter After Download:
- After the malware has been downloaded, shut down the VM without saving the changes.
- Go back to the Network Adapter settings in VirtualBox.
- Go to Advanced Settings, disable adapters 2-4, and make sure Host-Only Adapter is selected for Adapter 1.
- This ensures that the VM can only communicate with the host system and not with the outside network, keeping your system isolated from any potential threats.
- Why Is This Important?:
- A Host-Only Adapter ensures that the malware is isolated within the VM and cannot affect other systems or the external network. It’s essential to ensure your host machine is fully locked down and ready to handle any malware behavior.
Running Malware in Flare-VM
Now that the VM is set up, you can run static and dynamic malware analysis on it. Here’s what you should do once the analysis is done:
- Power Down the VM Without Saving:
- After finishing with the malware analysis, power down the VM without saving any changes. This ensures that no malicious files or processes are carried over.
- Restore Flare-VM from the Baseline Snapshot:
- Once the VM is powered off, go back to the Flare-VM baseline snapshot and reload the machine. This restores your environment to a known safe state, preparing it for the next round of malware analysis.
Final Checks on Your Host System
This final scan adds an extra layer of security, ensuring that your host machine is clean and safe after completing the malware analysis.
Close All Windows and Apps:
Once you’ve completed the analysis in Flare-VM, close every single window and application on your host machine.
Run a Full Antivirus Scan:
Open your anti-virus software and run a full system scan to make sure no malware managed to escape the VM and infect your main machine.
Conclusion
I hope you enjoyed this walkthrough and that it helped you with any parts you might have been stuck on. I also hope that the safety precautions provided here helped you fully understand how to securely lock down your VM and how to remediate your machine in case of a VM escape.
VM escape can be scary, but with these steps, you can quickly act on it to make sure little to no damage is done to your host machine. By isolating the network, taking snapshots, and maintaining up-to-date security, you can ensure that your analysis environment is secure, and your host system remains safe.
The process of analyzing malware can be both challenging and rewarding. With the precautions outlined in this blog, you’re equipped to safely run malware in a controlled VM environment, making it an excellent tool for cybersecurity analysis and research. Always be vigilant and take the time to create backups and snapshots to protect your work.
Feel free to revisit this guide whenever you need a refresher, and good luck with your malware analysis journey!


Leave a Reply to Step-by-Step Malware Analysis Answer Lab Walkthrough | LetsDefend – WiredCyberKnight Blog Cancel reply