
Introduction
This guide will help you run through a malware analysis environment, including both static and dynamic analysis methods. Whether you’re using a virtual lab environment provided by Let’sDefend or setting up your own secure VM, this guide is designed to keep your environment safe while allowing for effective malware analysis.
If you haven’t built your malware analysis lab yet, be sure to check out my other blogs that explain how to spin one up – https://blogs.wiredcyberknight.com/building-a-malware-analysis-lab-flare-vm-windows-10-letsdefend/
Static Malware Analysis
Step 1: Identifying the File Extension
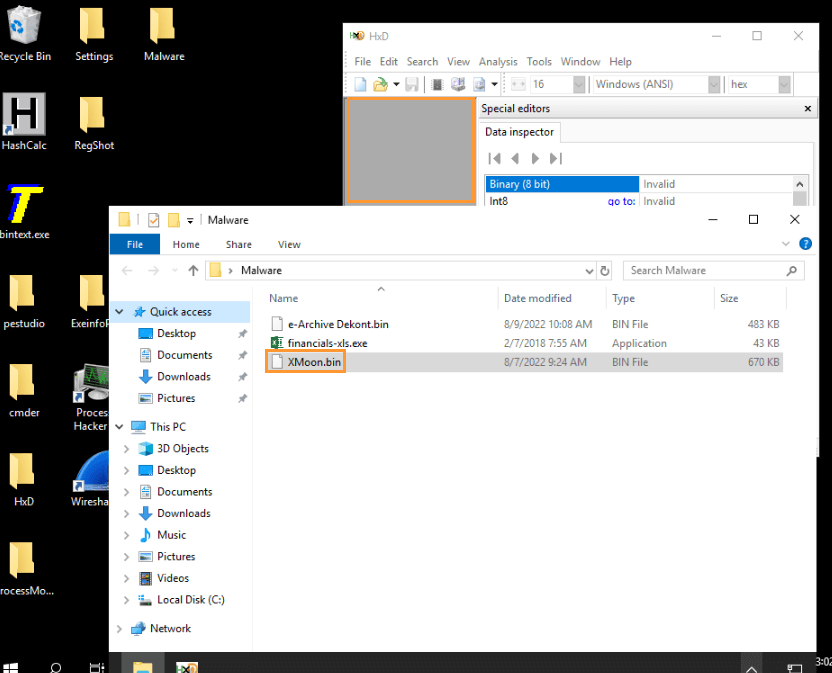
- Objective: Find the actual extension of the “XMoon.bin” file.
- Open the malware folder and launch one of the hashing tools, such as HashCalc or HashMyFile.
- Drag and drop the “XMoon.bin” file into the hashing tool.
- Generate the MD5 hash and note down the hash value:
- MD5 Hash:
a690cce59e21f5198ca304243b084f9e
- MD5 Hash:

- Go to VirusTotal and paste the MD5 hash into the search bar.
- Result: The file is identified as an .exe file.


Step 2: Analyzing the Hex Editor
- Objective: Identify the first four characters of the “XMoon.bin” file.
- Open HxD64 Hex Editor and drag and drop the “XMoon.bin” file into the editor.

- Look for the first four characters in the file.
- You should find the characters “4D 5A”.
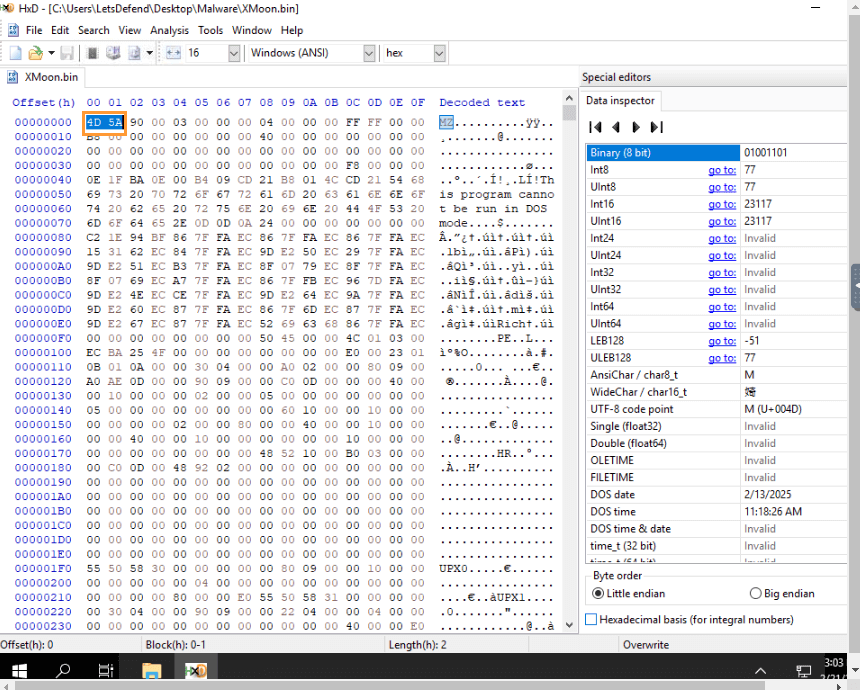
- Explanation: These characters correspond to ASCII values “M” and “Z,” which indicate the file is a Windows executable. This is an important header for identifying executable files.
- Additional Tip: Read more about these characters here: SANS Blog on Executable Identification or read below
- Executable Identification: The “4D 5A” hex values correspond to the ASCII characters “M” and “Z,” which are the first two bytes of the file header in DOS (Disk Operating System) executable files. These files often use the .exe or .com extensions. When analyzing a file, identifying this header helps analysts quickly confirm whether the file is a Windows executable.
- Signature for Analysis: Malware authors often use executable files to distribute malicious code. By detecting the “4D 5A” signature, malware analysts can quickly identify if a file might be executable, which is crucial for deciding how to approach further analysis.
- Malware Behavior: Some malware may rely on tricks to disguise itself as an executable by modifying its file header or embedding this signature in non-executable files. Identifying this header early in the analysis helps differentiate between legitimate and potentially malicious files.
- In short, “4D 5A” is an essential marker for recognizing executable files, which is the first step in malware analysis.

Step 3: Identifying the Signature of “financials-xls”
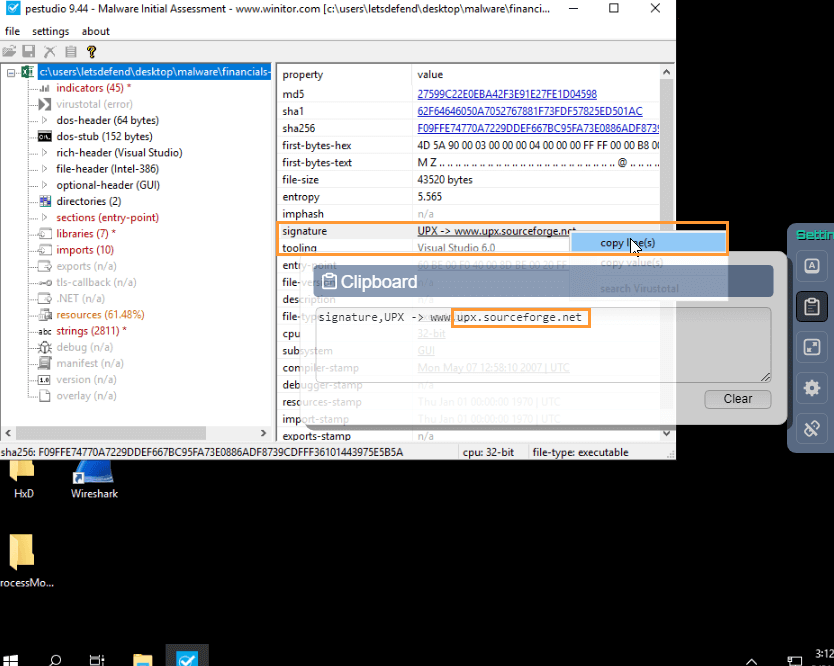
- Objective: Find the signature value for the “financials-xls” file.
- Open PEStudio and drag the “financials-xls” file into the white box in the app.

- Locate the signature section and copy the link or the value.
- Result: Paste the signature value into the answer field for your analysis.


Step 4: Checking the File Size of “financials-xls”
- Objective: Determine the file size (in bytes) of the “financials-xls” file.
- Open ExeinfoPE and drag the file into the app.
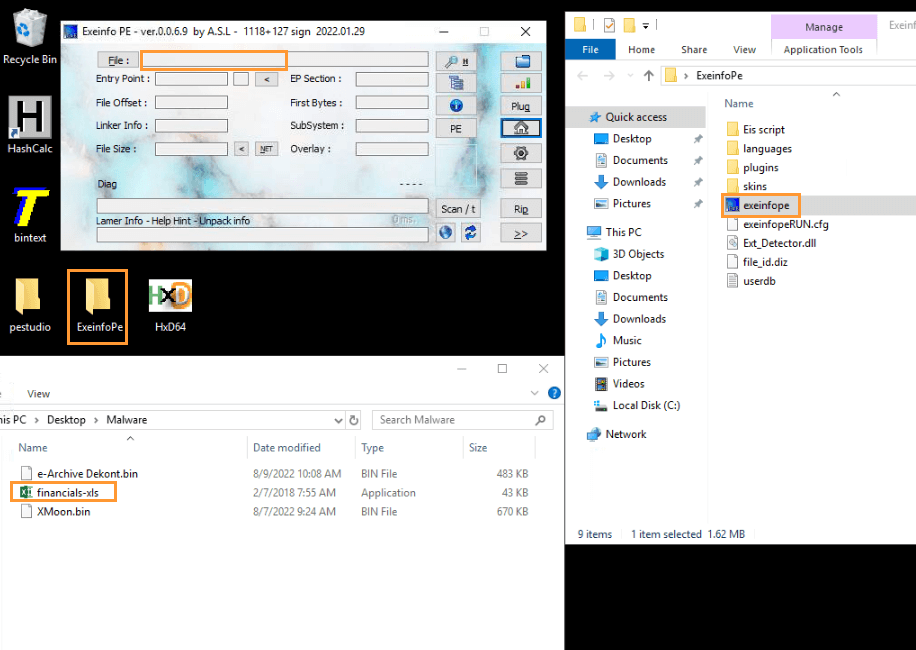
- Hover your cursor over the File Size text box to reveal the size.
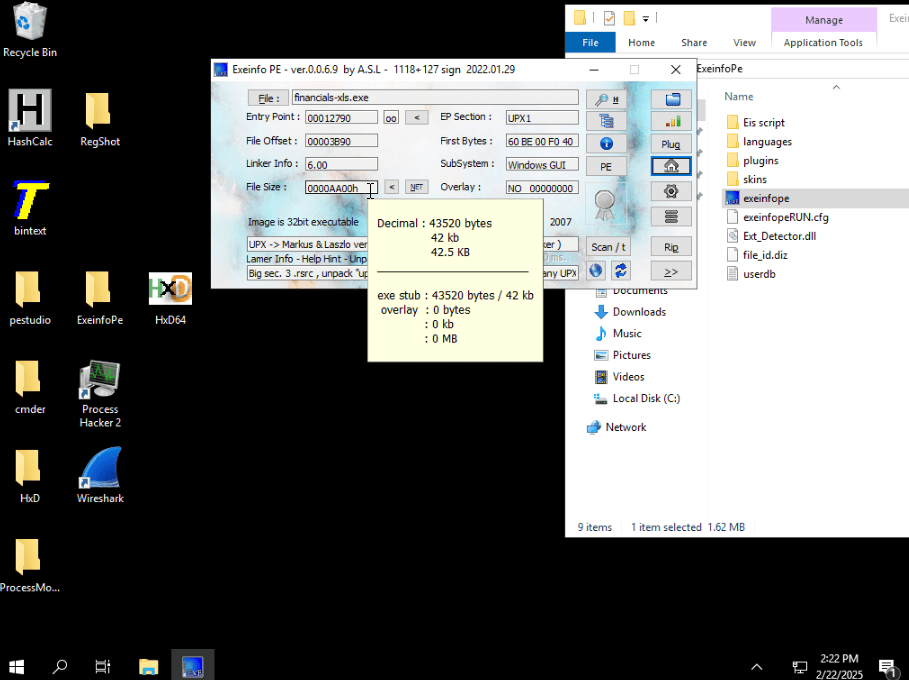
- Tip: While you could just check the properties of the file, using a new tool like ExeinfoPE helps familiarize you with additional analysis utilities.

Dynamic Malware Analysis
Step 5: Preparing the Tools for Dynamic Analysis
- Objective: Set up the tools for dynamic malware analysis.
- Open the following applications:
- Regshot
- Process Monitor (ProcMon)
- Process Hacker 2
- Wireshark
- Tip: Minimize these windows for easy access during analysis.
- Open the following applications:

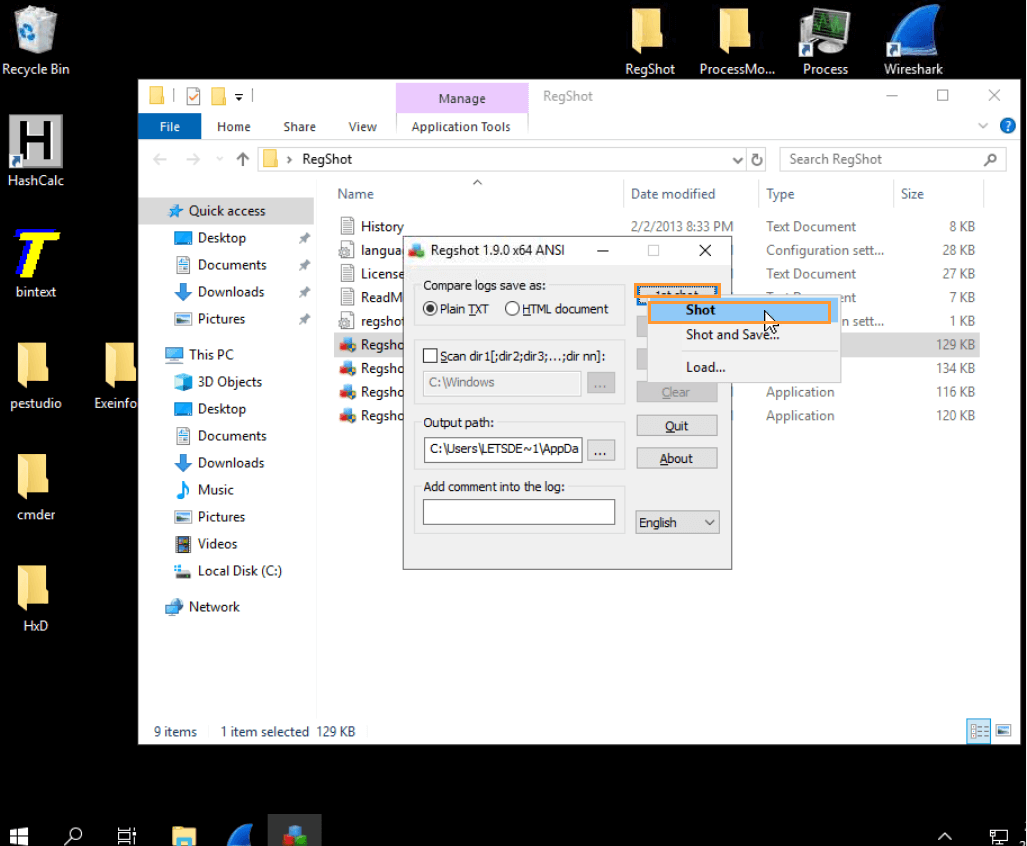
Step 6: Capture the Initial System State
- Objective: Take the first snapshot of the system.
- Launch Regshot and click on the First Shot button. This may take up to 2 minutes to complete.
- After the snapshot is taken, minimize Regshot and continue setting up the rest of your tools.
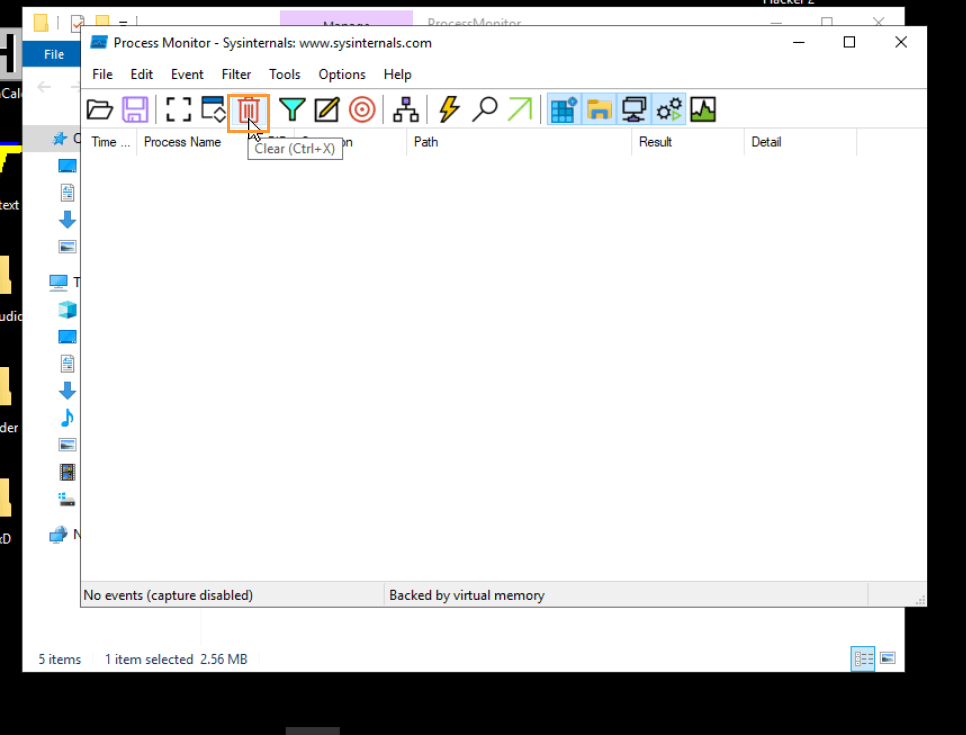
Step 7: Monitoring with Process Monitor
- Objective: Begin monitoring the processes on your system.
- Open ProcMon and agree to the prompt.
- Clear the screen to remove old data.
- Minimize ProcMon and continue with Process Hacker 2.
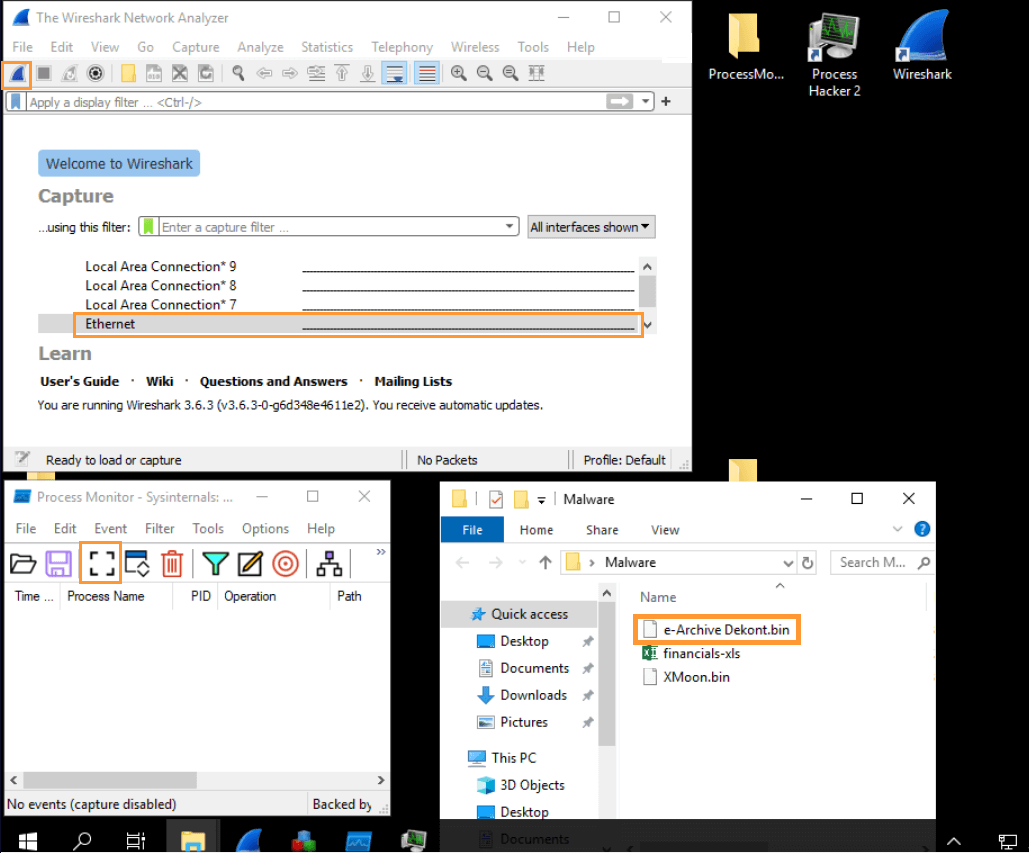
Step 8: Start Capturing Network Traffic
- Objective: Set up Wireshark for network traffic capture.
- Open Wireshark and select the Ethernet interface.
- Start capturing packets.
- Tip: You’ll also need to start ProcMon (if not already running) by clicking on the four 90-degree angles icon to begin data capture.

Step 9: Execute the Malware
- Objective: Execute the malware to observe its behavior.
- Important: Ensure all tools (Wireshark, ProcMon, and Regshot) are minimized but running in the background.
- Run the malware (e.g., “e-Archive Dekont”).
- Wait for 1 minute while the tools capture the system’s behavior and network activity.
- Stop the captures once sufficient data is collected.
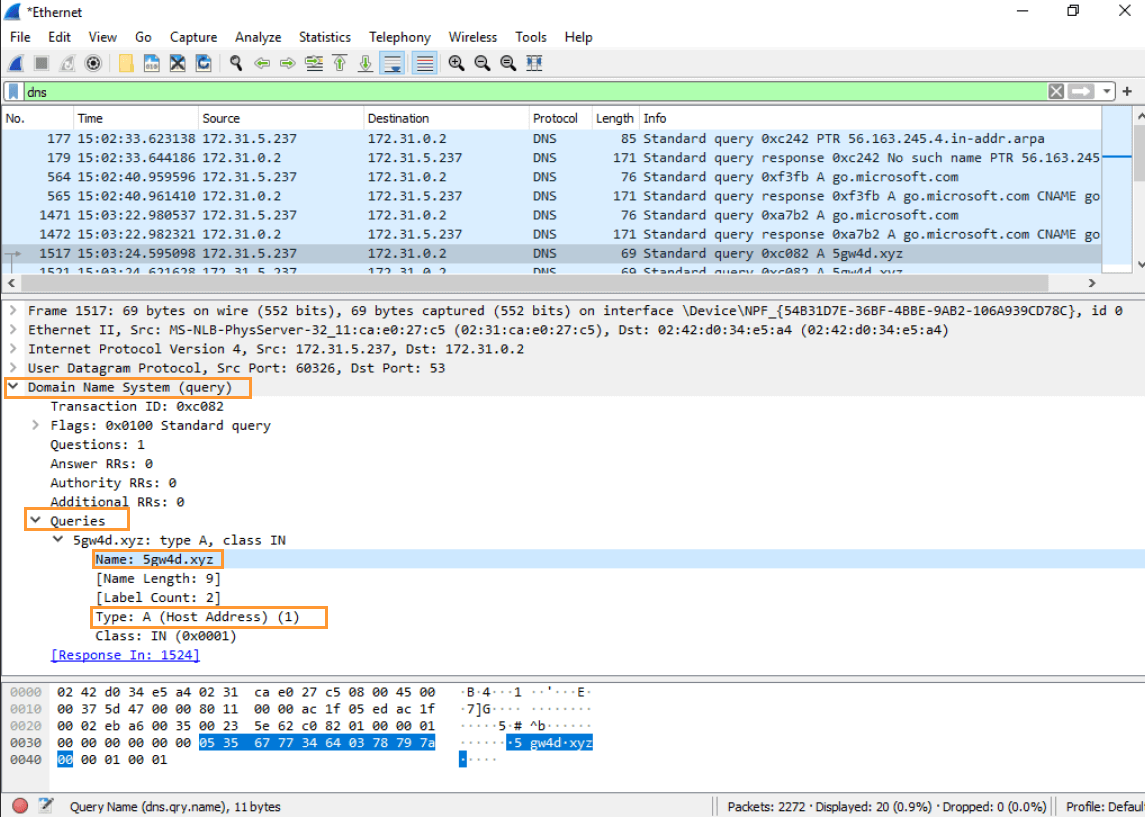
Step 10: Analyzing DNS Requests in Wireshark
- Objective: Find the domain address where the malware sends DNS requests.
- In Wireshark, use the filter
dnsto isolate DNS packets. - Look for packet 1517, which should reveal the DNS query.
- Tip: In the packet’s details, look for the type A record (IPv4 address) and the domain name in the query.
- In Wireshark, use the filter

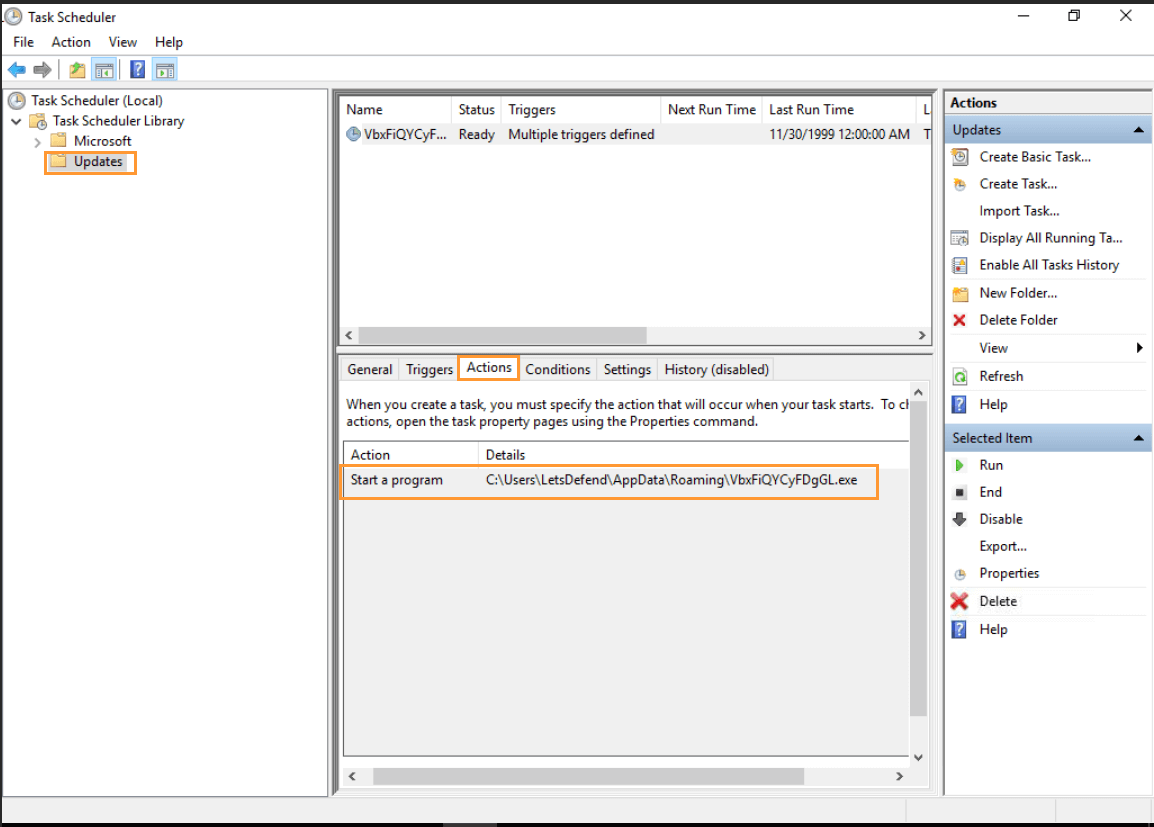
Step 11: Investigating the Scheduled Task
- Objective: Analyze any scheduled tasks created by the malware.
- Open ProcMon and locate the Task Scheduler in the process tree.
- Follow the logs to find the creation of a task associated with the malware.
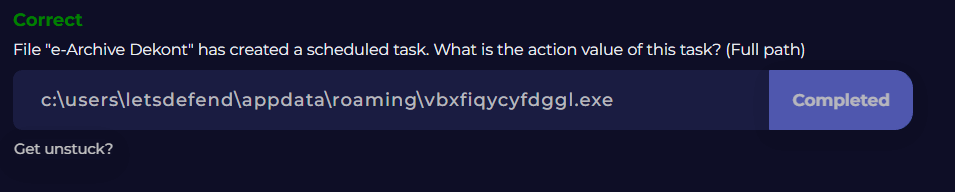
- Tip: The task action will be listed with its full path. In the case of “e-Archive Dekont,” you will find that it has created a task for “update.”

- Task Scheduler: You can open the Task Scheduler through the Windows search bar and locate the specific task that was created by the malware.
Conclusion
This detailed, step-by-step guide walks you through both static and dynamic analysis processes for malware in a lab environment. Be sure to follow each instruction carefully, utilize the appropriate tools, and confirm your results through platforms like VirusTotal and Wireshark. With these steps, you’ll gain a deeper understanding of malware behavior and how to detect and analyze it effectively.


Leave a Reply