

In this walkthrough, I will guide you through the process of investigating a suspicious XLS file. Each step is designed to ensure that you thoroughly analyze the file, identify potential threats, and take appropriate actions to contain and mitigate any risks. By following the steps outlined below, you’ll be able to navigate through the case efficiently, document your findings, and provide clear insights for the next analyst to continue their investigation.
Quick Tip
If the photos in this guide are too small to read or view clearly, simply right-click on the image you wish to enlarge and select “Open image in new tab.” This will open the image in a larger format for better visibility.
Additional Tip:
I should have used TinyPNG to optimize the images for proper loading, but simply refreshing the page will make all of the photos render/load properly.

Create a New Case
The first step is to create a new case in the system.


Start the Playbook
Next, click on “Start Playbook” to see the next steps for this investigation.

Open a New Tab for Navigation
For easier navigation, I suggest opening a new tab for all other options in the SIEM platform. This will help streamline your process.

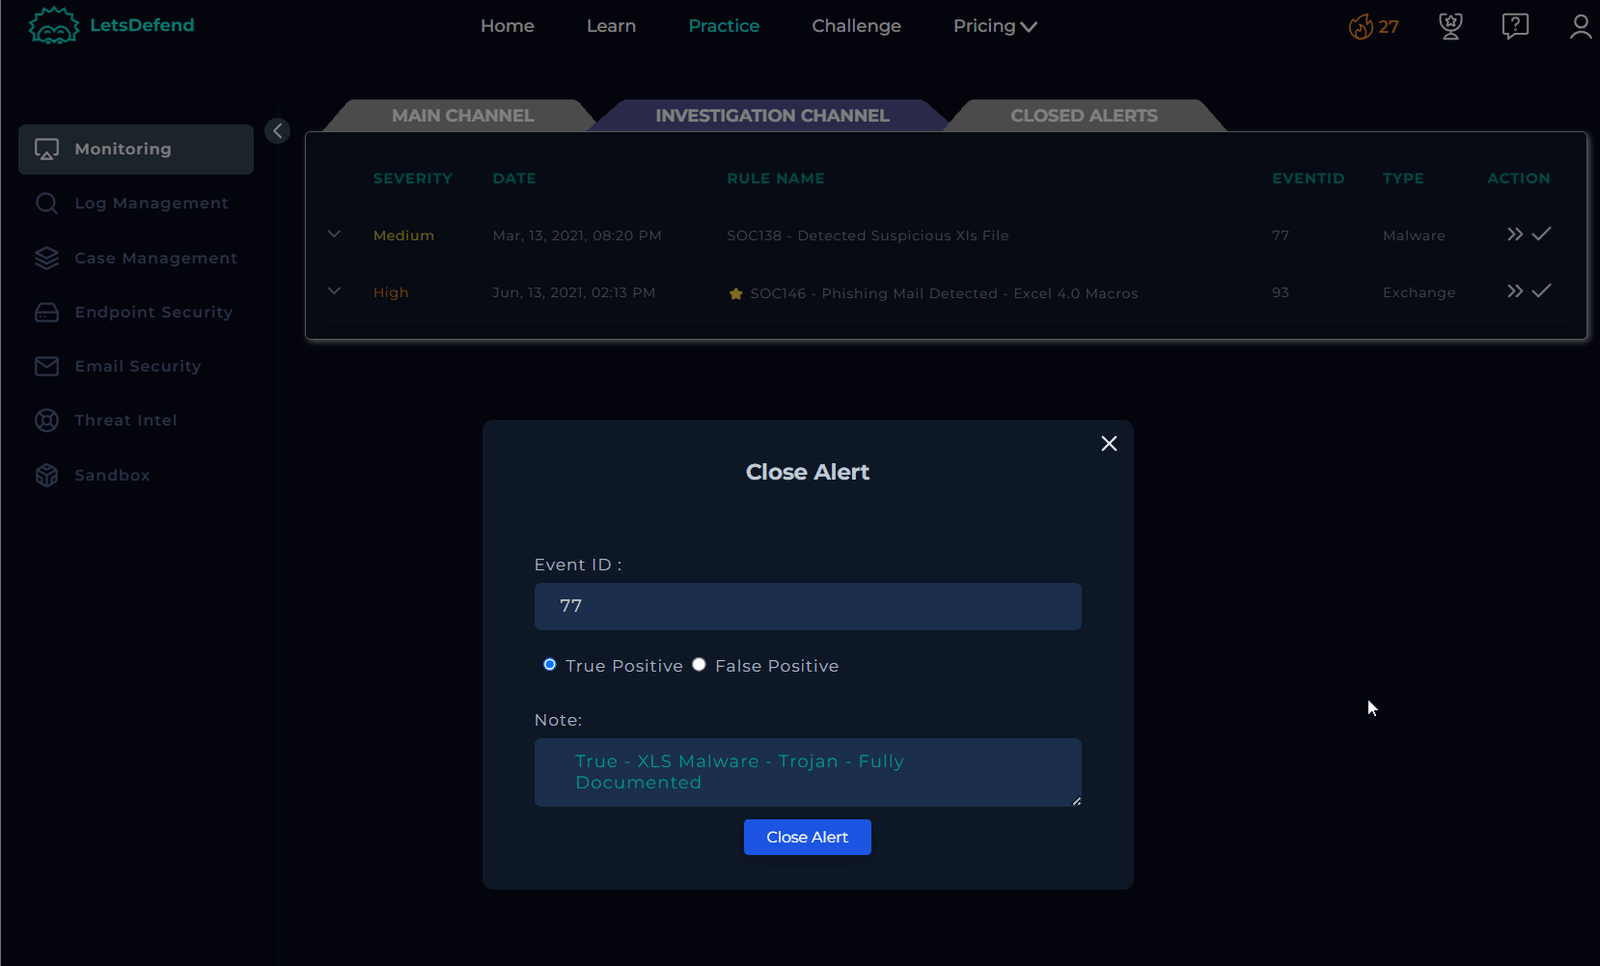
Review the Case Details
Go back to the monitoring page to review additional details about this case. In the investigation channel, you’ll see a file hash with other pertinent information. For now, focus on obtaining the file hash, which we’ll use to check for any reports on the file.

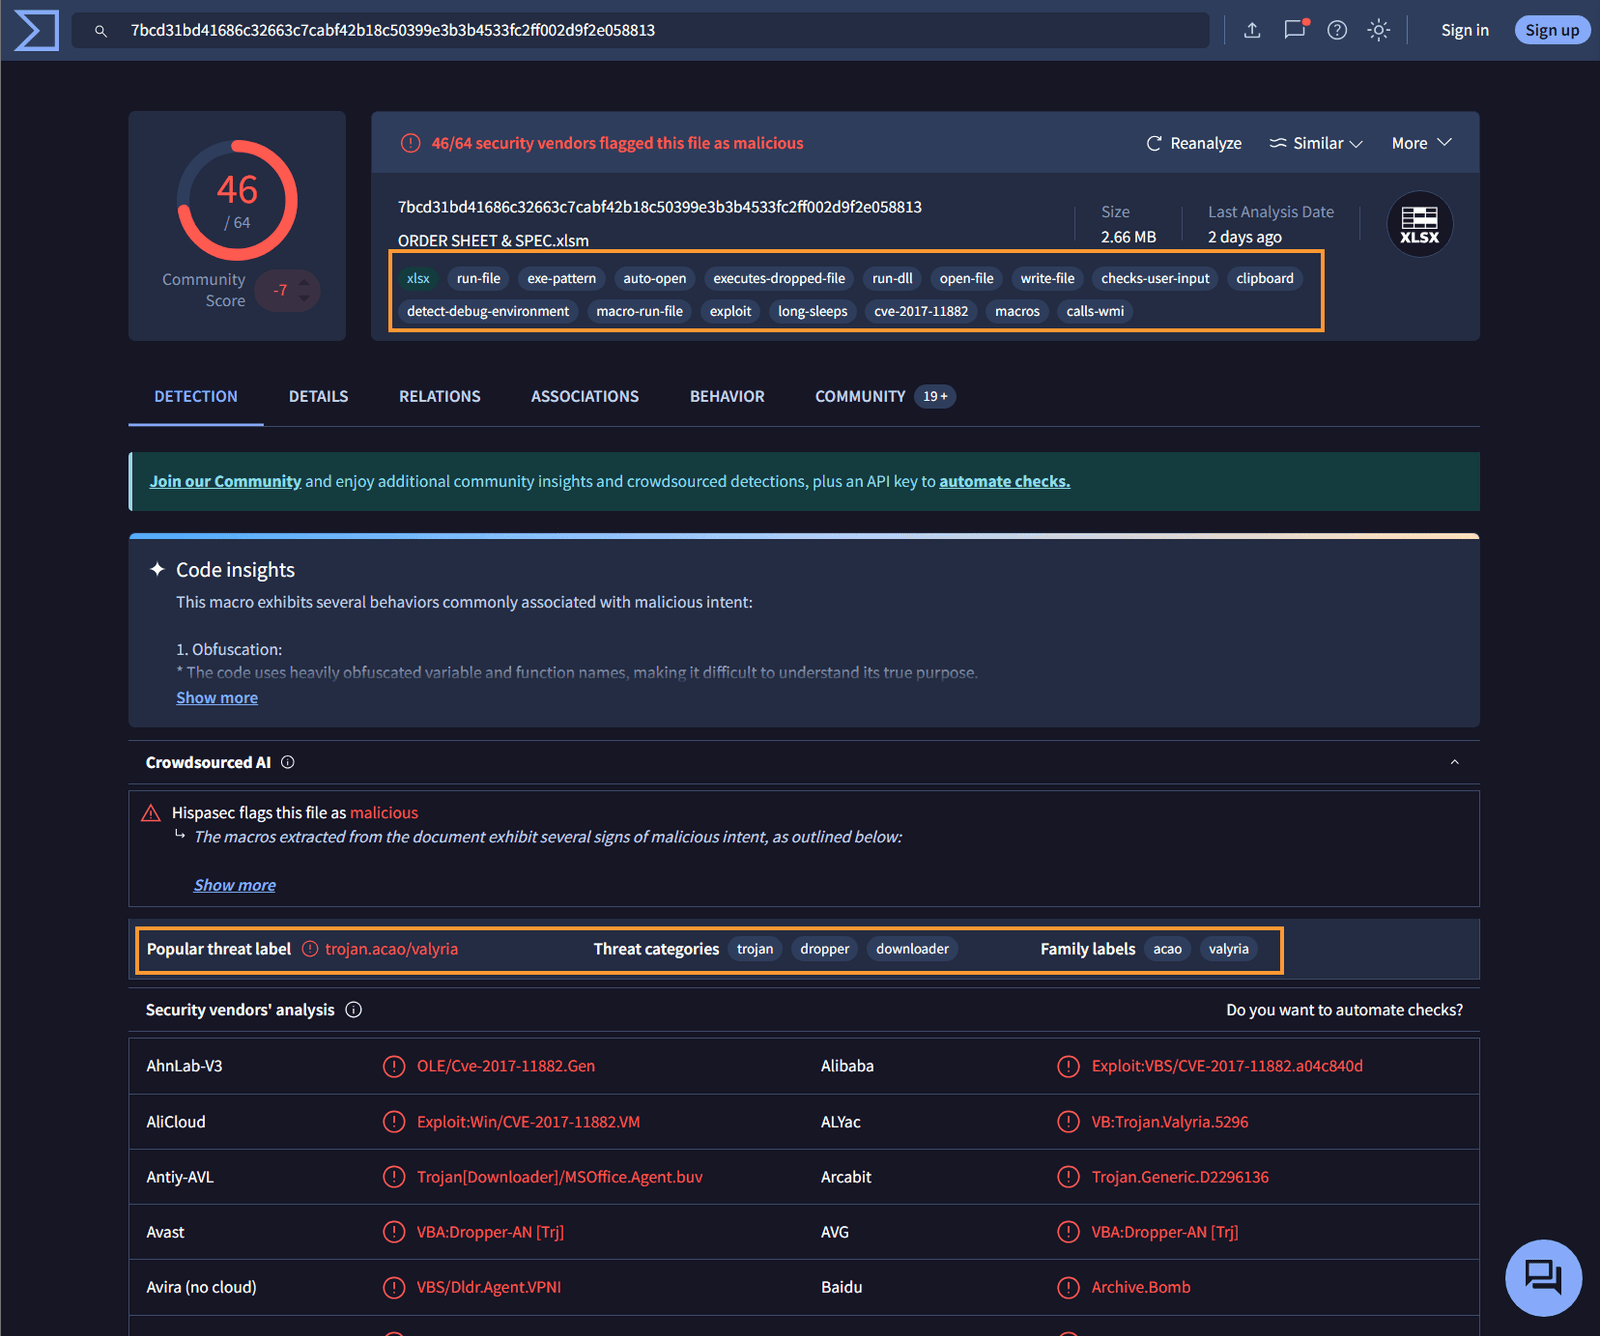
Check the File Hash on VirusTotal
Paste the file hash into VirusTotal to determine if it has been flagged. As seen, the file is indeed flagged under multiple categories, indicating it’s suspicious. While it could fall under “Unknown or Unexpected Outgoing Internet Traffic” (the first option in the playbook), let’s not stop there. Let’s take this file hash to AnyRun for further analysis.
Analyze the File on AnyRun
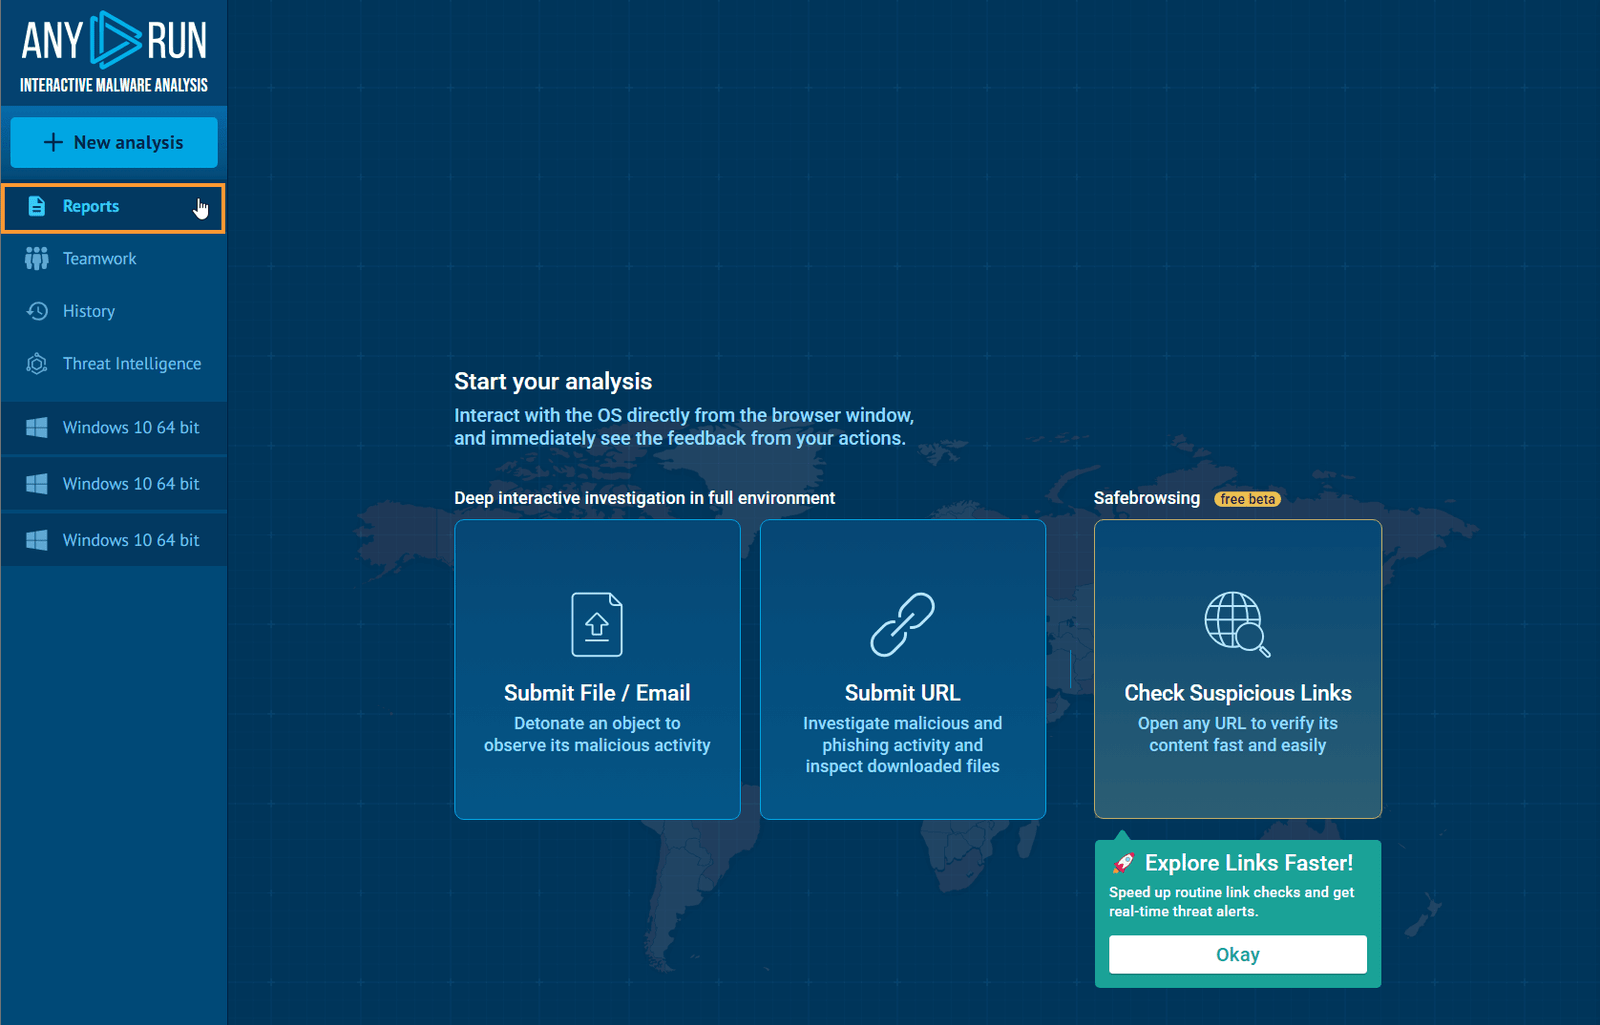
In AnyRun, go to “Products” and select “Sandbox.” Click on “Get Started.” On the left-hand side, click on “Reports.”
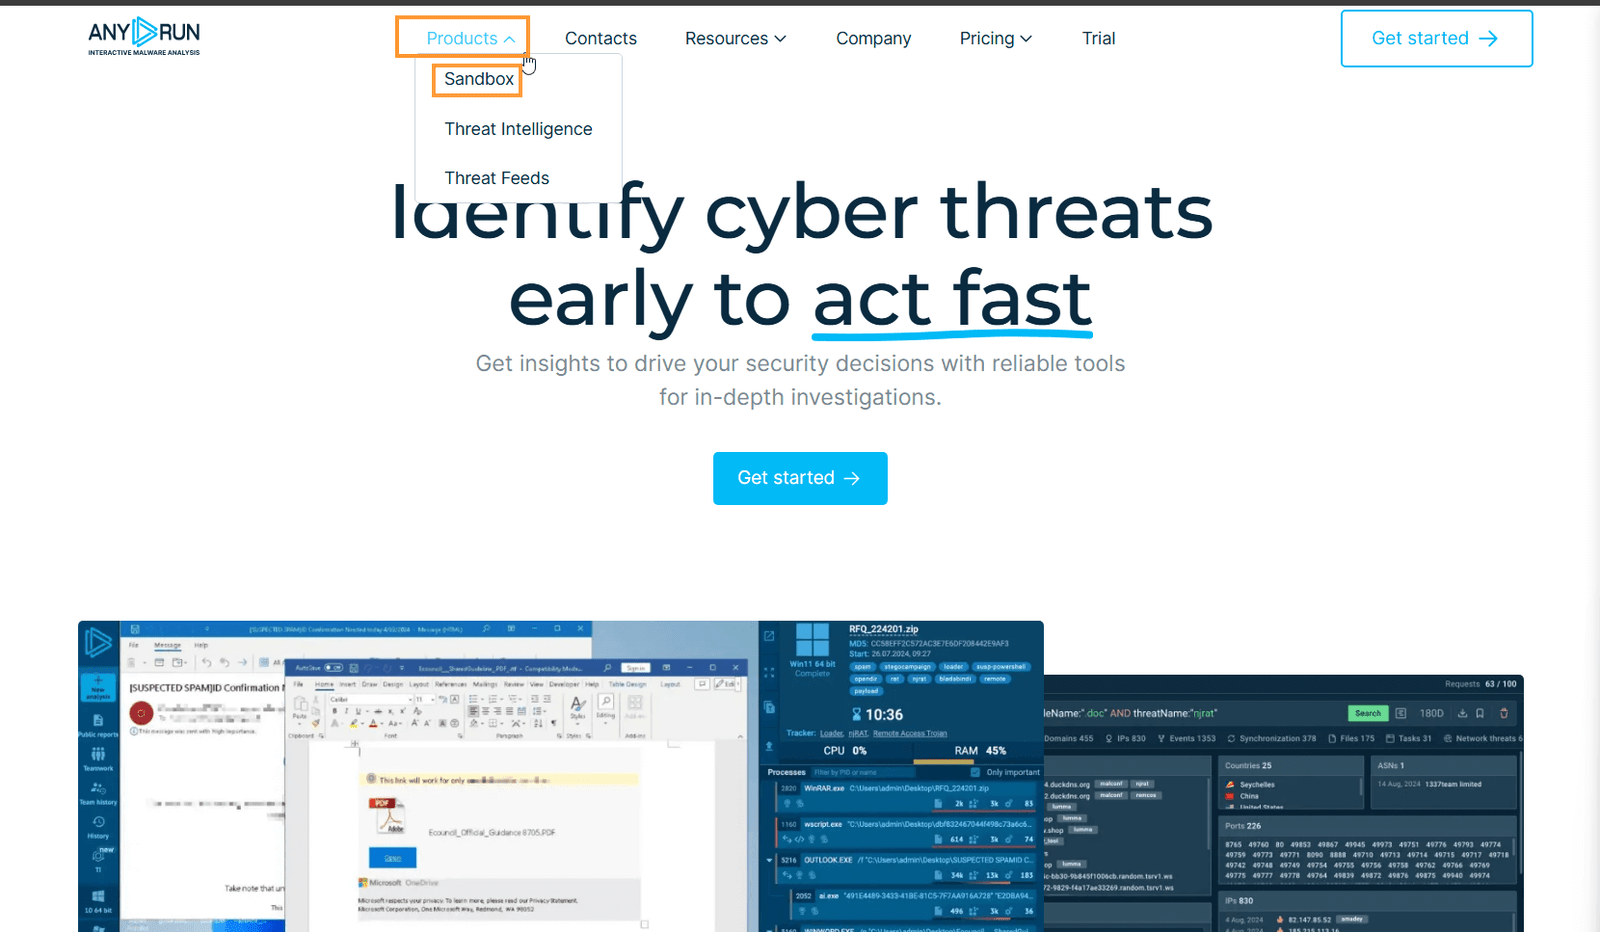
Click on “Get Started.”

On the left-hand side, click on “Reports.”
Search for the Hash in AnyRun
Input the hash from the case into the search box. Since this hash has been analyzed multiple times, it can provide useful information for your investigation. Click on the first option to review the report.
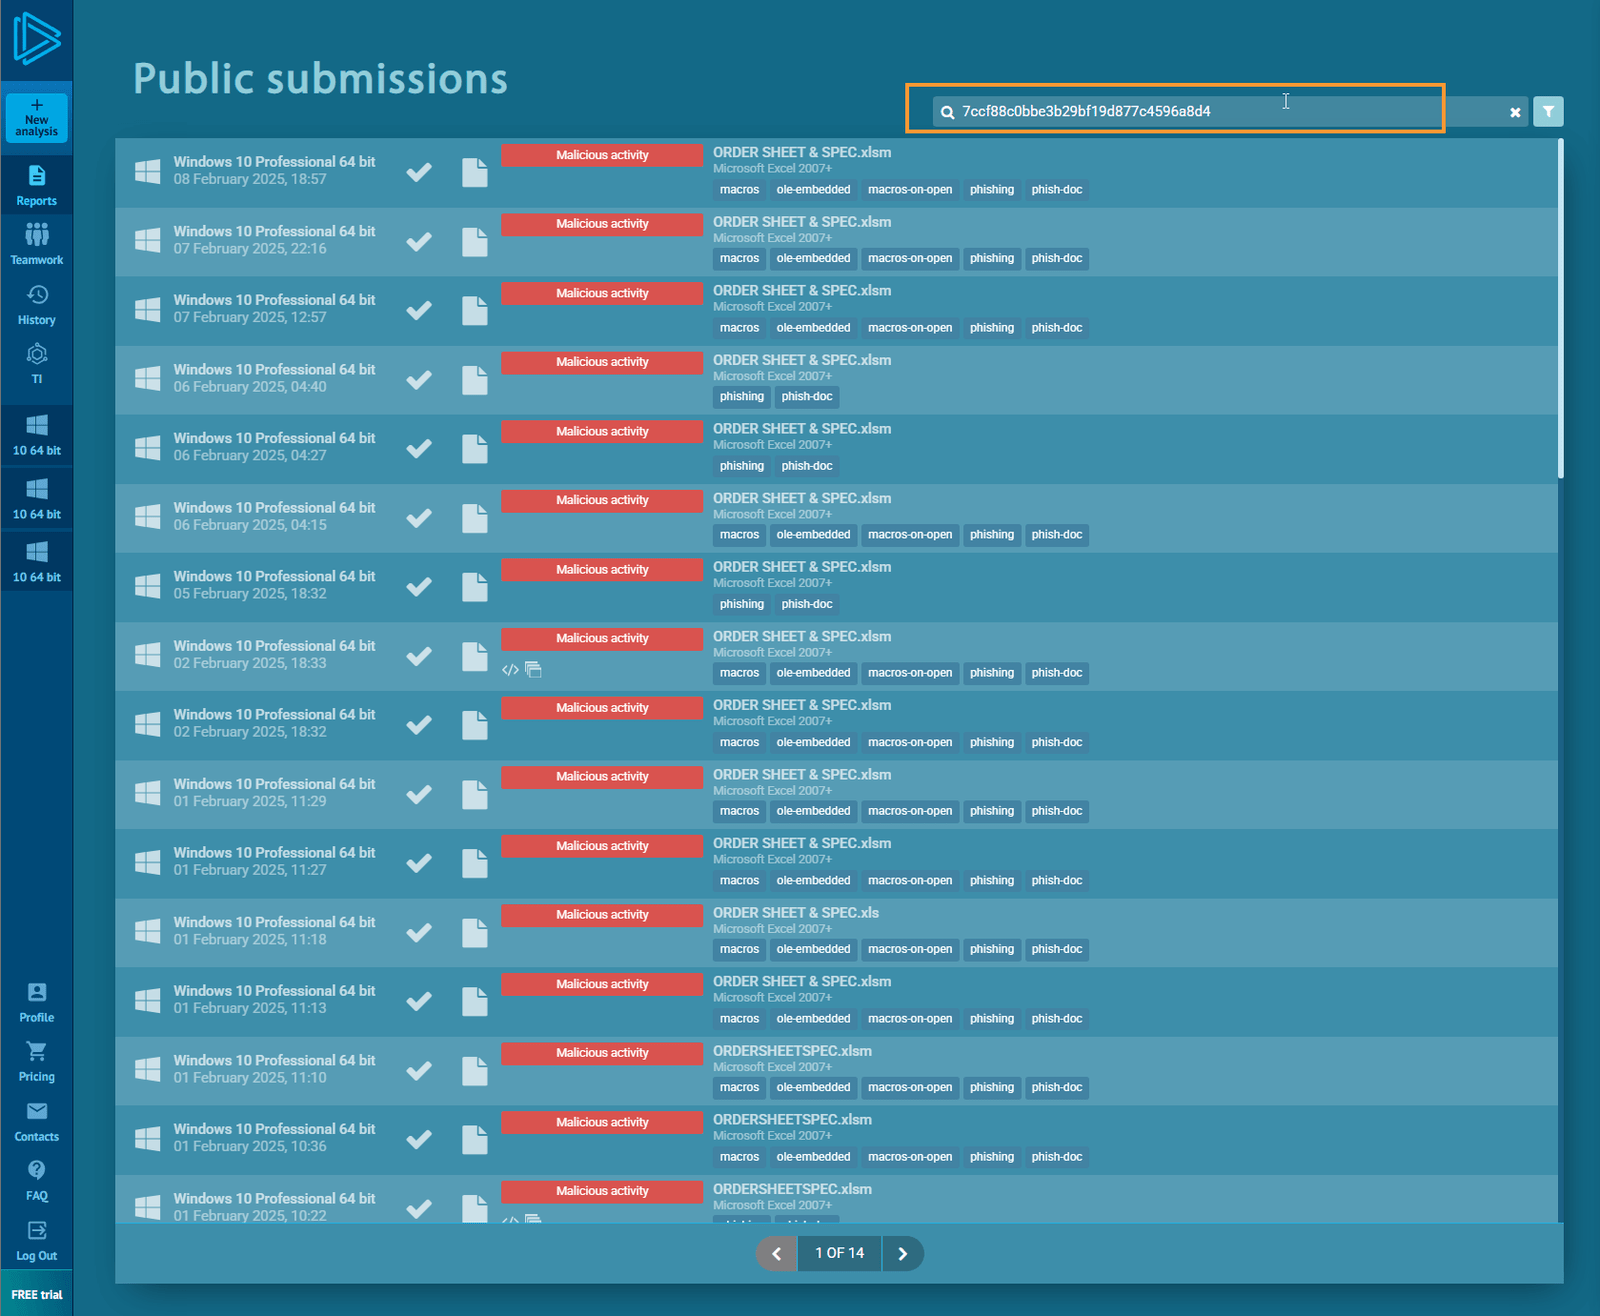
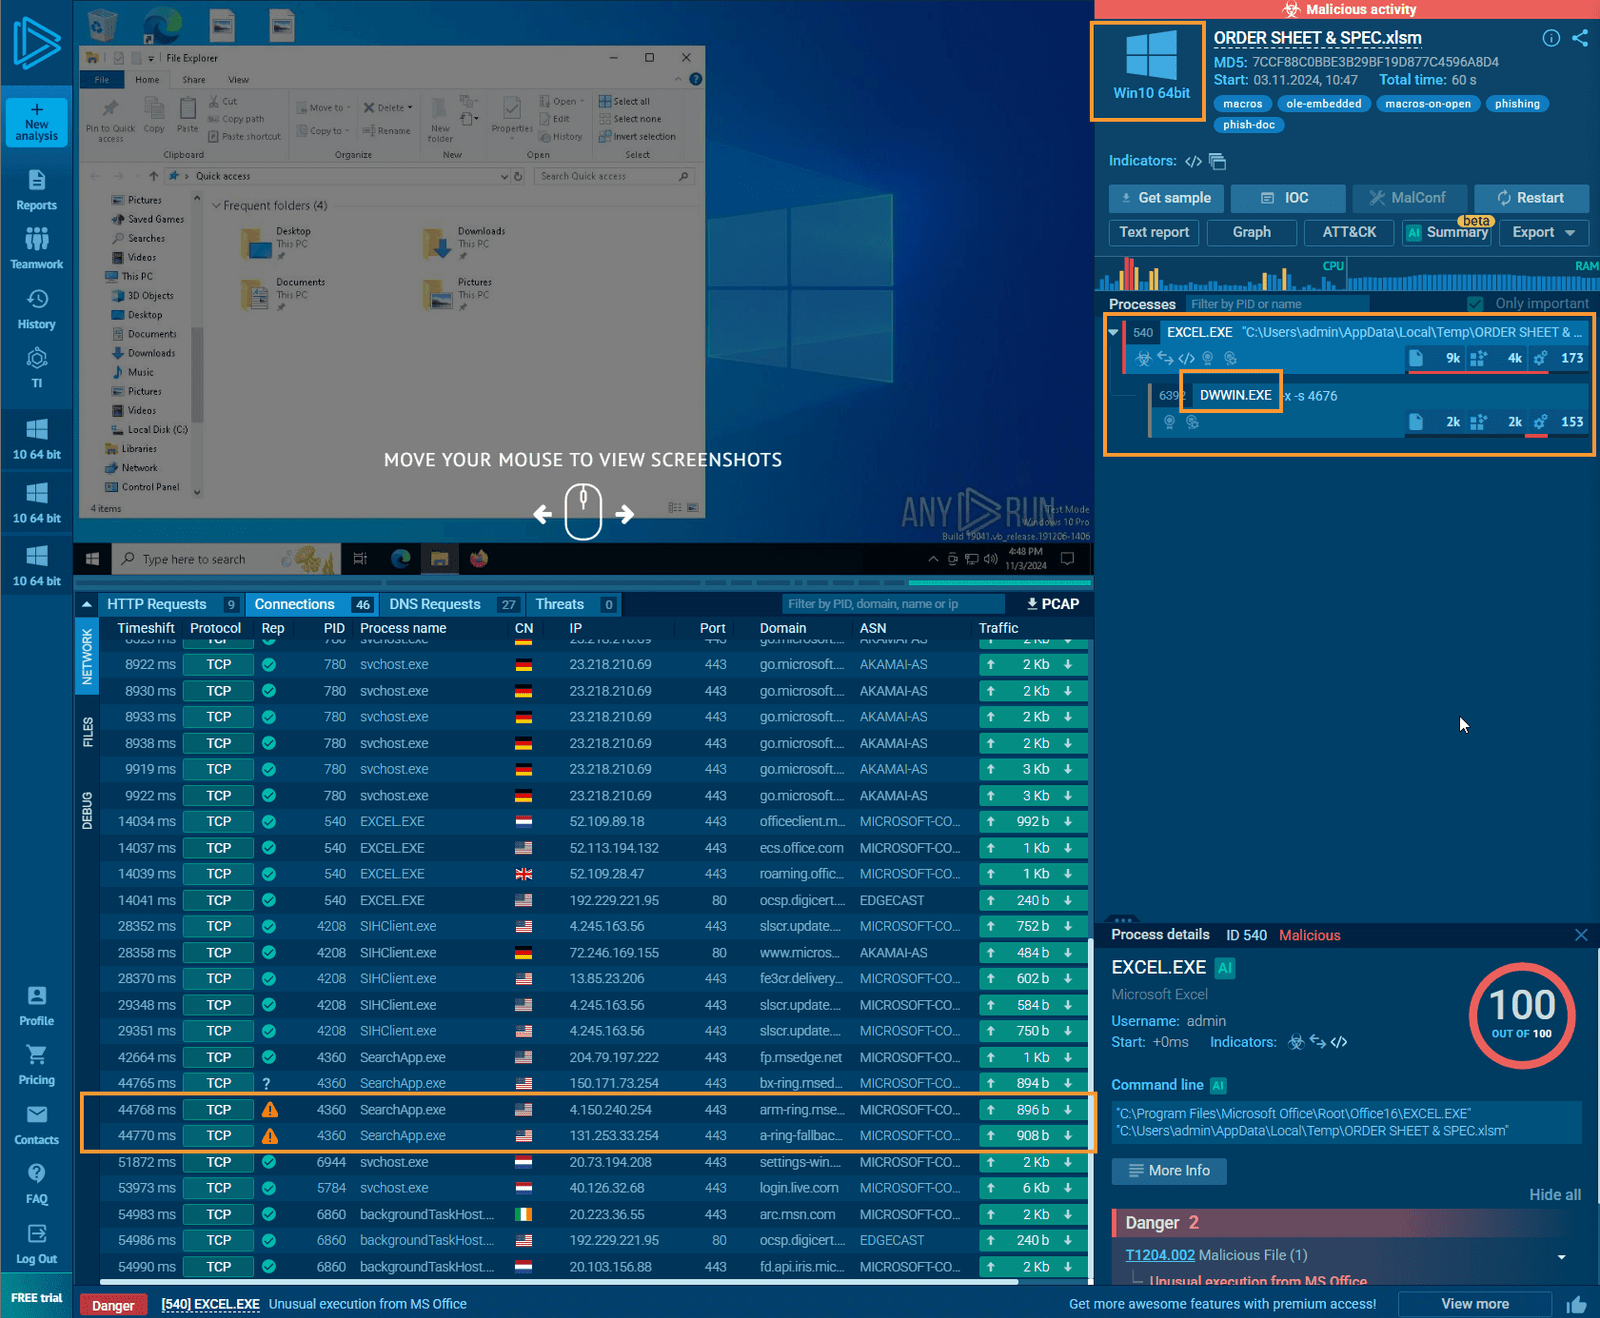
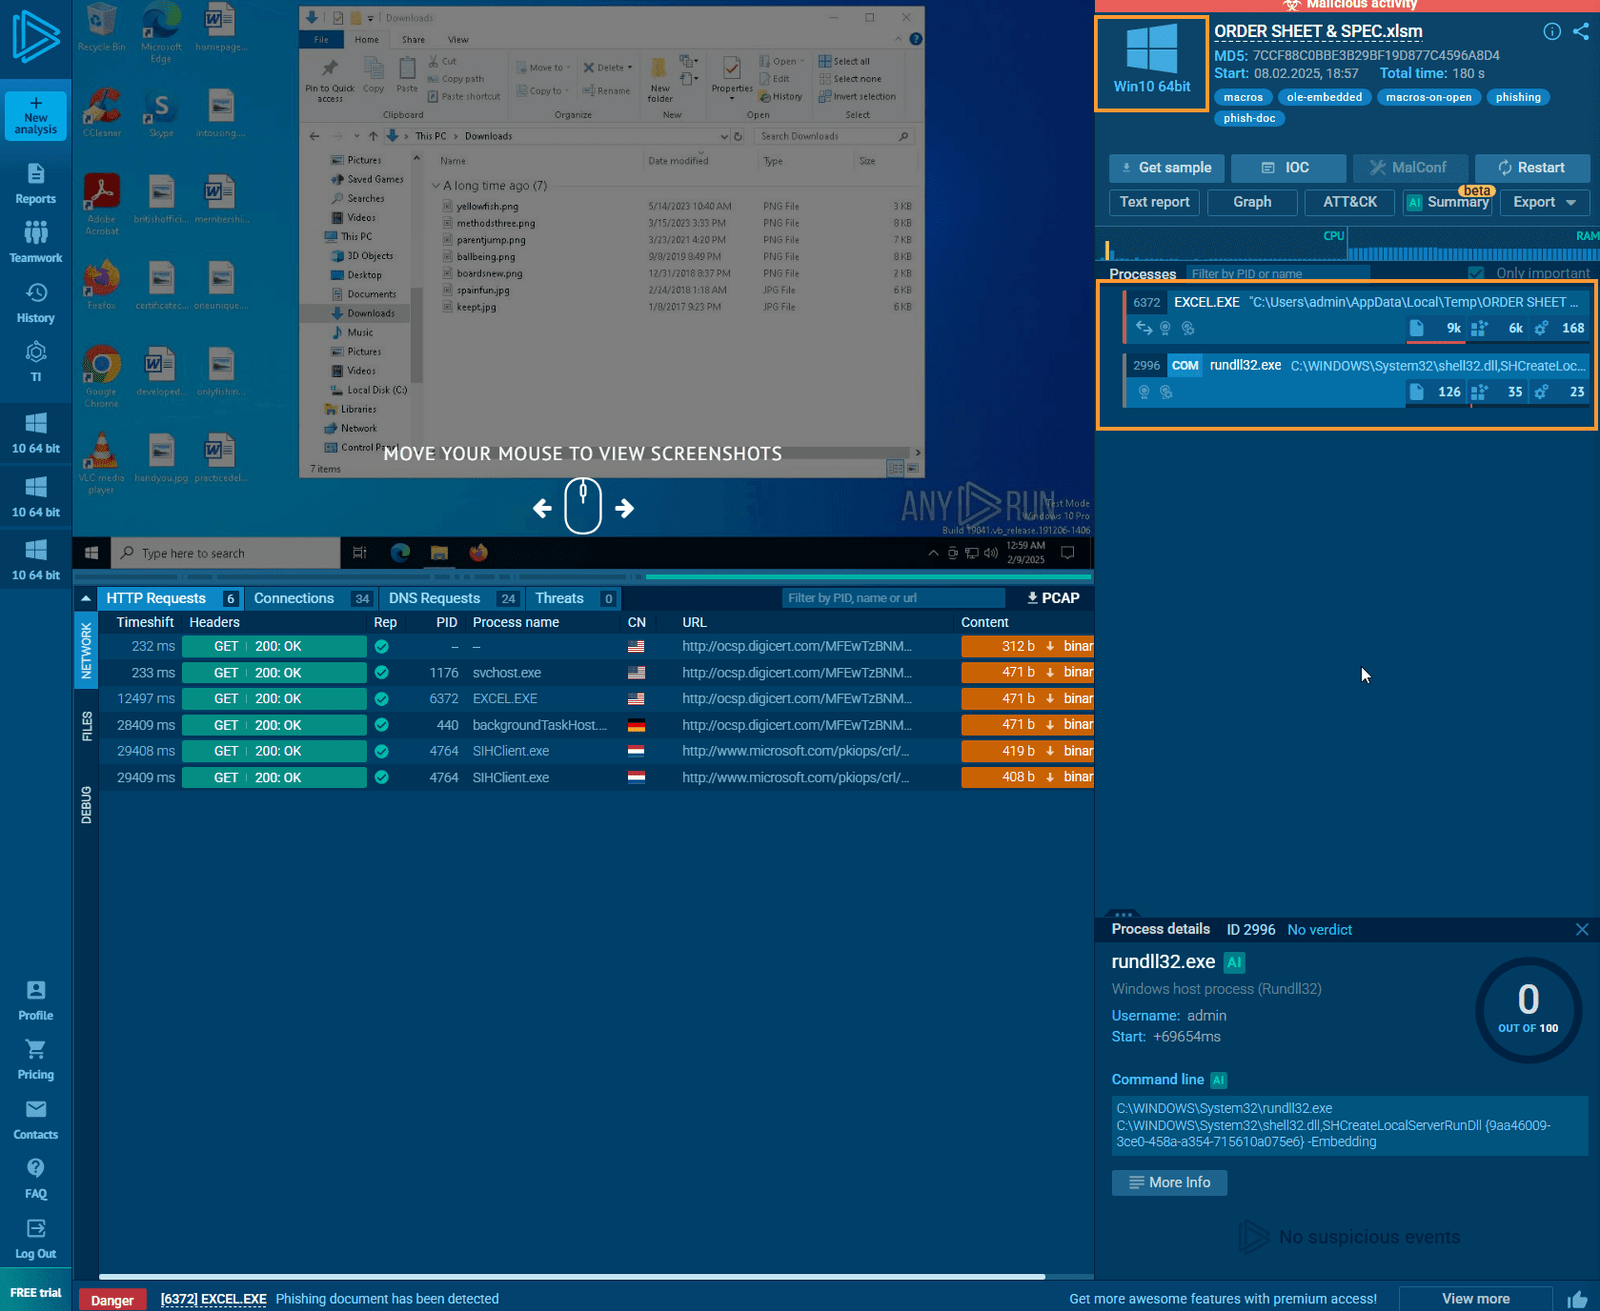
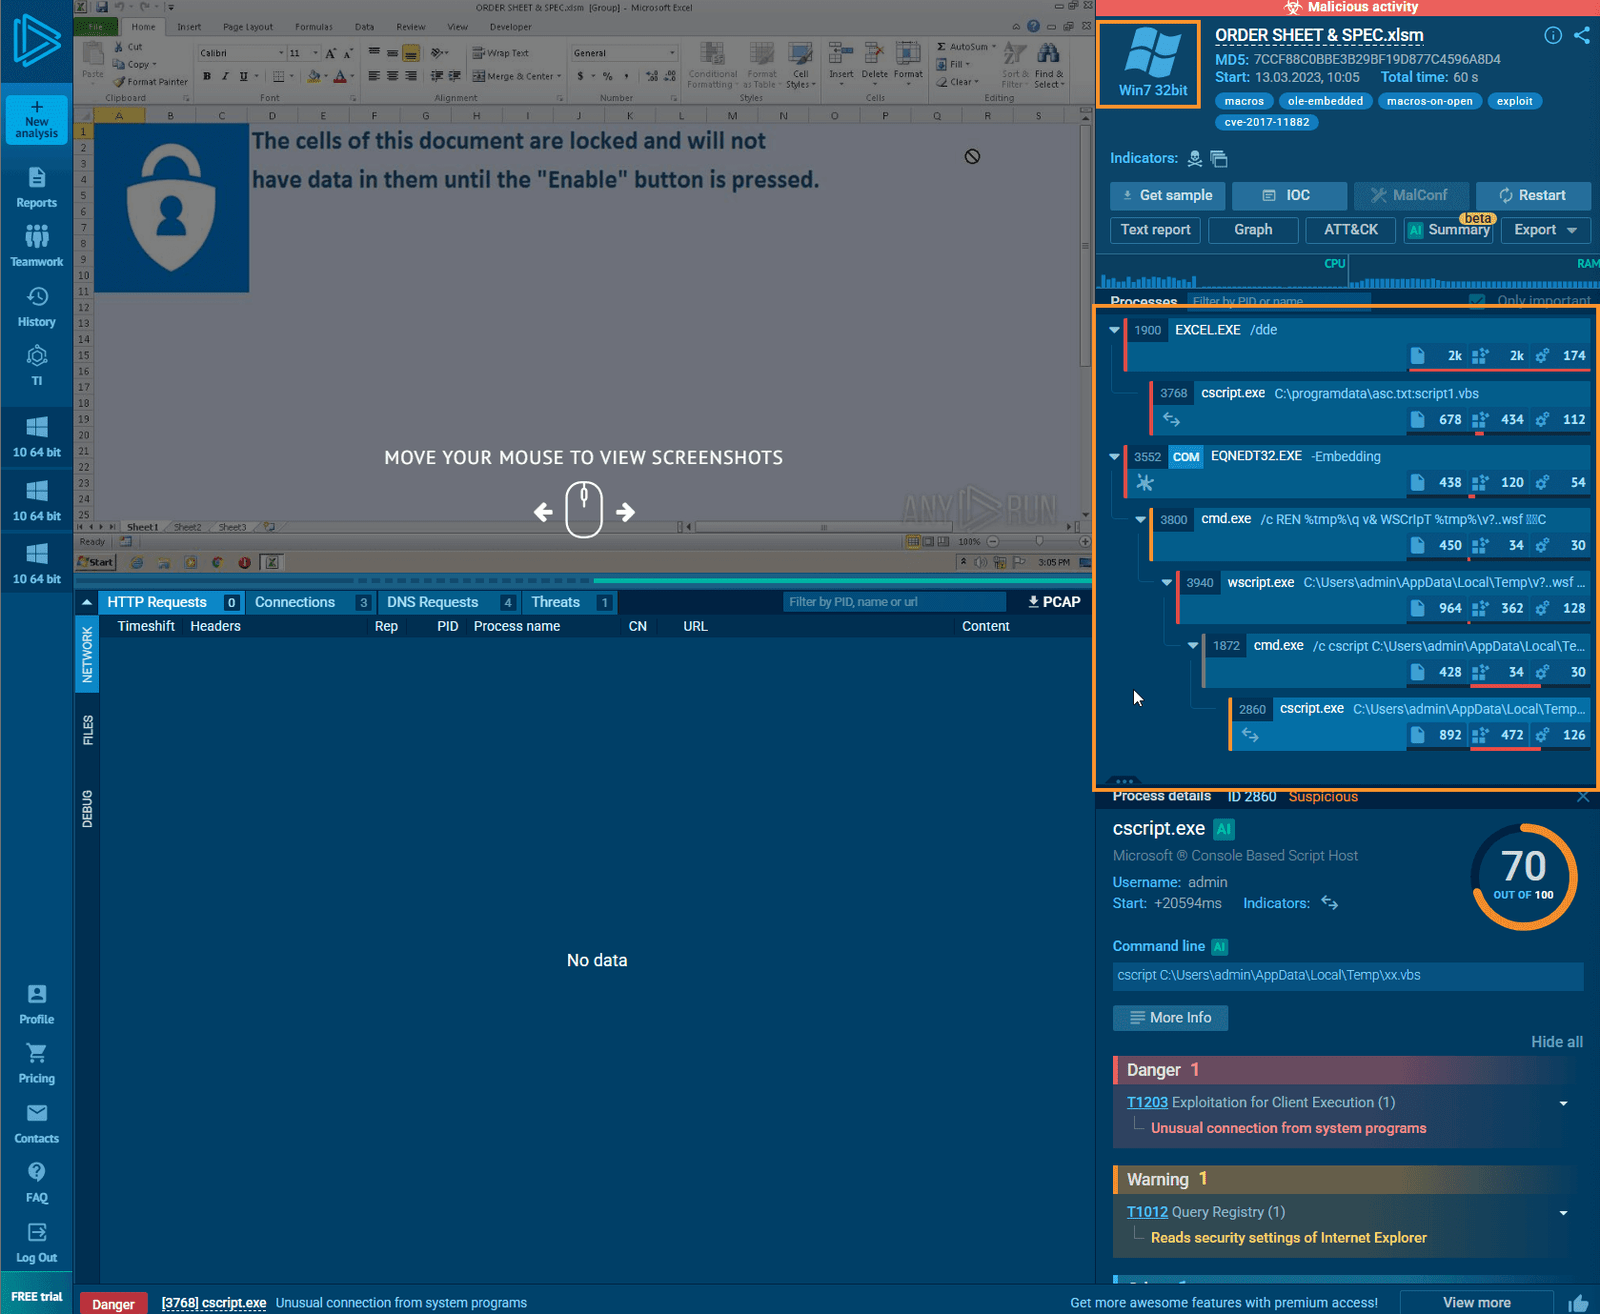
Review AnyRun Reports
After reviewing the reports from multiple Windows 10 machines with associated attack categories, and a Windows 7 machine, it becomes clearer that this is indeed suspicious outgoing internet traffic.

Return to Case Management
Return to the case management tab, select the first option, and click on “Next.”

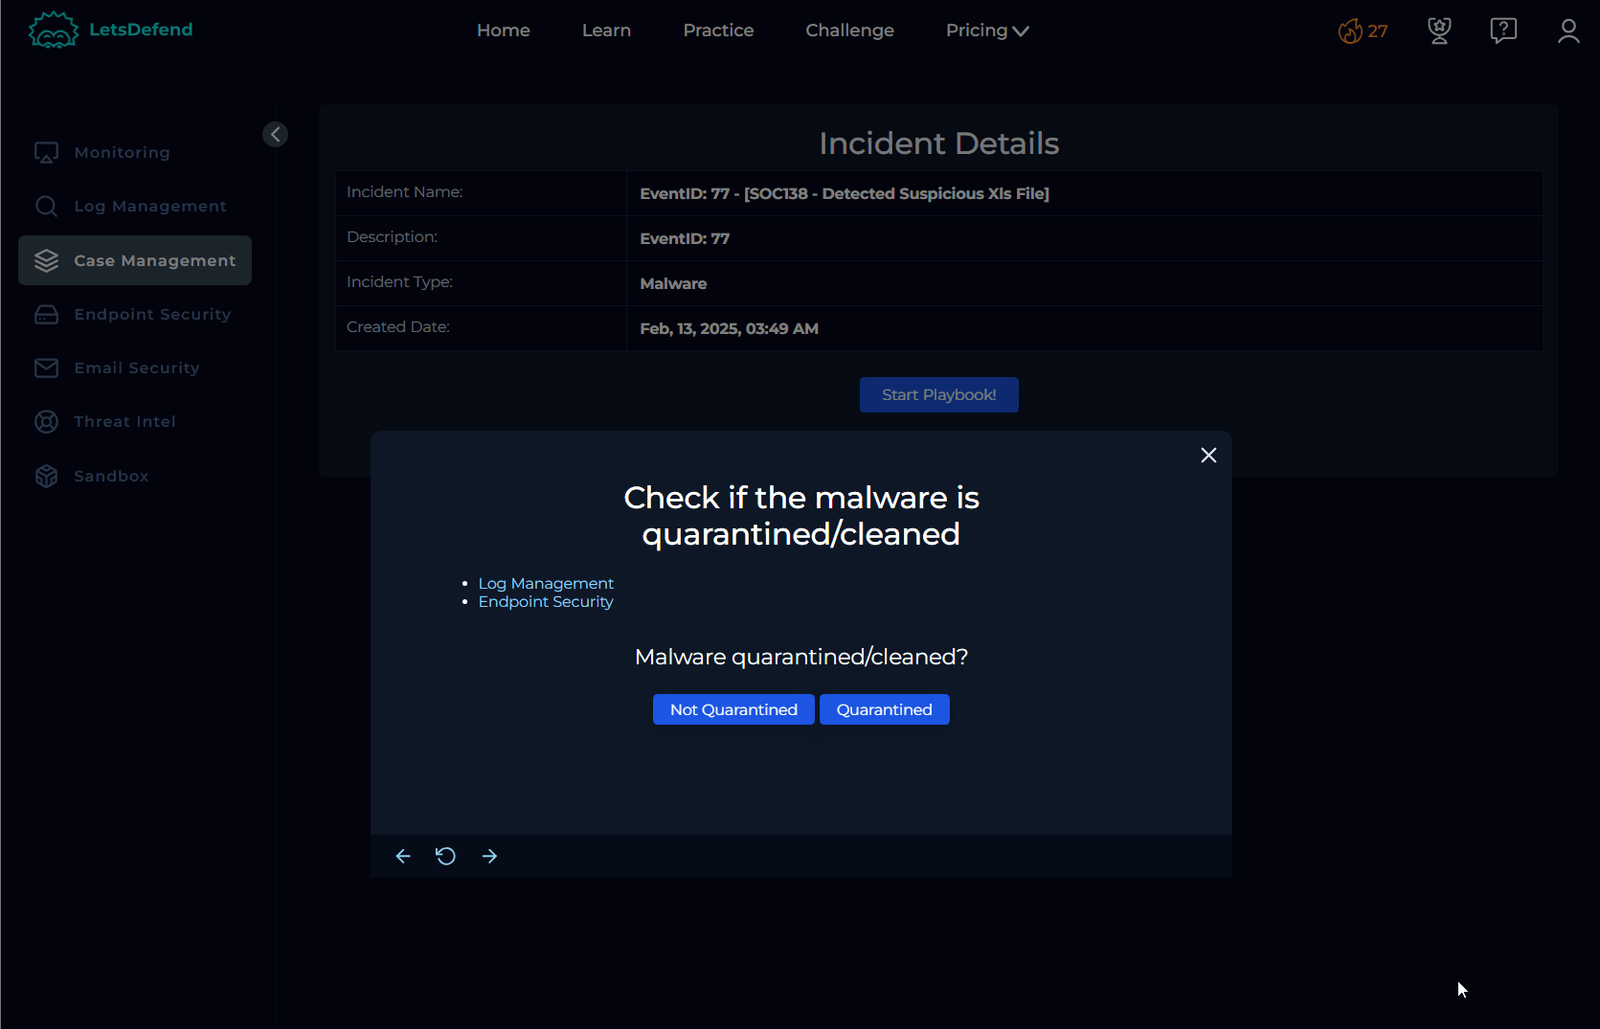
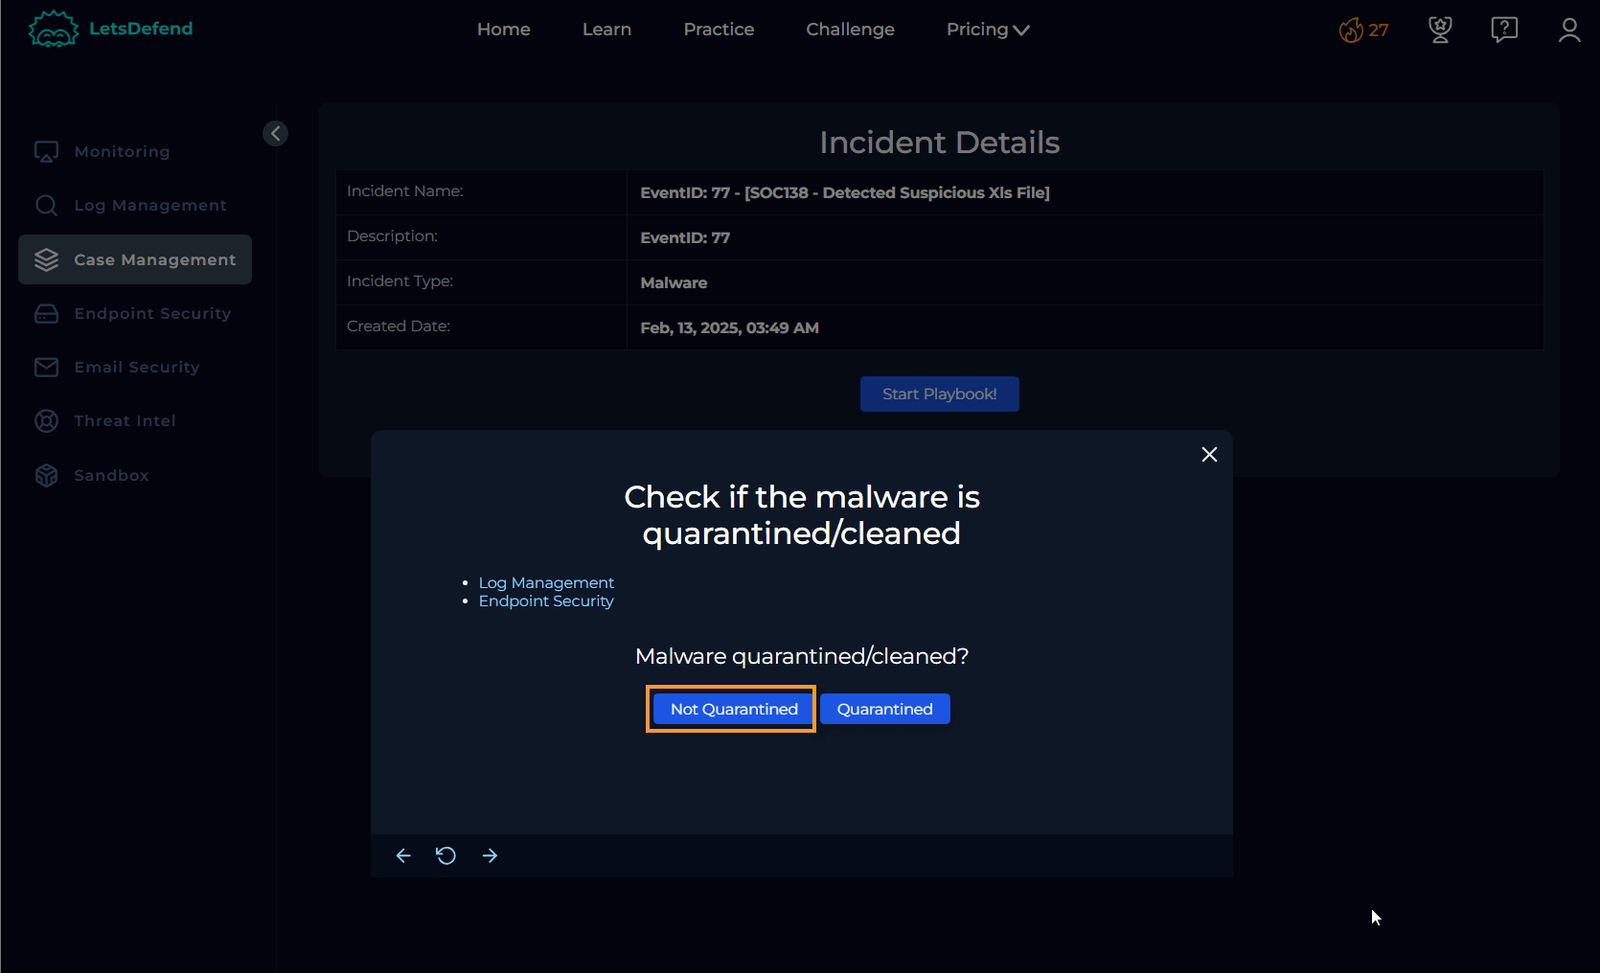
Now we need to verify whether the malware has been cleaned or quarantined. Check both “Log Management” and “Endpoint Security.”
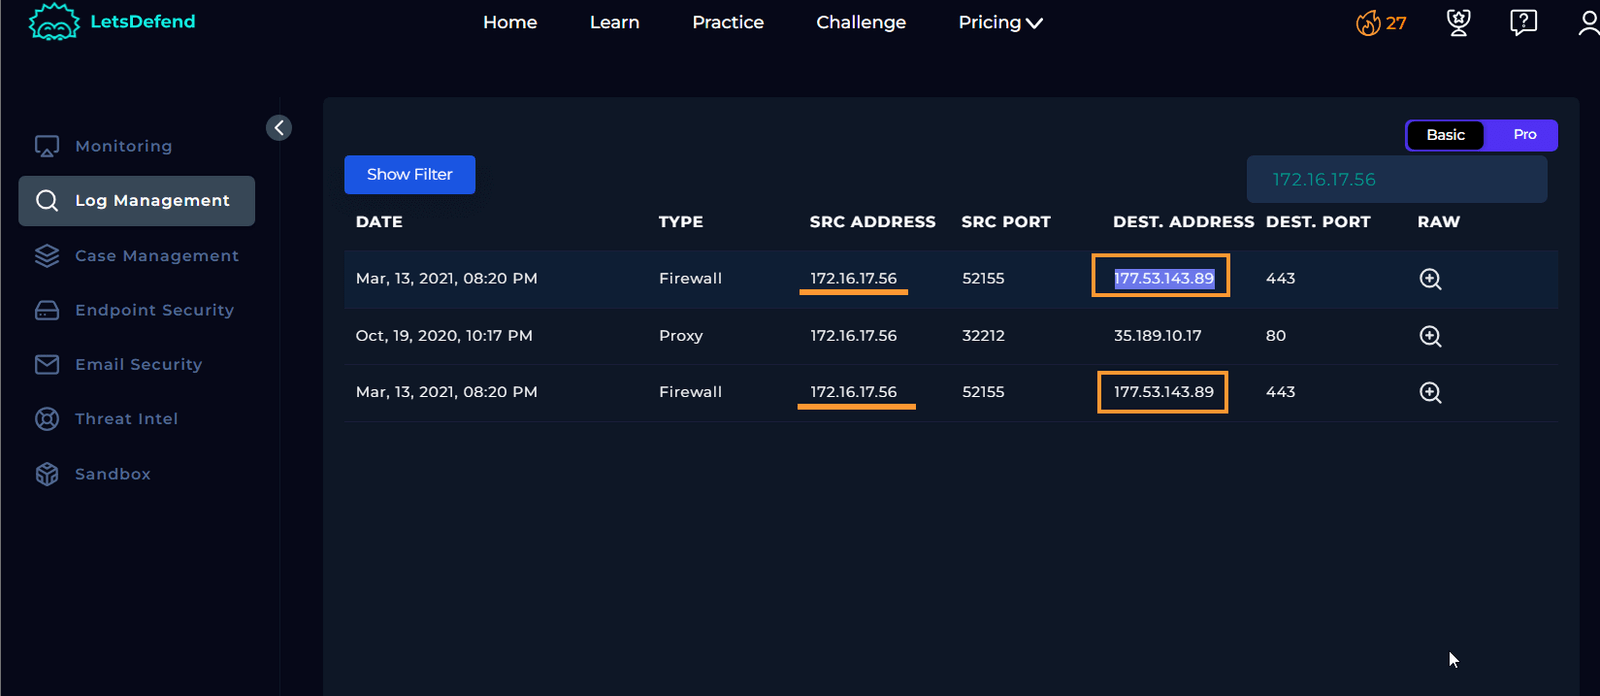
Review Log Management Data
After applying Sofia’s IP address in the filter box and reviewing the raw data, it doesn’t provide much insight. Next, let’s check the endpoint data.

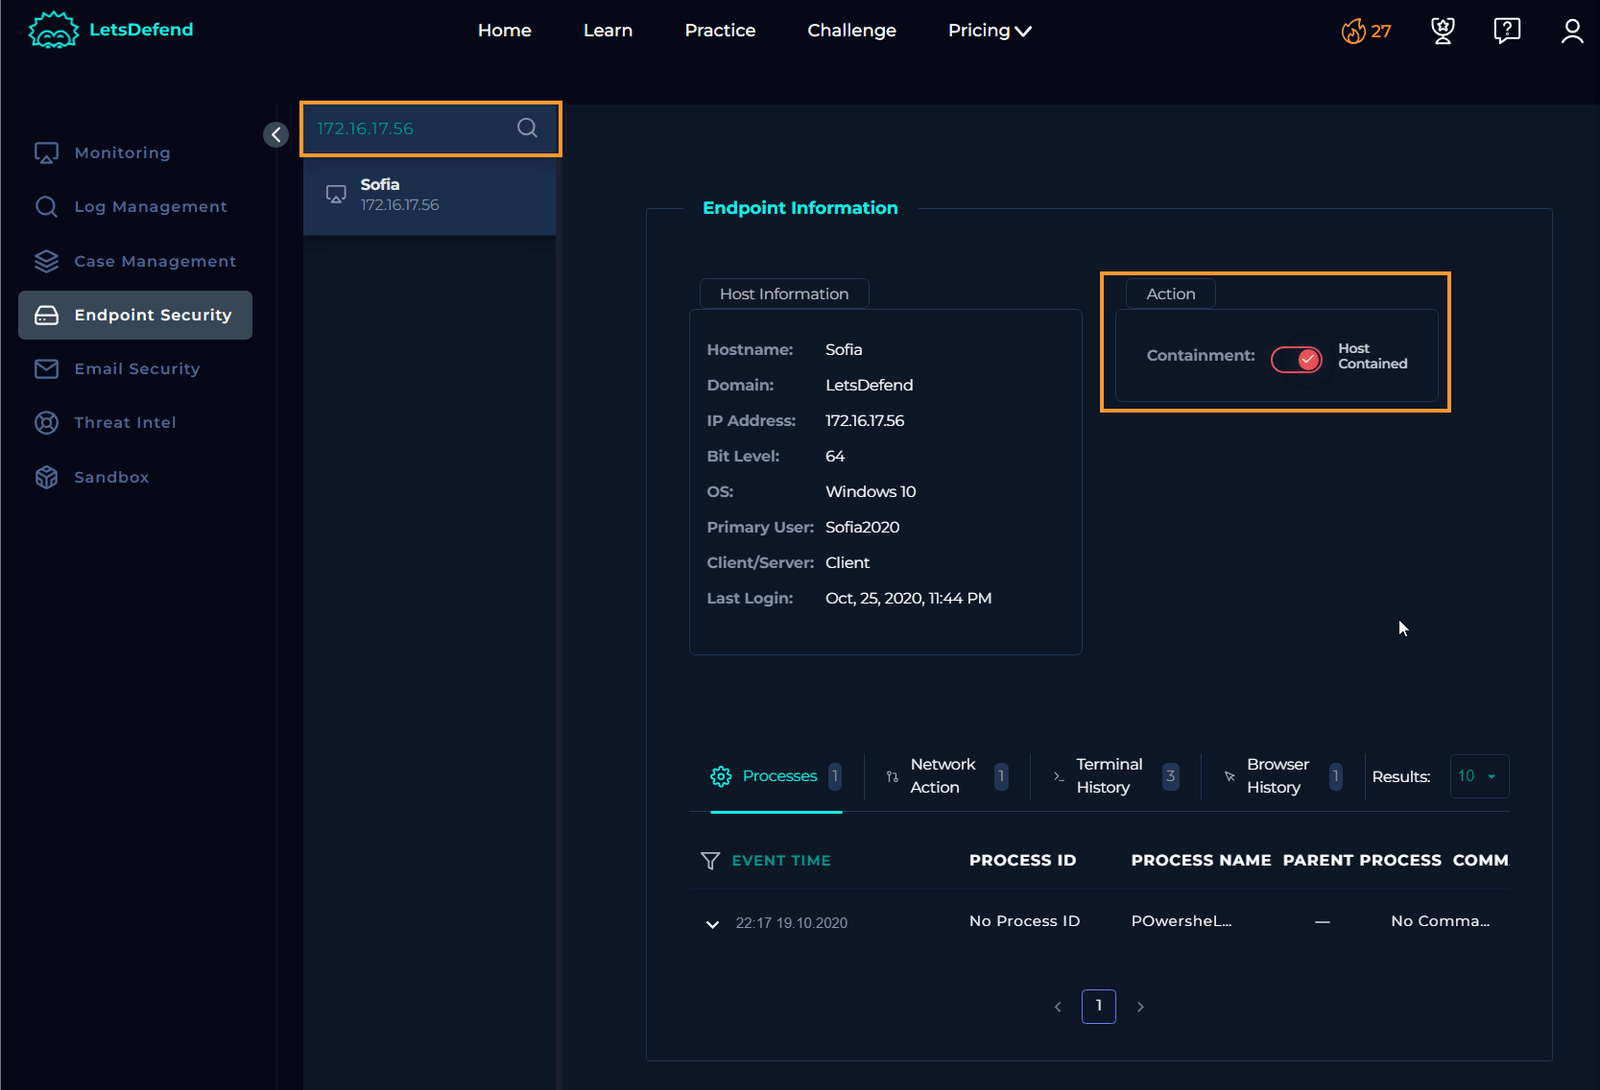
Review Endpoint Security
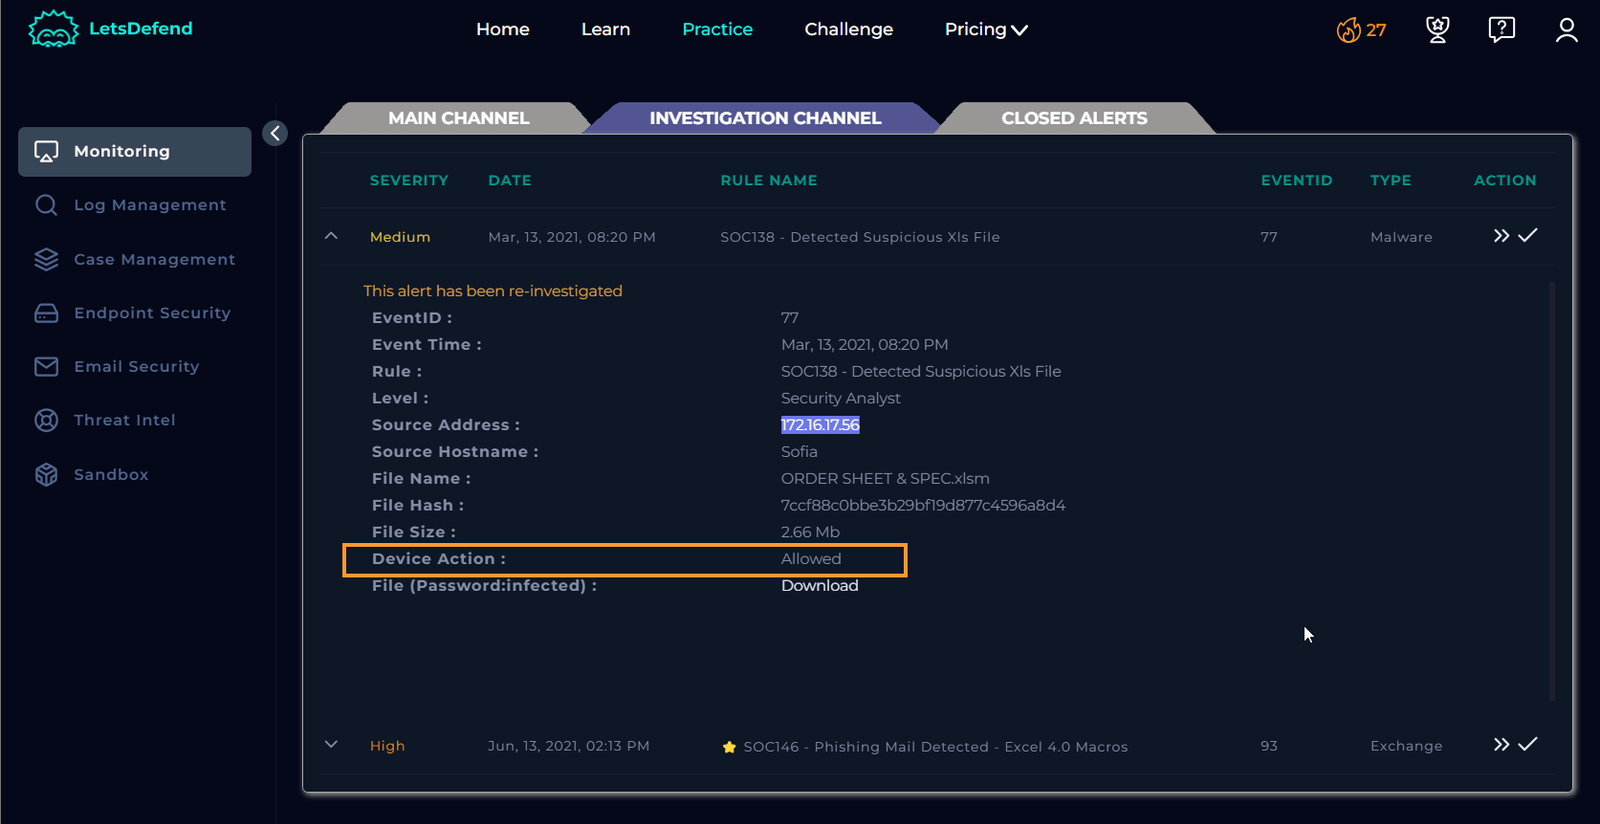
Searching for Sofia’s IP address in the endpoint security data shows her machine isn’t in containment, and the details don’t align with the case.
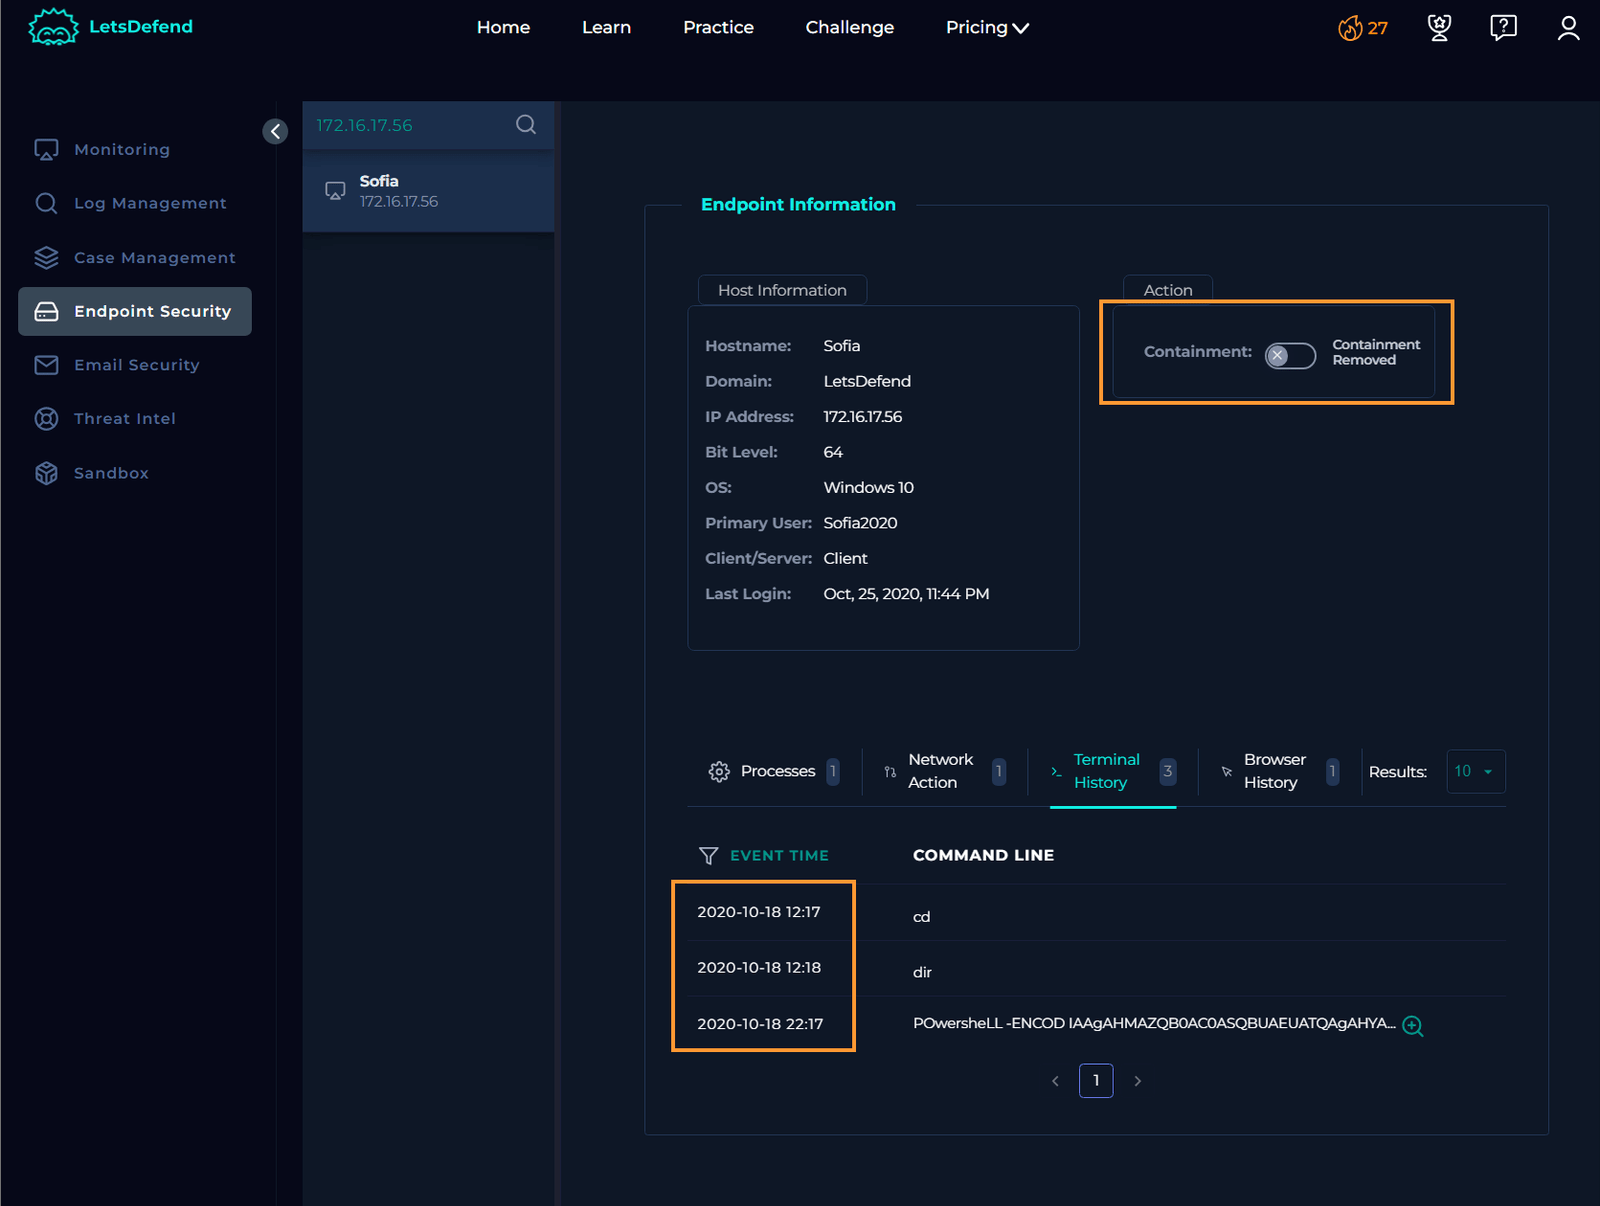
However, I noticed that the device action is set to “Allowed,” indicating that the malware was executed.
Confirm the Malware Status
Given the execution of the malware and the device action being set to “Allowed,” we can conclude that the malware was neither quarantined nor cleaned.
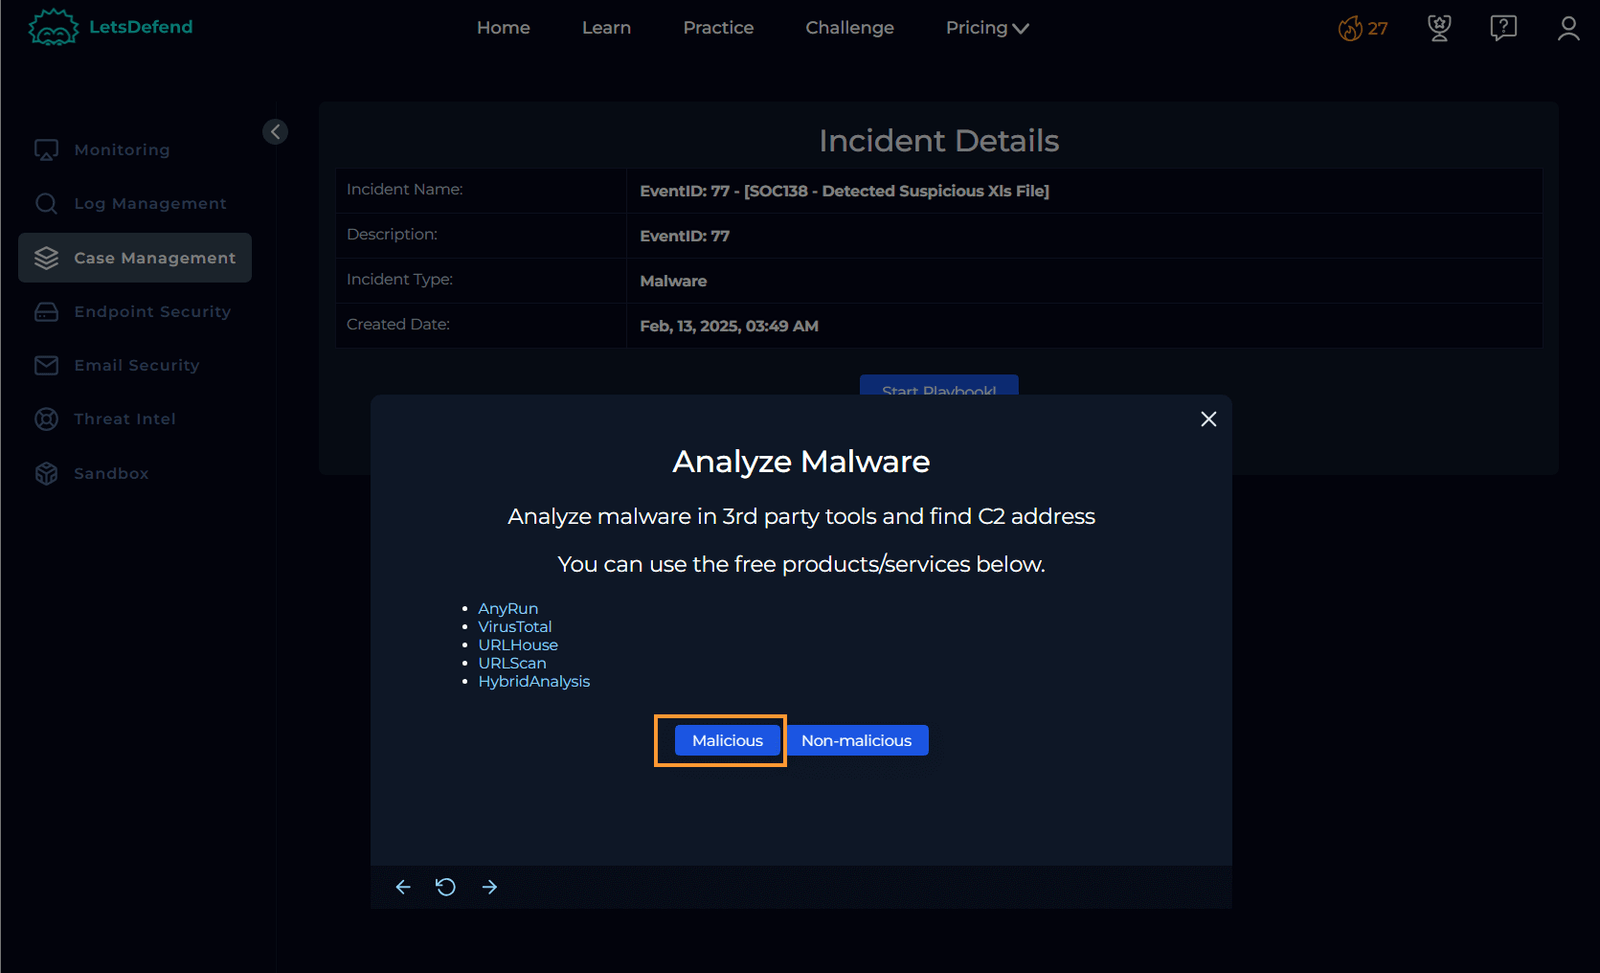
Proceed with Malware Analysis
The playbook instructs us to analyze the malware. Based on the training from Let’sDefend, my instinct is to begin the analysis immediately. However, let’s continue to follow the playbook and check the other three websites listed. We’ve already checked AnyRun and VirusTotal.
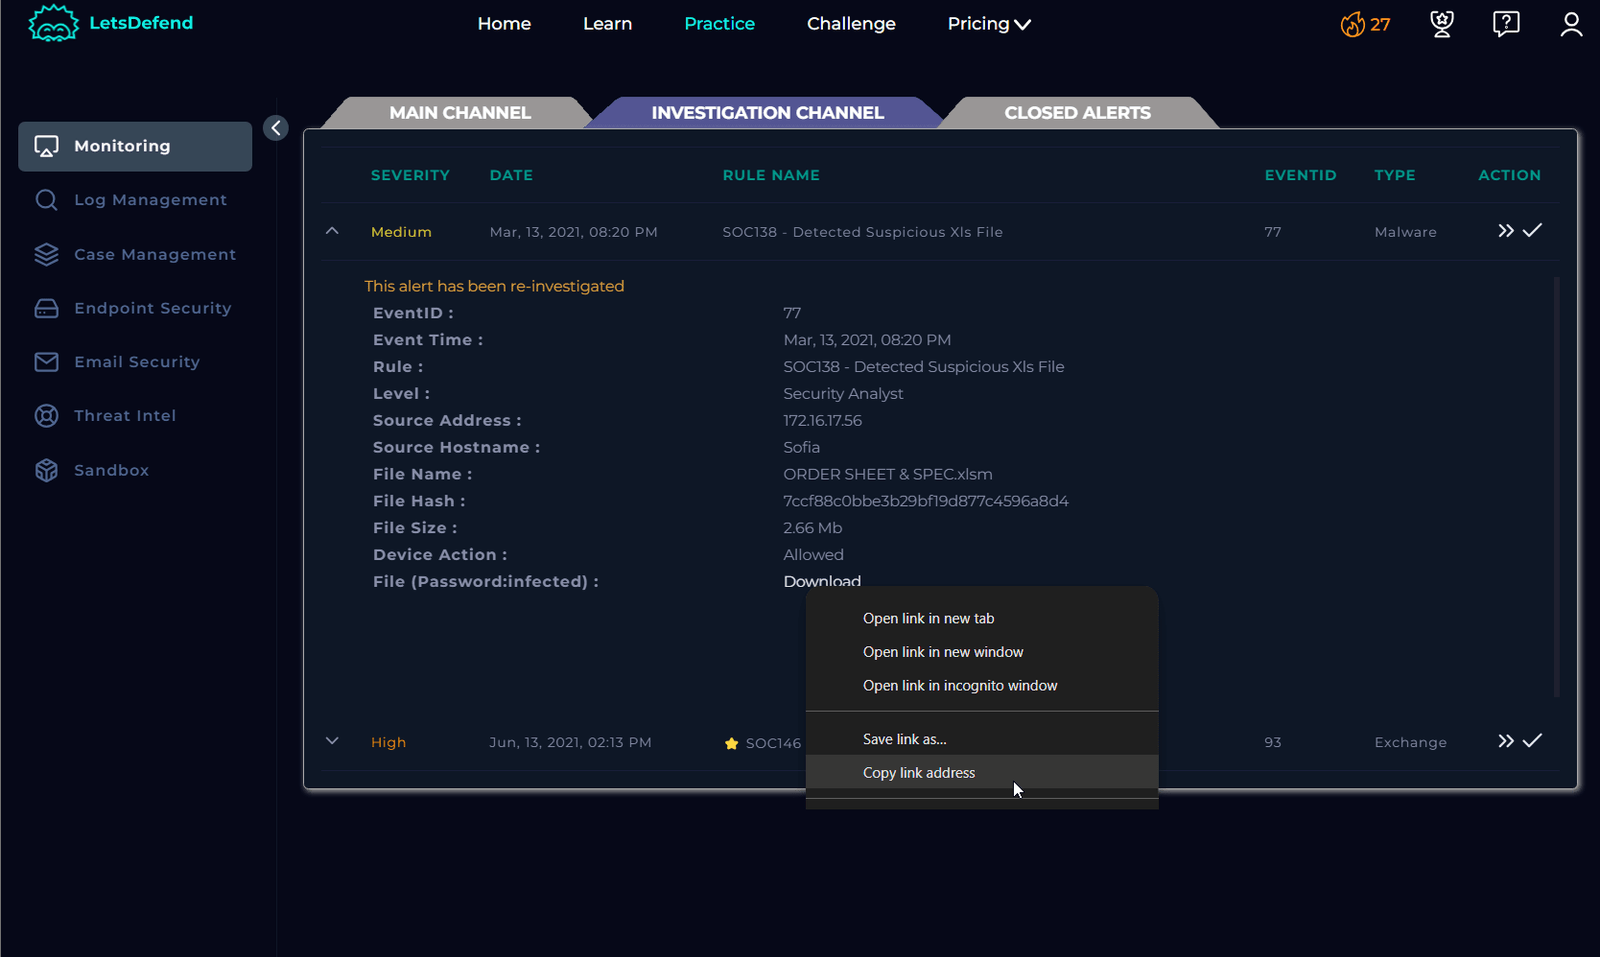
Important Warning: Do not click directly on the file. When these analysis sites request the file’s address, hover over the downloadable file, right-click, and select “Copy Link Address.”

Analyze Using URLScan and Hybrid Analysis
URLScan and Hybrid Analysis provide additional insights, although Hybrid Analysis yielded limited information. URLHouse, however, was not helpful in this case. On the other hand, URLScan provided two IP addresses that we can further investigate.


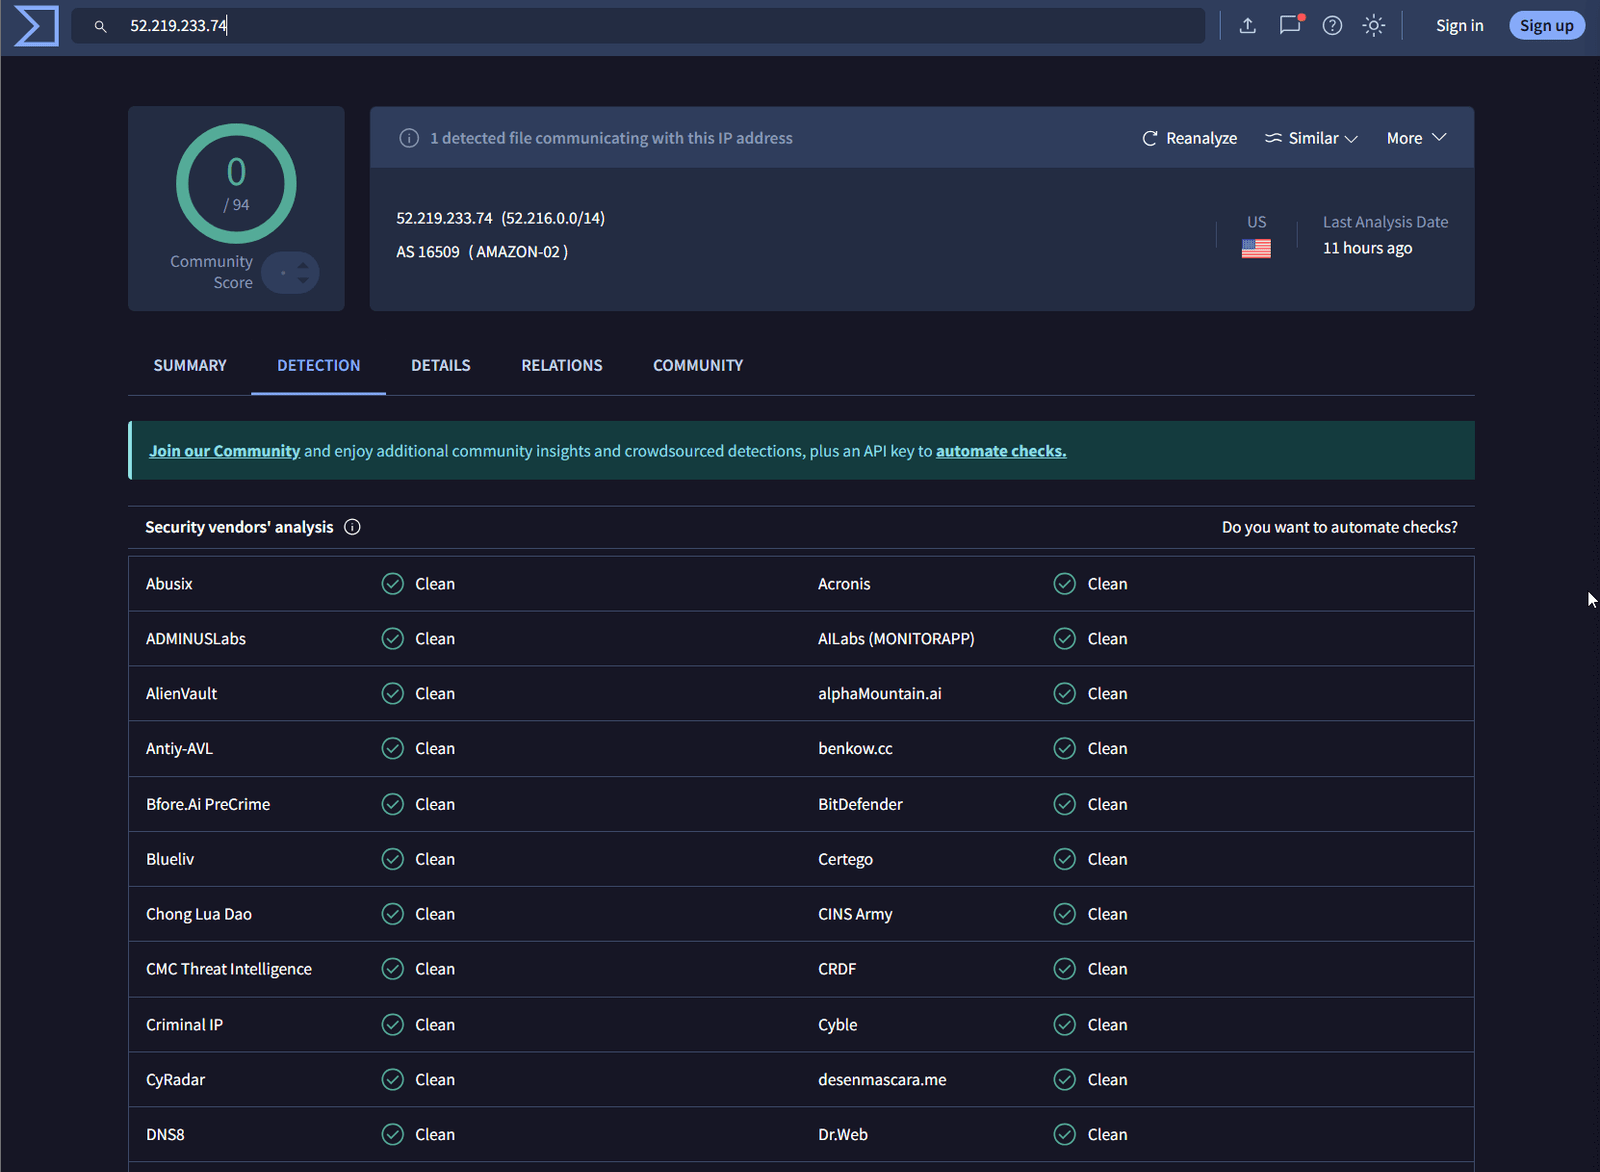
Investigate the IP Addresses
I took the first IP address (52.219.233.74) and found no results on VirusTotal. I’ll now take the second IP address to check for any information.
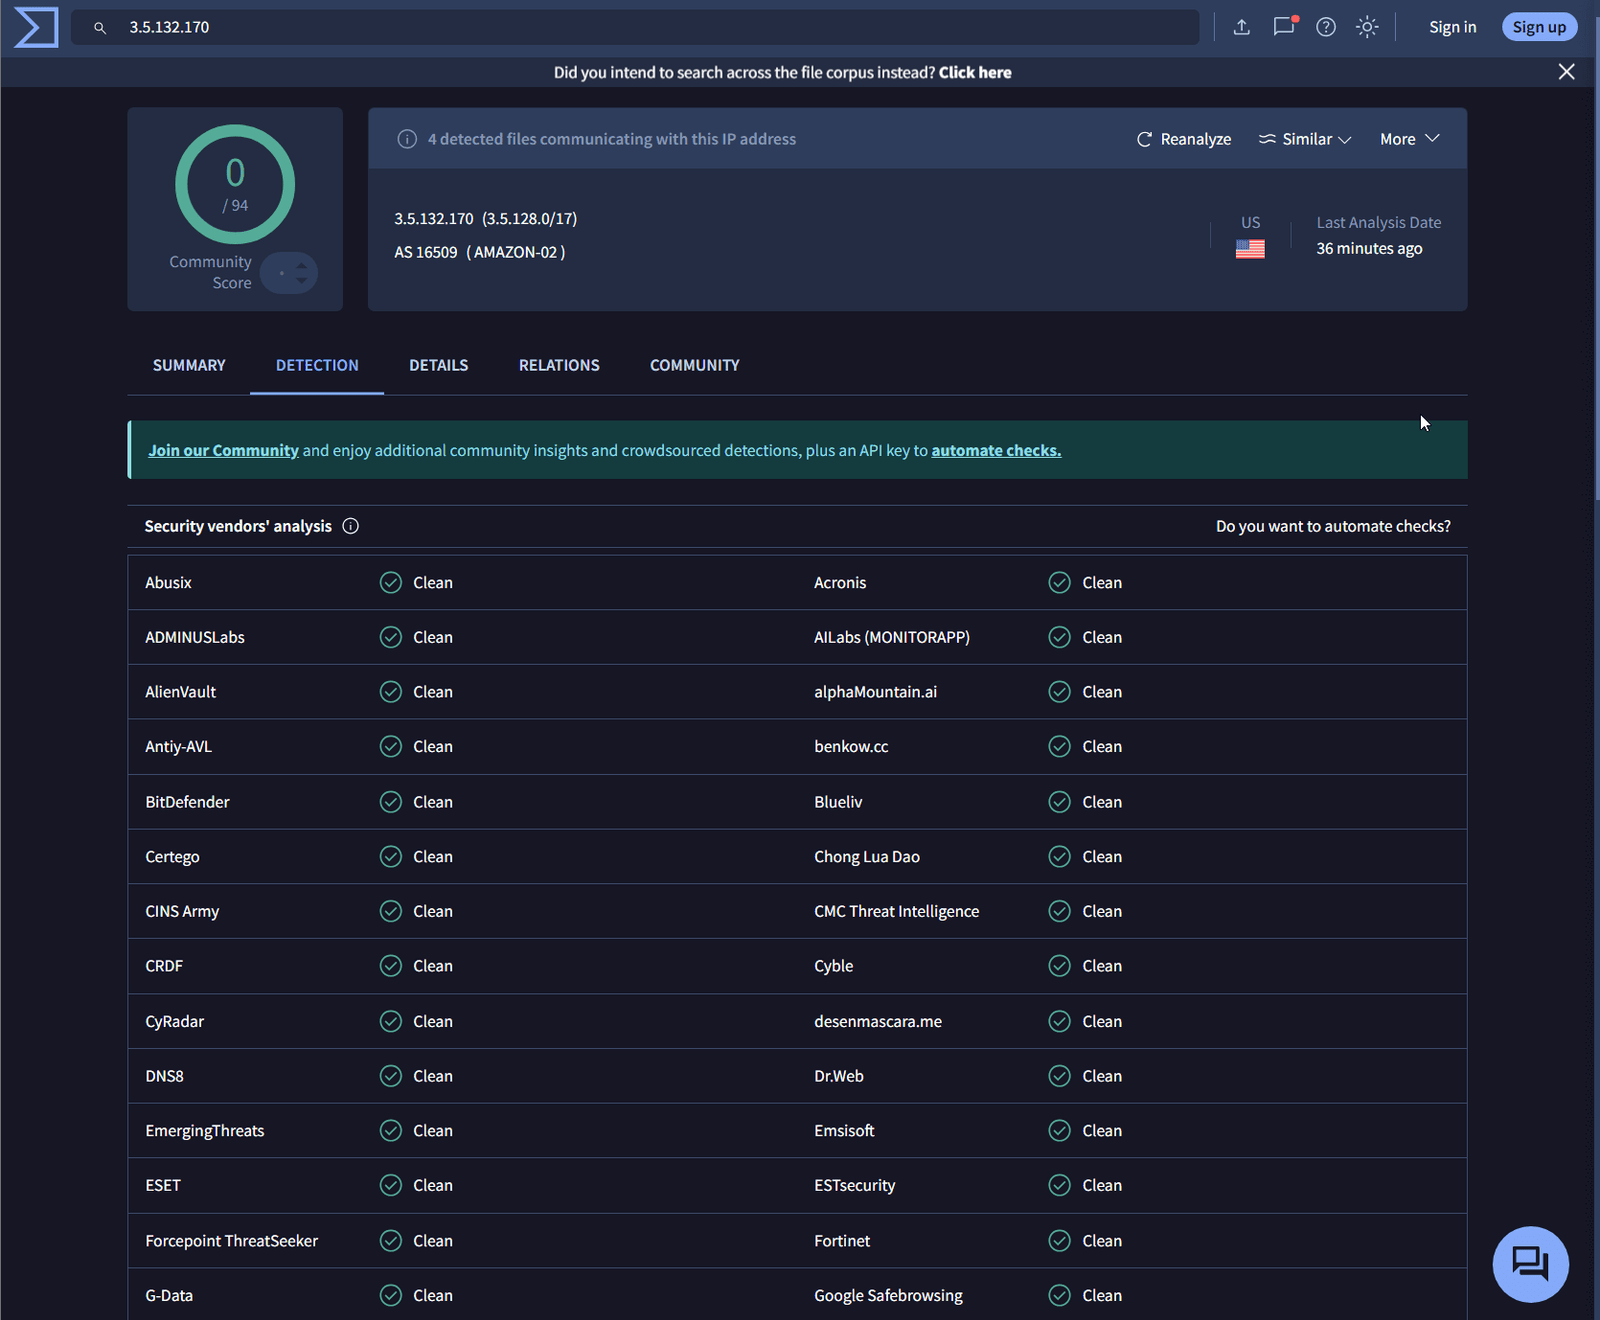
Analyze the Second IP Address
Unfortunately, the second IP address didn’t yield any results either. Let’s return to the original VirusTotal hash, which has a community score of 46, and continue cross-referencing this with AnyRun.
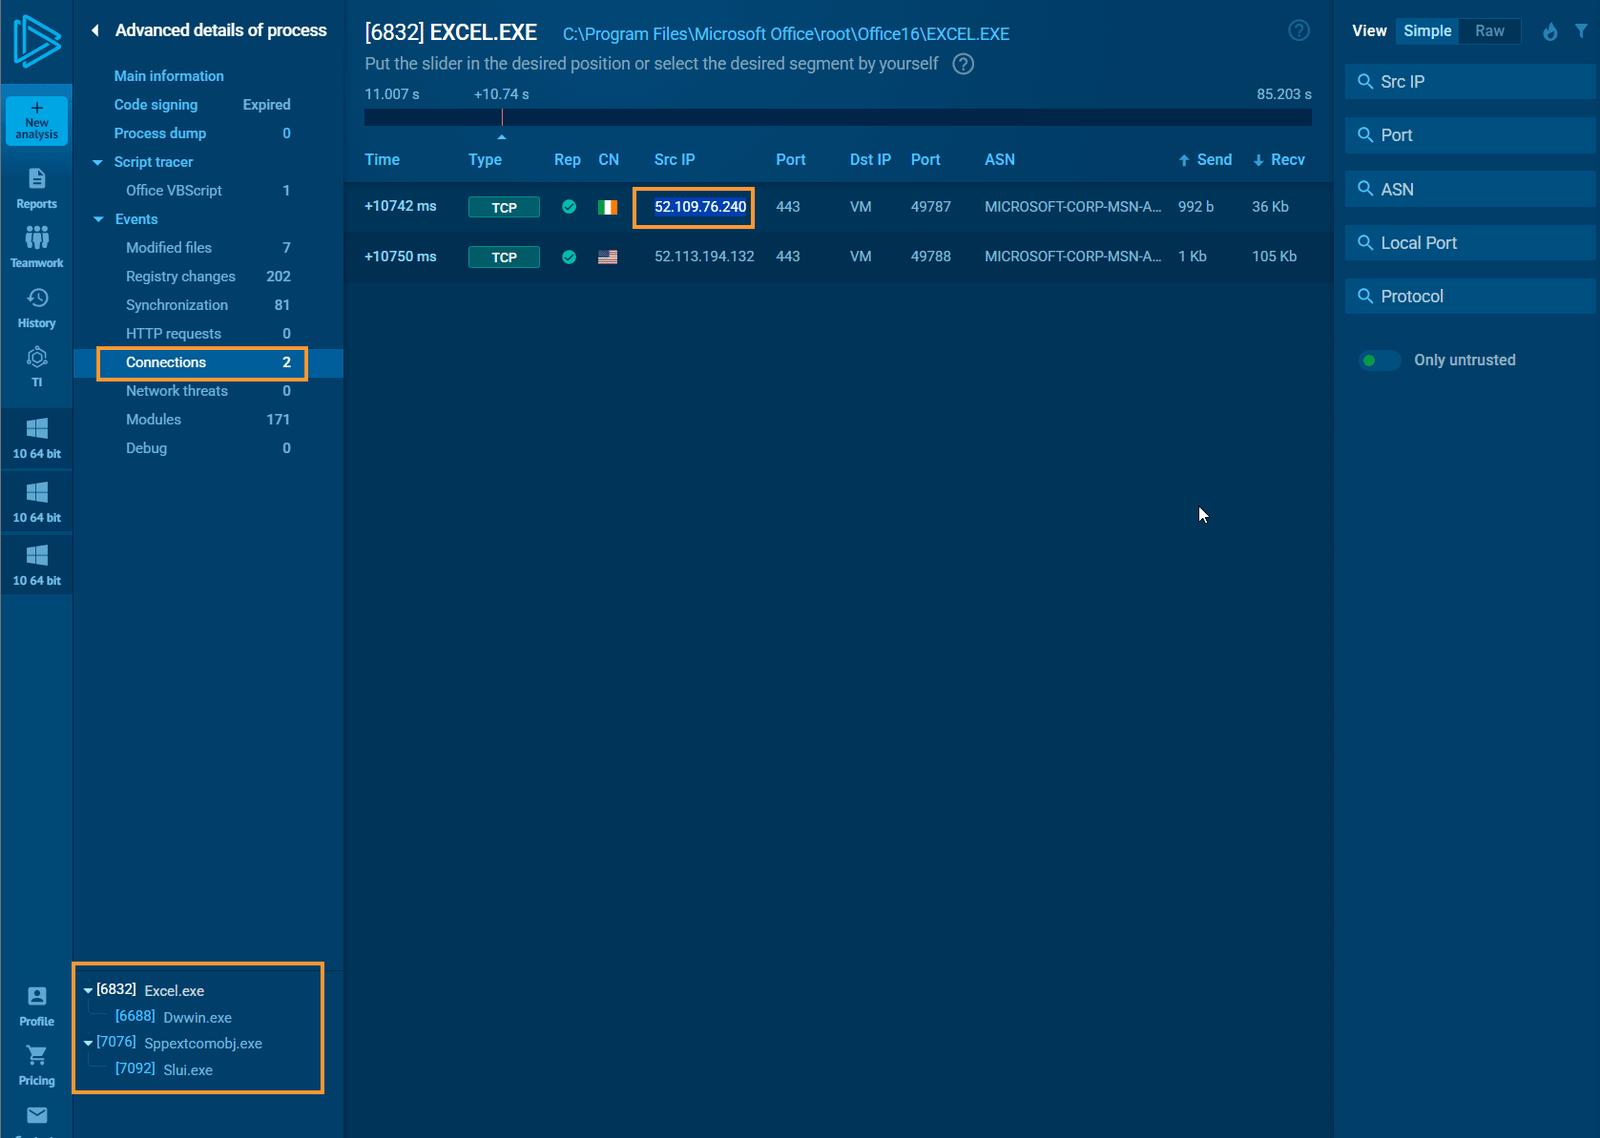
Back and Forth Analysis
As you can see, this is a lot of back-and-forth, but we’re gathering a wealth of information that is crucial for the investigation. Be sure to document everything. Examine modified files, network connections, and child processes for further insights.


Determine if the File is Malicious
Based on our analysis, we can confidently say that the file is malicious, a conclusion we reached early on with the file hash but will be reinforced by the additional artifacts collected.
Check for C2 Communication
The next step asks us to determine whether someone has requested the C2.

We’ve already found that Sofia’s IP address (172.16.17.56) accessed the C2 at 177.53.143.89.

C2 at 177.53.143.89.

Contain Sofia’s Machine
Now, return to endpoint security to place Sofia’s machine under containment.
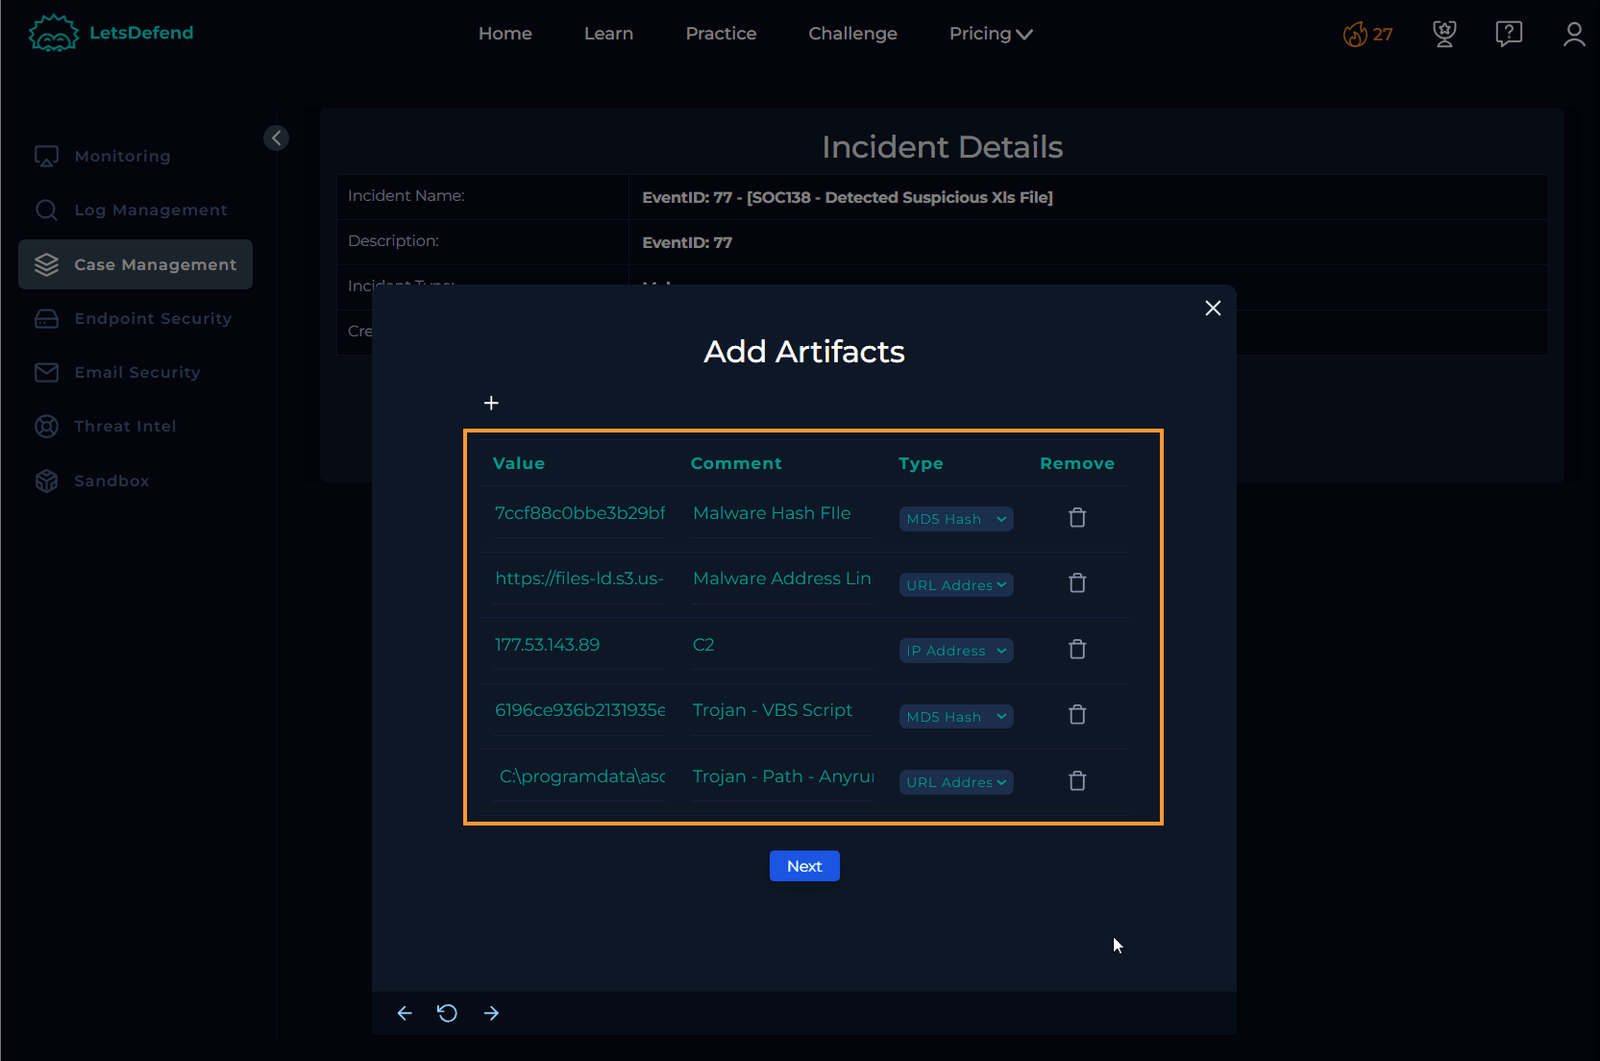
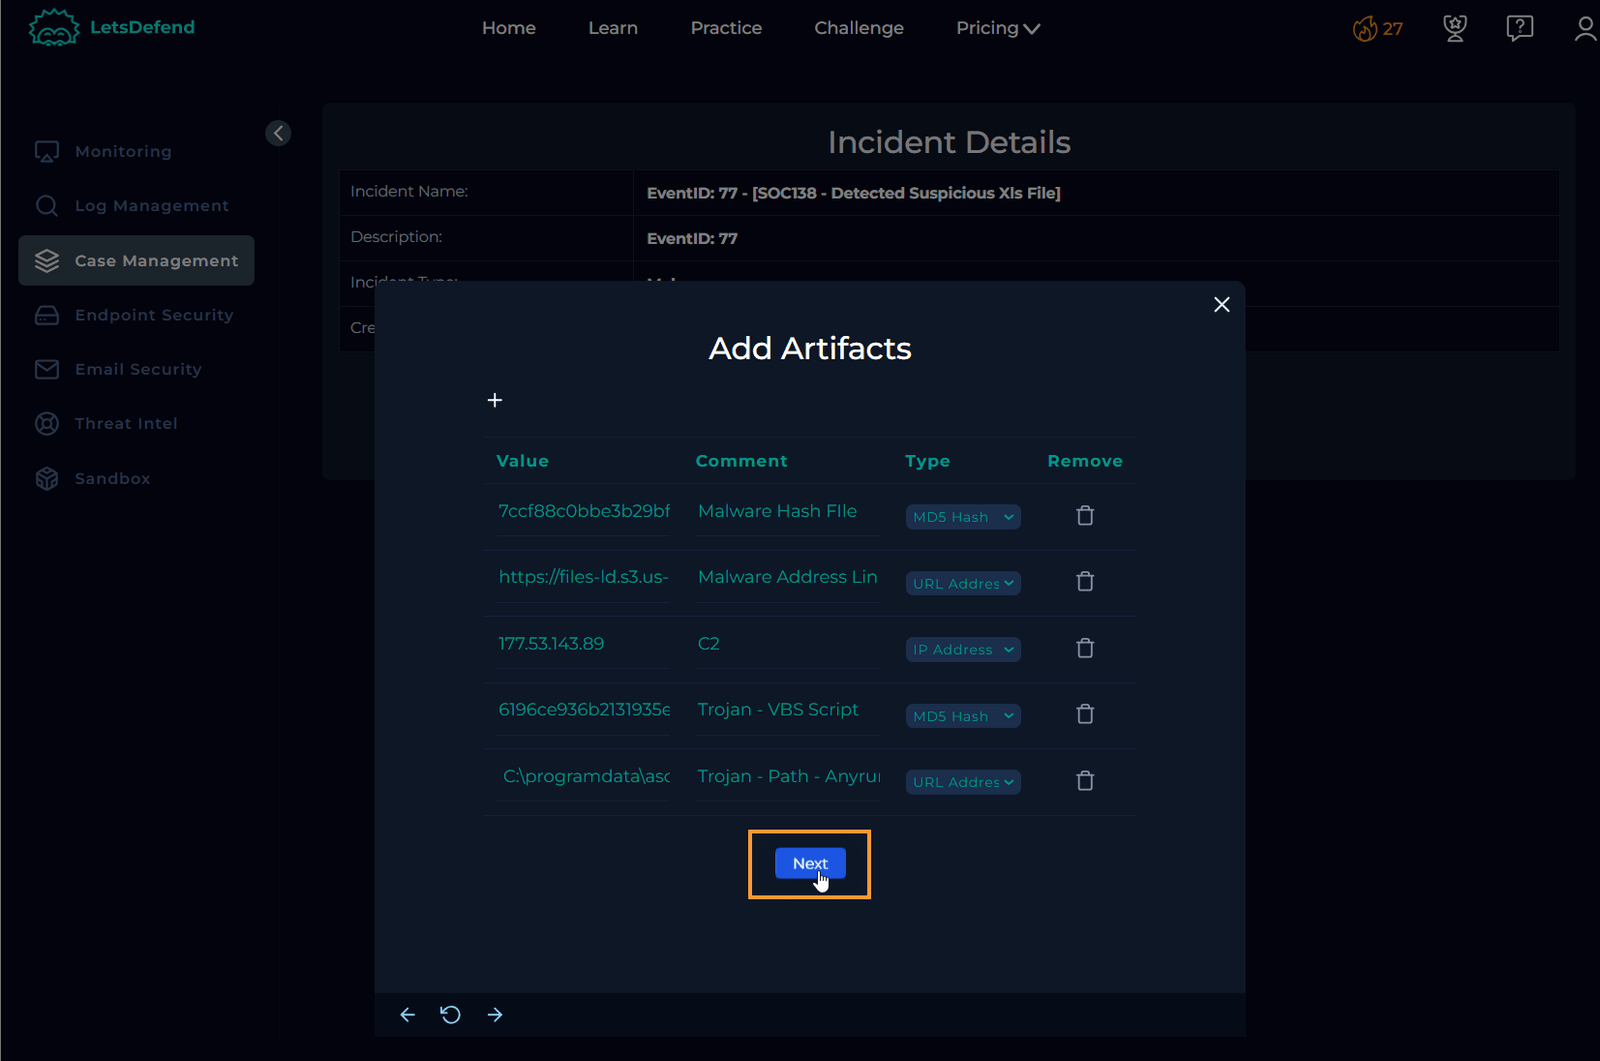
Add Collected Artifacts
Add all the artifacts you’ve found to the case file. Feel free to add more, but with the artifacts already collected, anyone reviewing this case should be able to easily identify the key indicators for deeper analysis.
Document Analyst Notes
Write detailed analyst notes to ensure the next person knows exactly what to look for to act swiftly on the case.

Confirm and Continue
After adding your notes, click “Confirm” and then “Continue.” You will be redirected to the investigation channel. If not, navigate to the channel and proceed to close the case.


Final Step
To wrap up, I’ll keep this last step short: by following these detailed steps, you should have successfully investigated the case.
Congratulations!

Conclusion
By following the steps outlined in this walkthrough, you’ve learned how to methodically investigate a suspicious file, analyze key artifacts, and determine the nature of a potential threat. Effective case management, thorough analysis, and proper documentation are essential for maintaining security and ensuring a smooth handoff to subsequent analysts.
Remember, cybersecurity investigations are often iterative, requiring attention to detail and persistence. The skills you’ve applied here are critical in identifying and mitigating risks, and with practice, you’ll continue to sharpen your investigative abilities.
Thank you for following along, and I hope this guide has provided valuable insights into the investigative process. Stay vigilant, and keep honing your skills to stay ahead in the ever-evolving world of cybersecurity.


Leave a Reply