

Project Type: Windows Server | Multi-Site AD | DFS Replication
Skill Level: Intermediate
Lab Platform: Hyper-V + VMware + pfSense + Windows Server 2022
Why I Built This
Day 9 of my 10-day hands-on IT lab series focuses on multi-site Active Directory (AD) and DFS replication in a hybrid environment. This lab involved setting up pfSense for routing between multiple sites, configuring Active Directory Sites and Services for different locations, and ensuring file replication across domain controllers (DCs) using DFS.
By simulating multi-site AD and setting up DFS replication, I now have a robust, distributed environment that ensures high availability and synchronization between the NYC and FL sites. This is crucial for organizations with geographically dispersed data centers that require fault tolerance and data redundancy.
Lab Setup Overview
| Component | Details |
|---|---|
| Hypervisor | Hyper-V (Main Hypervisor) |
| VMware Platform | VMware Workstation Pro |
| Domain Name | wired.com |
| Subnet | 192.168.1.0/24 (NYC), 192.168.2.0/24 (FL) |
| DC IP Address | NYC-DC1: 192.168.1.10, FL-DC1: 192.168.2.10 |
| Client DNS | 192.168.1.10 (NYC-DC1), 192.168.2.10 (FL-DC1) |
| New Clients | NYC-CLI1, FL-CLI1 (Windows 10/11 on VMware) |
| Network Setup | pfSense routing between NYC and FL sites |
Step-by-Step Breakdown
Phase 1: Initial Network and Firewall Configuration
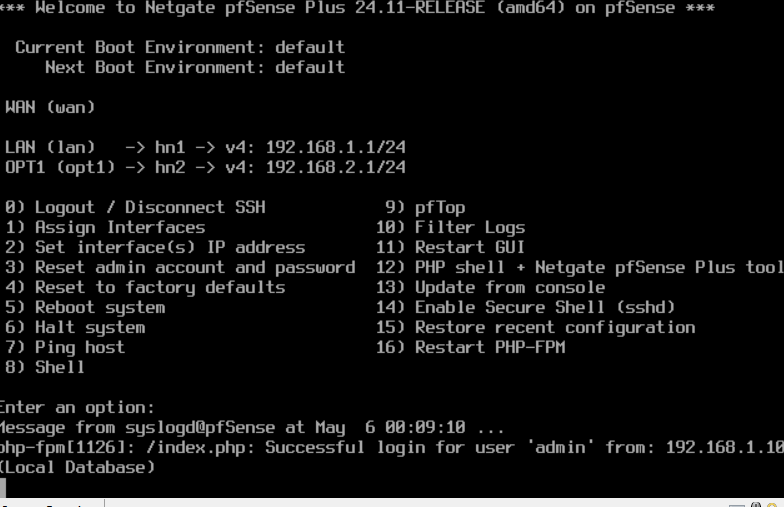
- pfSense Setup:
- Configured three network interfaces:
- LAN: 192.168.1.1/24 (NYC site)
- OPT1: 192.168.2.1/24 (FL site)
- Firewall Rules:
- Allowed all traffic from OPT1 (FL subnet) to ANY.
- Enabled manual outbound NAT for both subnets (192.168.1.0/24 and 192.168.2.0/24) for internet access.
- Static IP Configuration:
- Set static IPs on both servers:
- NYC-DC1: 192.168.1.10
- FL-DC1: 192.168.2.10
- Set static IPs on both servers:
- DNS Settings:
- Configured DNS settings on both DCs to point to their respective IPs, with loopback as secondary:
- NYC-DC1: 192.168.1.10
- FL-DC1: 192.168.2.10
- Configured DNS settings on both DCs to point to their respective IPs, with loopback as secondary:
Phase 2: Active Directory Site and Subnet Configuration
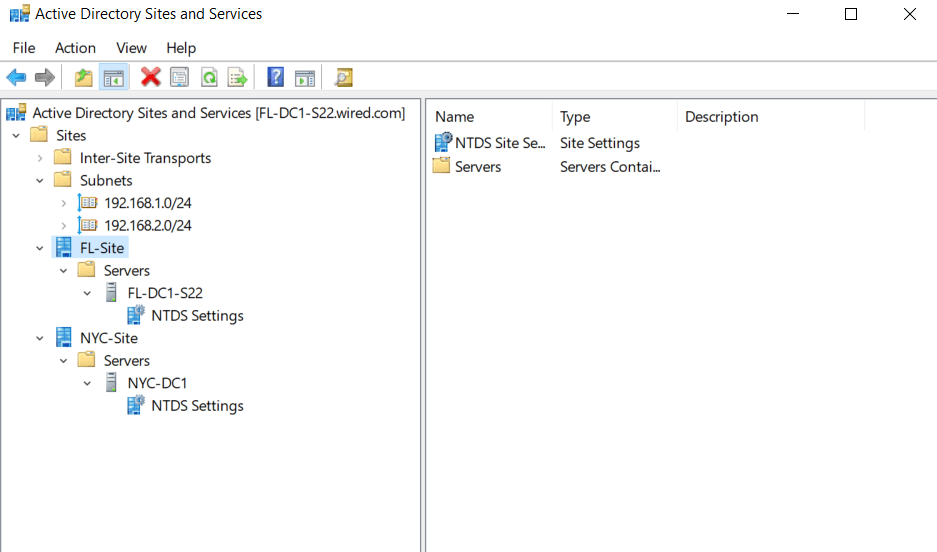
- Create AD Sites:
- Renamed the default site to NYC-Site.
- Created a new site for FL called FL-Site.
- Subnet Association:
- Created subnets in AD Sites and Services:
- 192.168.1.0/24 for NYC-Site
- 192.168.2.0/24 for FL-Site
- Created subnets in AD Sites and Services:
- Move Domain Controllers to Their Sites:
- Moved NYC-DC1 to NYC-Site.
- Moved FL-DC1 to FL-Site.
- Verify Site Links:
- Confirmed the DefaultIPSiteLink between NYC-Site and FL-Site.
- Adjusted cost and replication settings as needed.
Phase 3: DFS Replication Setup
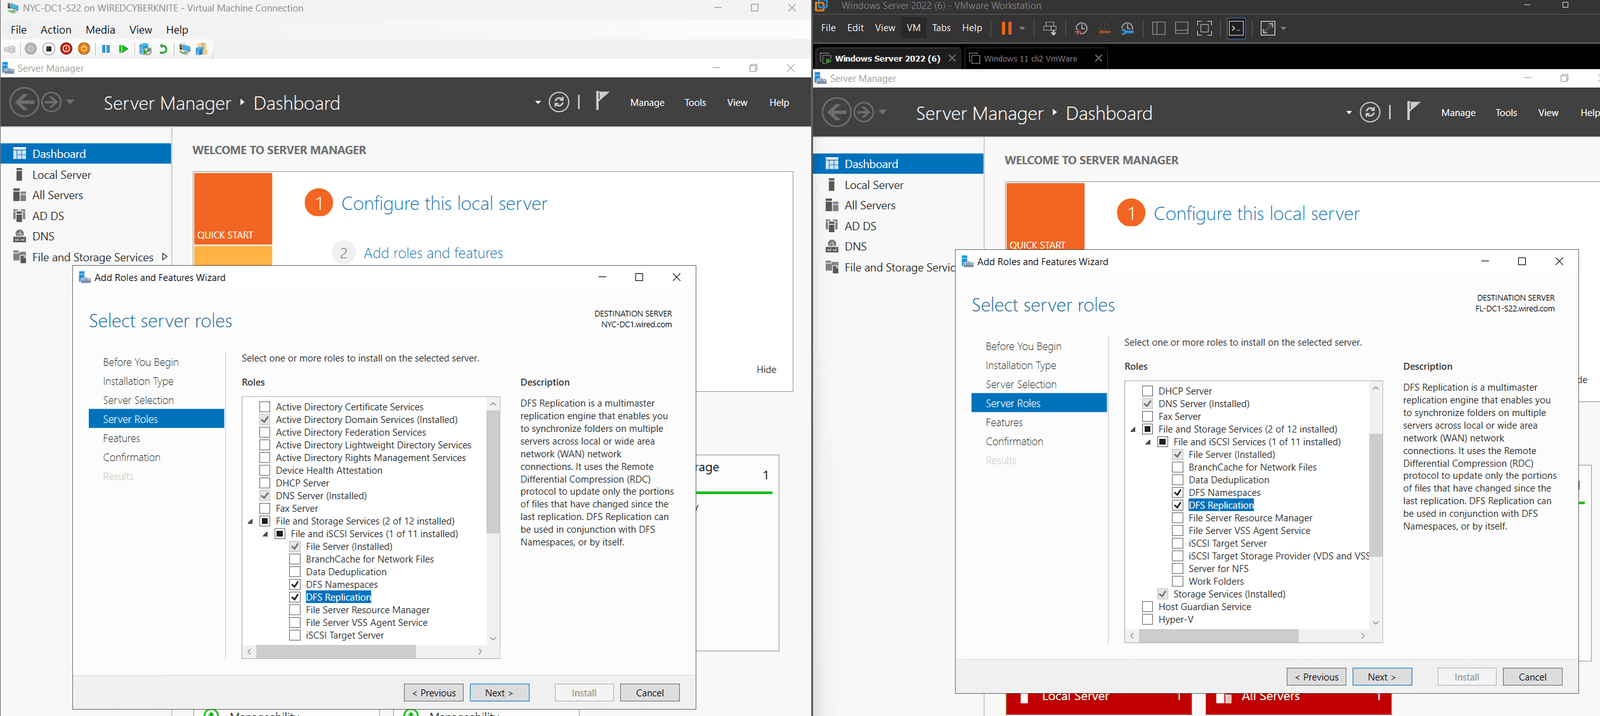
- Install DFS Roles:
- On NYC-DC1 and FL-DC1, open Server Manager > Add Roles and Features.
- Installed the following DFS roles:
- DFS Namespaces
- DFS Replication
- Create DFS Replication Group:
- Open DFS Management.
- Created a new Multipurpose Replication Group named NYC-FL-DFS.
- Added NYC-DC1 and FL-DC1 as members.
- Chose Full Mesh topology for redundancy.
- Create Shared Folder:
- Created C:\DFShare on both NYC-DC1 and FL-DC1 and shared it with appropriate permissions.
- Set Replication Schedule and Bandwidth:
- Used default settings for the replication schedule and bandwidth (suitable for lab environments).
Phase 4: Testing DFS Replication
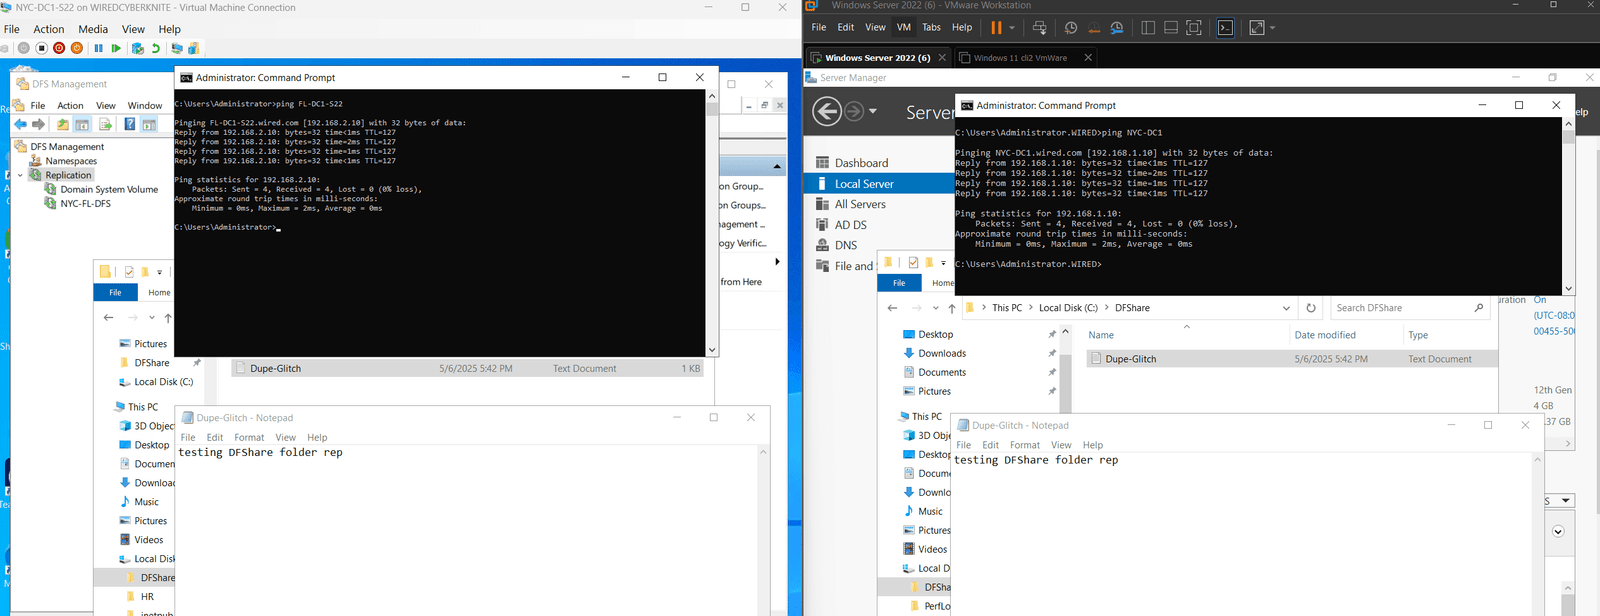
- Test File Sync:
- Created a test file (Dupe-Glitch.txt) in the DFShare folder on NYC-DC1.
- Verified that it replicated to FL-DC1 successfully.
- Sync Verification:
- Used the repadmin /syncall /AdeP command to manually trigger replication.
- Monitored DFS Management and Event Viewer for any errors during the replication process.
Key Problems Solved
- Network and DNS Configuration: Set up pfSense for network routing between NYC and FL and configured static IPs and DNS for both DCs.
- Active Directory Site Management: Renamed and created AD sites, linked subnets, and moved domain controllers to their respective sites for a multi-site setup.
- DFS Replication: Implemented DFS replication between the NYC and FL sites to ensure file synchronization and redundancy.
Troubleshooting Tips
- Site Link Not Created?
- Ensure subnets are correctly associated with their respective sites in AD Sites and Services.
- Check the site link settings in Inter-Site Transports and confirm proper configuration.
- DFS Replication Not Working?
- Ensure DFS roles are installed correctly on both DCs.
- Verify the shared folder exists and that NTFS permissions are correctly configured.
- Use DFS Management to check the replication status and address any errors.
- Replication Delays?
- Use repadmin /syncall to force replication.
- Adjust the replication schedule and bandwidth settings if necessary for larger environments.
What I Learned
- Multi-Site AD Configuration: How to configure multi-site Active Directory, including creating sites, associating subnets, and moving DCs between sites.
- DFS Replication: Understanding how to set up DFS replication between sites for redundancy and ensuring file synchronization.
- Network Setup: Gained experience configuring pfSense for network routing between sites and setting up static IPs and DNS for internal services.
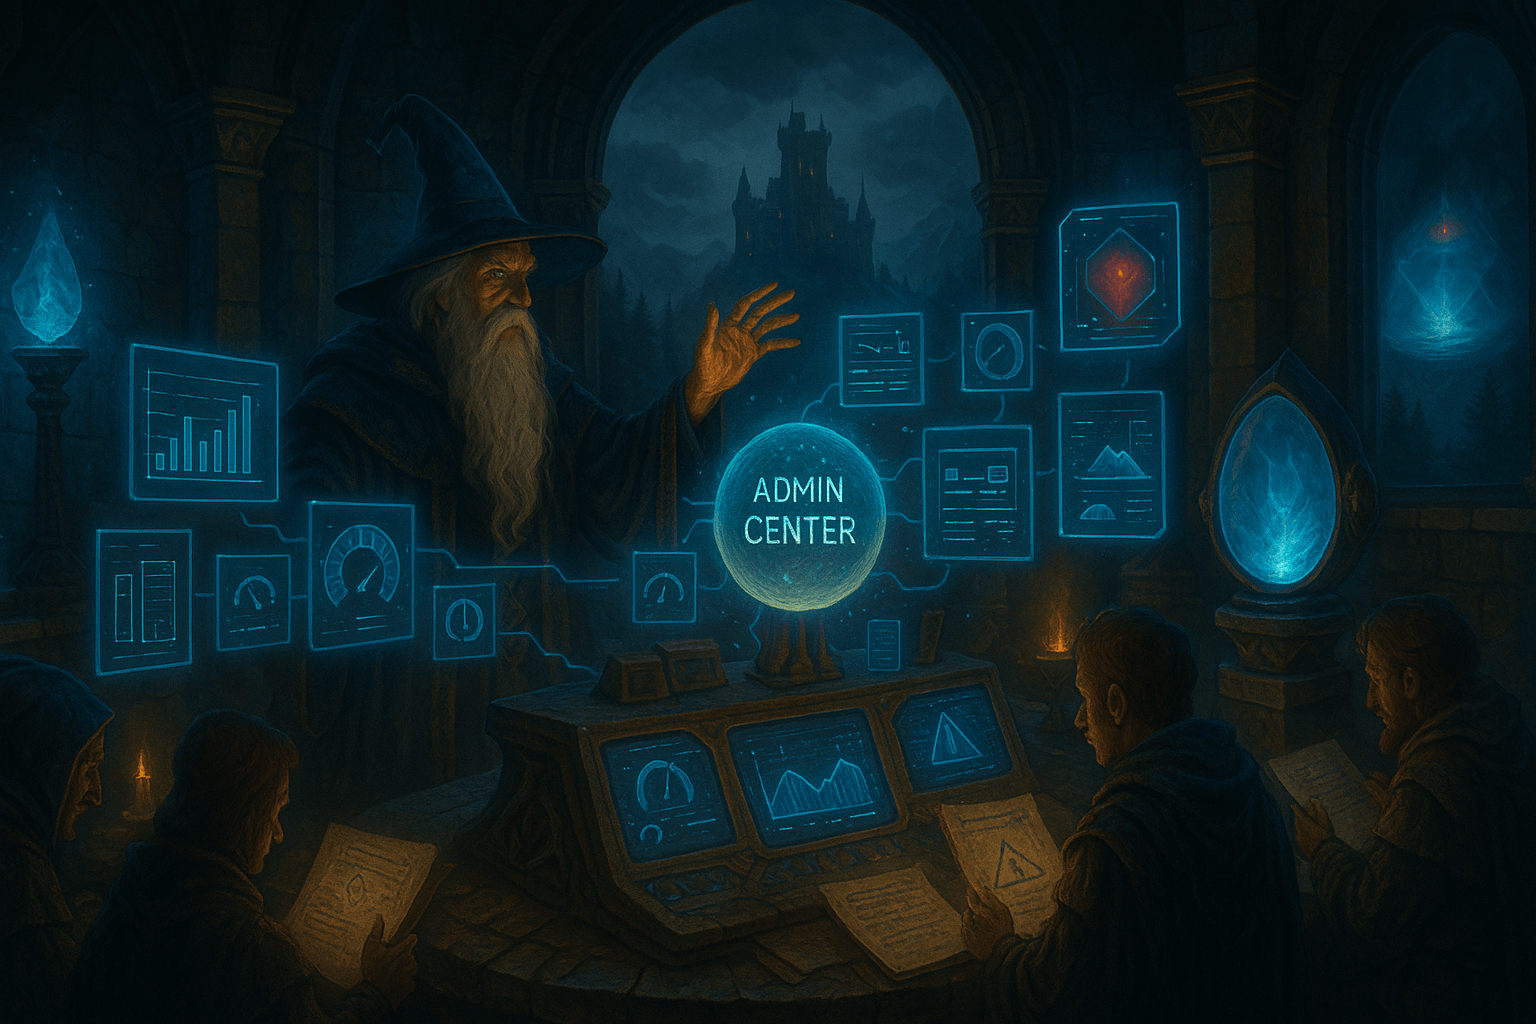
What’s Next?
In Day 10, I will focus on:
- Installing and configuring Windows Admin Center for centralized management of my virtual lab.
- Adding all lab VMs to the dashboard for performance monitoring, update tracking, and service management.
- Simulating and troubleshooting slow systems or service failures using the monitoring tools in Windows Admin Center.
Stay tuned as I dive into Windows Admin Center for managing and monitoring my virtual lab environment!
Follow the Journey
This blog post is part of my Real-World IT Lab in 10 Days series. Stay tuned for Day 10, where I will explore Windows Admin Center and focus on performance monitoring and troubleshooting.
Follow me on LinkedIn for more updates and insights!


Leave a Reply