

Project Type: Ubuntu Server | osTicket | IT Help Desk Simulation
Skill Level: Intermediate
Lab Platform: Hyper-V + VMware + Ubuntu Server 22.04 LTS
Why I Built This
Day 8 of my 10-day hands-on IT lab series focuses on setting up osTicket on an Ubuntu Server and integrating it with Active Directory (AD). By following the LAMP stack setup (Linux, Apache, MySQL, PHP), I was able to simulate a real-world help desk environment and troubleshoot IT tickets using a domain-integrated ticketing system. This setup will also help me simulate common IT support scenarios such as printer issues, user authentication, and password resets, among others.
In this day, I configured osTicket, connected it to my domain for LDAP login, and practiced resolving help desk tickets.
Lab Setup Overview
| Component | Details |
|---|---|
| Hypervisor | Hyper-V (Main Hypervisor) |
| VMware Platform | VMware Workstation Pro |
| Domain Name | wired.com |
| Subnet | 192.168.1.0/24 |
| DC IP Address | 192.168.1.10 (Static) |
| Client DNS | 192.168.1.10 (Domain Controller) |
| osTicket Server | Ubuntu Server 22.04 LTS |
Step-by-Step Breakdown
Phase 1: Set Up Ubuntu Server VM
- Download Ubuntu Server ISO:
- Get Ubuntu Server 22.04 LTS from Ubuntu Download.
- Create Ubuntu VM in Hyper-V:
- Name: osTicket-Server
- Generation: Gen 2 (recommended)
- Memory: 2-4 GB
- Network: Connect to the same virtual switch as your domain environment.
- Install Ubuntu:
- Mount the ISO, boot the VM, and start the installation process.
- Installation Options:
- Language: English
- Keyboard: Default
- Network: DHCP (can assign static IP later)
- User: admin (or any local admin name)
- Enable OpenSSH server for remote management.
- Finish Installation and Reboot.

Phase 2: Install LAMP Stack (Linux, Apache, MySQL, PHP)
- Update the System: bashCopy
sudo apt update && sudo apt upgrade -y - Install Apache Web Server: bashCopy
sudo apt install apache2 -y - Install MySQL: bashCopy
sudo apt install mysql-server -y sudo mysql_secure_installation - Create MySQL Database and User: bashCopy
sudo mysql -u root -p CREATE DATABASE osticket; CREATE USER 'osticketuser'@'localhost' IDENTIFIED BY 'StrongPassword123!'; GRANT ALL PRIVILEGES ON osticket.* TO 'osticketuser'@'localhost'; FLUSH PRIVILEGES; EXIT; - Install PHP and Required Extensions: bashCopy
sudo apt install php php-mysql php-imap php-apcu php-intl php-gd php-xml php-mbstring php-curl php-zip unzip -y sudo systemctl restart apache2
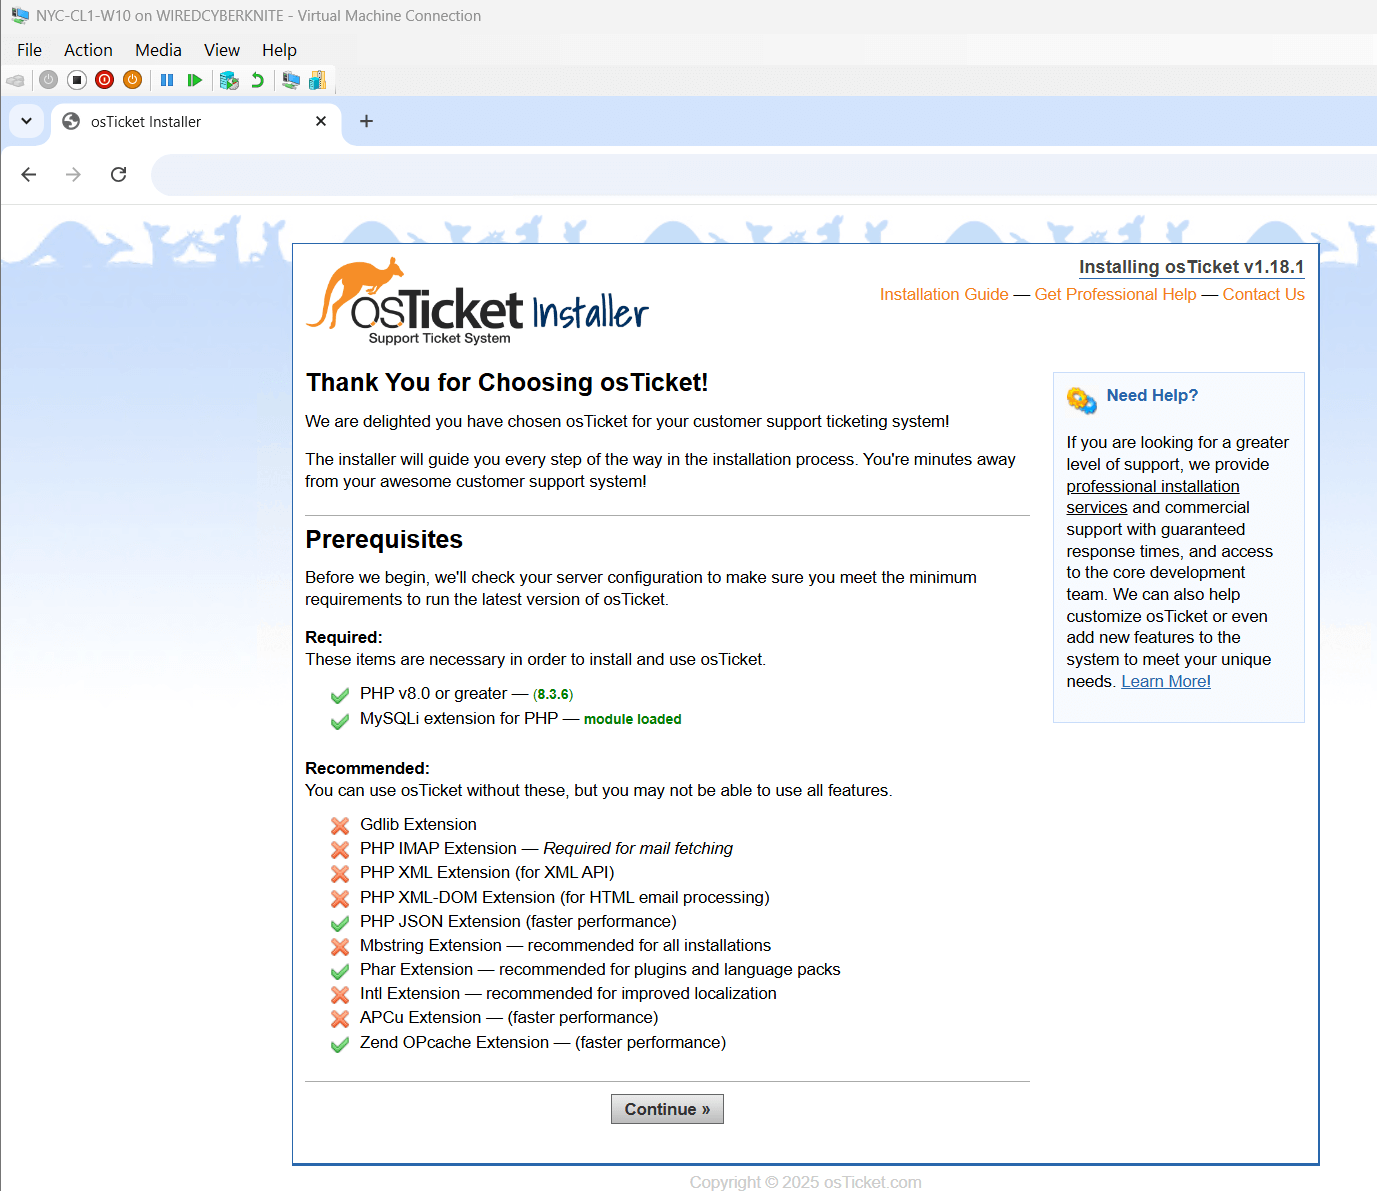
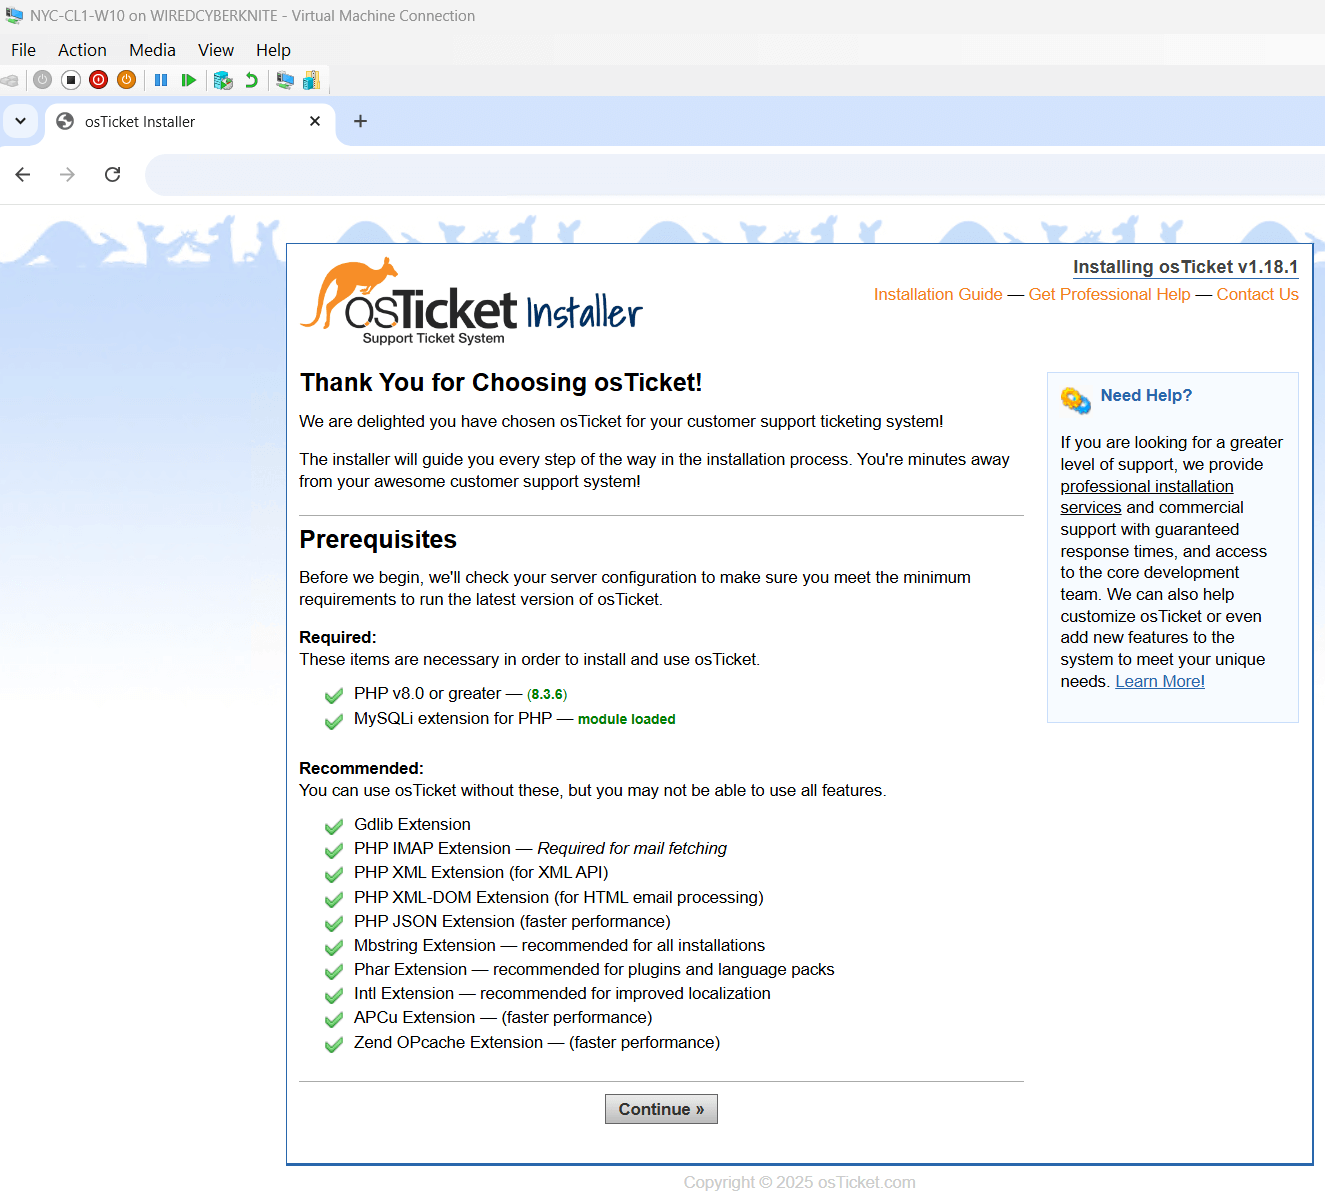
Phase 3: Download & Configure osTicket
- Download osTicket: bashCopy
cd /var/www/html sudo wget https://github.com/osTicket/osTicket/releases/download/v1.18.1/osTicket-v1.18.1.zip sudo unzip osTicket-v1.18.1.zip sudo mv upload osticket sudo chown -R www-data:www-data /var/www/html/osticket - Set Correct Permissions: bashCopy
sudo chmod -R 755 /var/www/html/osticket - Rename the Config File: bashCopy
cd /var/www/html/osticket/include sudo cp ost-sampleconfig.php ost-config.php
Phase 4: Finish Setup via Web Interface
- Open a browser and go to: arduinoCopy
http://<Ubuntu VM IP>/osticket - Complete the web-based installer:
- Fill in site info.
- Use the DB credentials from earlier.
- Set admin user.
- When done:
- Delete the setup directory:
sudo rm -rf /var/www/html/osticket/setup
Phase 5: Domain Integration & Simulation
Integrate osTicket with Active Directory (optional for LDAP login): bashCopysudo apt install realmd sssd adcli samba-common-bin -y sudo realm join --user=administrator wired.com
Key Problems Solved
- Setting up osTicket: Successfully configured osTicket with LAMP stack and integrated with the domain for LDAP login.
- Simulating Help Desk Scenarios: Created a realistic IT support environment for resolving tickets such as printer issues, user logins, and file access.
- Domain Integration: Integrated osTicket with Active Directory for streamlined user authentication.
Troubleshooting Tips
- osTicket Web Interface Not Loading?
- Ensure Apache is running:
sudo systemctl restart apache2. - Check file permissions and ensure the web directory has correct permissions (
www-data).
- Ensure Apache is running:
- Database Connection Issues?
- Double-check MySQL credentials and database setup.
- Ensure the correct PHP extensions are installed for MySQL support.
What I Learned
- osTicket Setup: How to set up an open-source ticketing system on Ubuntu Server.
- LAMP Stack: The process of installing Linux, Apache, MySQL, and PHP on a server for web applications.
- Domain Integration: Understanding how to integrate LDAP authentication with third-party applications like osTicket.
What’s Next?
In Day 9, I will focus on:
- Multi-Site Active Directory and DFS Replication.
- Renaming and creating new Active Directory sites for NYC and FL DCs.
- Setting up DFS replication for file consistency between DCs.
- Verifying site links and testing replication functionality.
Stay tuned as I configure multi-site AD and simulate file replication for distributed environments!
Follow the Journey
This blog post is part of my Real-World IT Lab in 10 Days series. Stay tuned for Day 9, where I will dive into multi-site AD and DFS replication.
Follow me on LinkedIn for more updates and insights!


Leave a Reply