

Project Type: Windows Server | Group Policy | Hybrid Lab Management
Skill Level: Beginner–Intermediate
Lab Platform: Hyper-V + VMware + Windows Server 2022 + PowerShell
Why I Built This
Day 3 of my 10-day hands-on IT lab series focuses on diving into Group Policy (GPO) management. By creating Organizational Units (OUs) and implementing Group Policies, I’m building out real-world administrative tasks to manage users across departments in a hybrid environment. This helps simulate an enterprise setup where admins configure network policies, enforce security measures, and automate routine tasks.
In this day, I used PowerShell to bulk-create users and configured essential GPOs for managing organizational security, user access, and network resources.
Lab Setup Overview
| Component | Details |
|---|---|
| Hypervisor | Hyper-V (Main Hypervisor) |
| VMware Platform | VMware Workstation Pro |
| Domain Name | wired.com |
| Subnet | 192.168.1.0/24 |
| DC IP Address | 192.168.1.10 (Static) |
| Client DNS | 192.168.1.10 (Domain Controller) |
| New Clients | FL-CLI1-W10 (Windows 10 on VMware) |
Step-by-Step Breakdown
Phase 1: OU Creation
- Log in to NYC-DC1-S22 (Domain Controller).
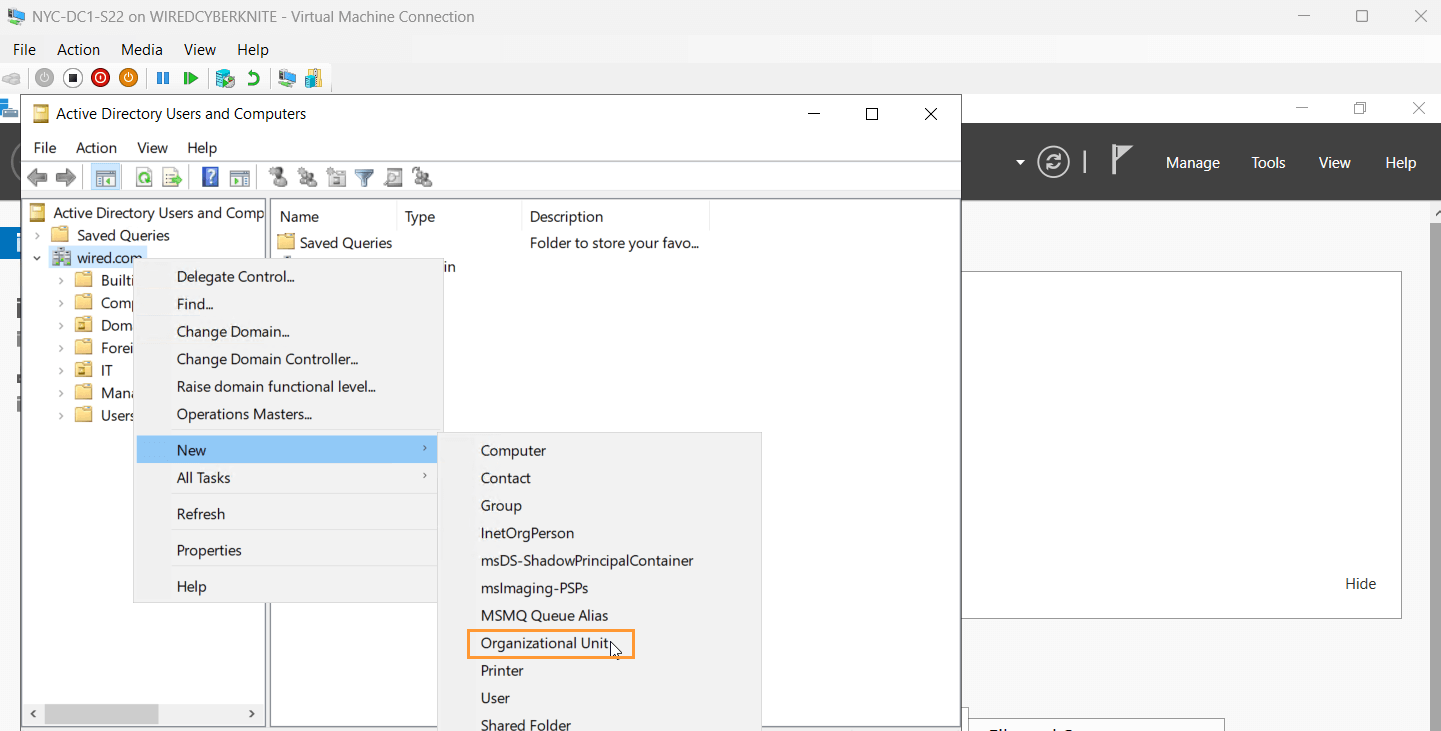
- Open Active Directory Users and Computers (ADUC).
- Under wired.com, right-click the domain and select New > Organizational Unit.
- Created 3 new OUs:
- IT
- HR
- Sales
Phase 2: Bulk User Creation with PowerShell
- Open PowerShell as Administrator on NYC-DC1-S22.
- Run the following PowerShell script to bulk-create 10 users in each OU. For example, for the IT OU:
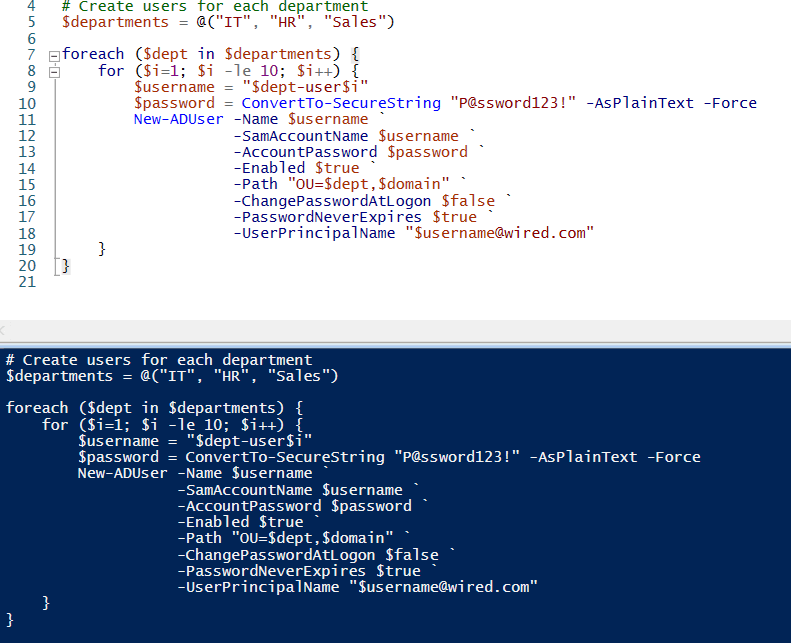
- Repeat for the HR and Sales OUs, changing the OU paths accordingly.
After running the scripts, you will have 30 users across 3 OUs.
Phase 3: Group Policy Setup (GPO Creation)
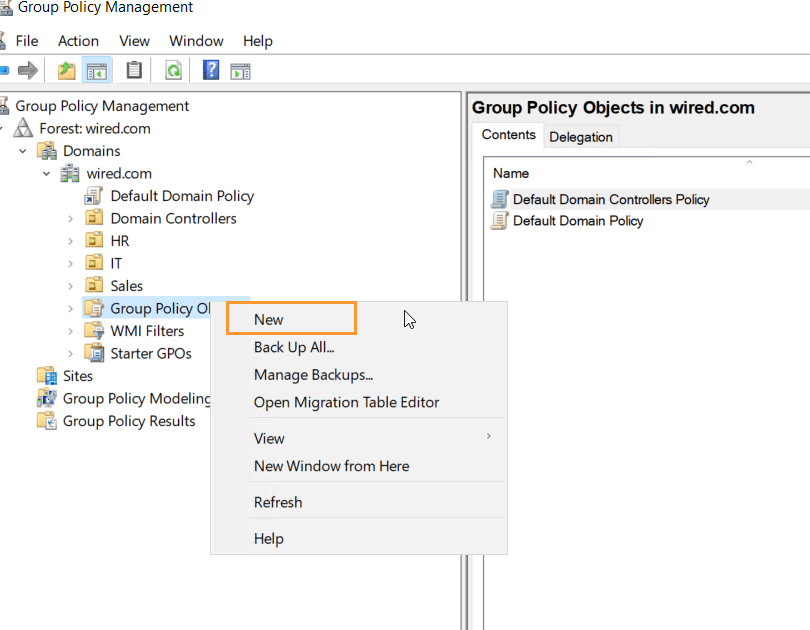
- Open Group Policy Management Console (GPMC) on NYC-DC1-S22.
- Created and linked the following GPOs:
- Password Policy GPO: Enforced at the domain root to ensure password complexity requirements.
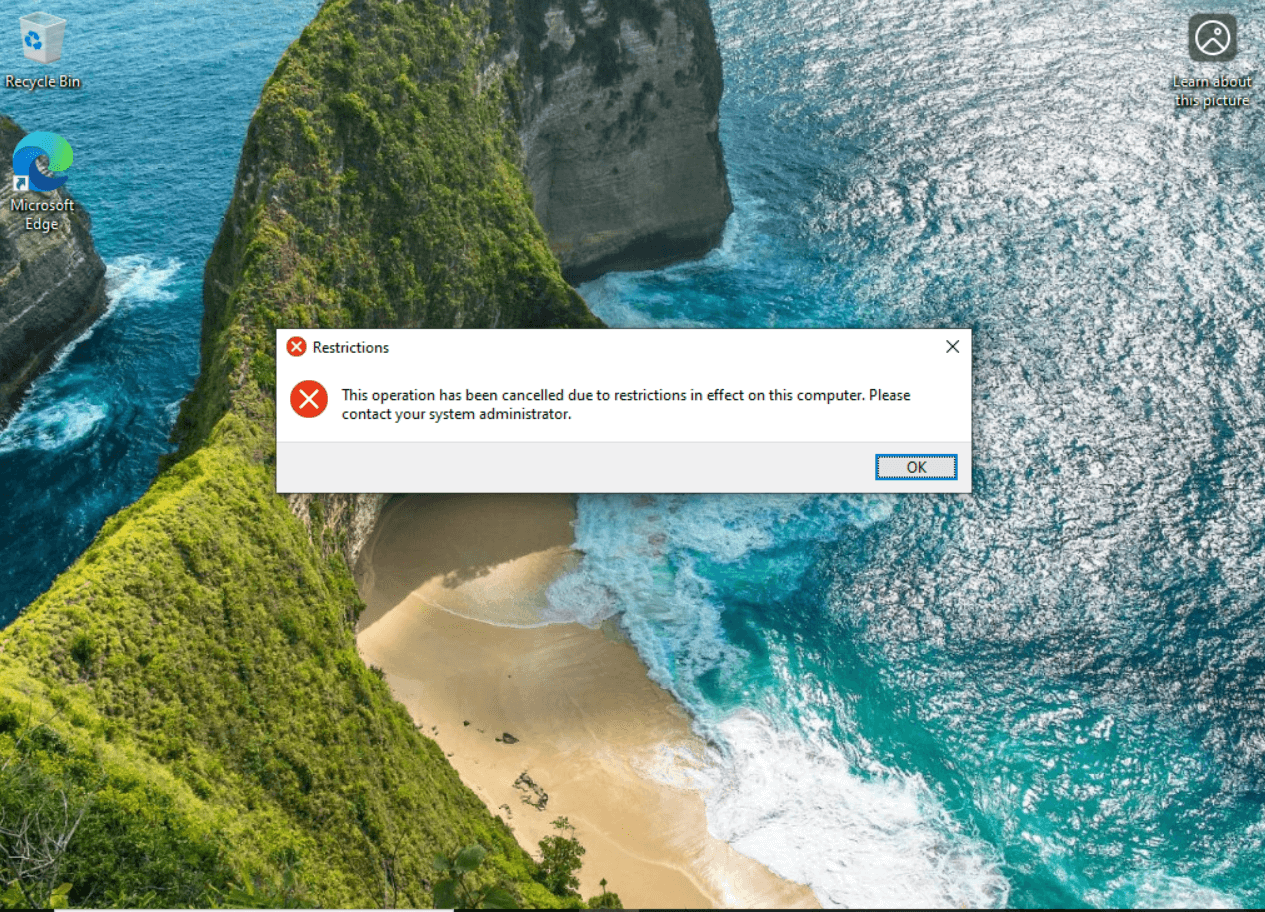
- Disable Control Panel: Applied to the Sales OU to restrict access to the Control Panel.
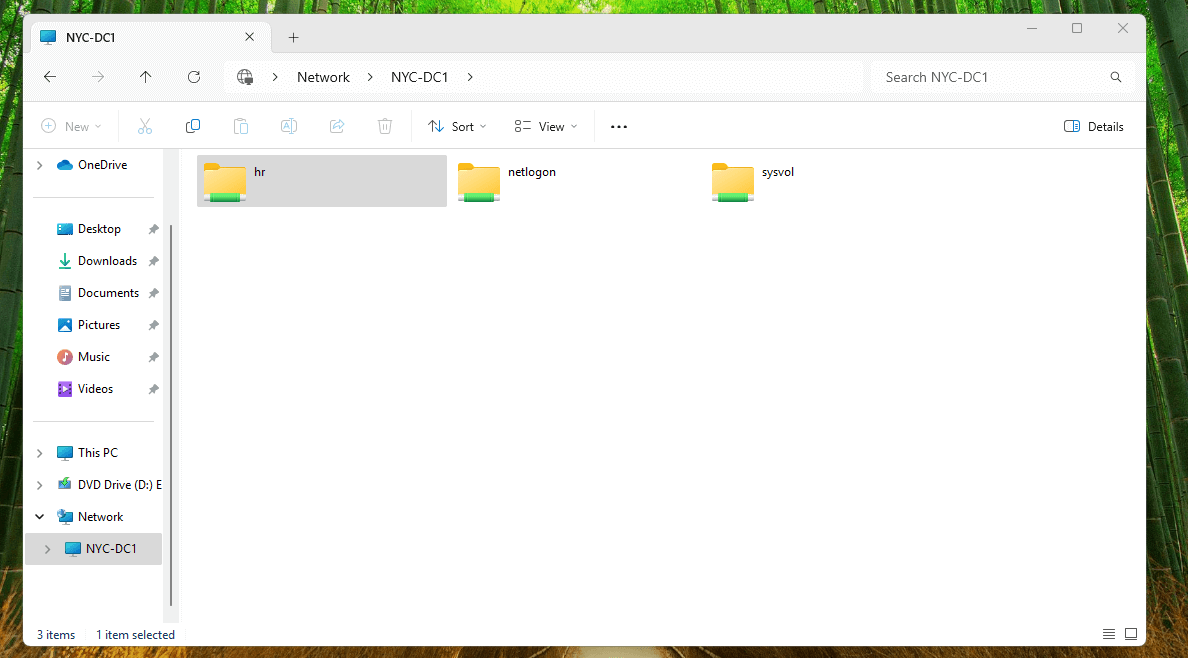
- Map Network Drive for HR: Applied to the HR OU to map a network drive automatically.
Phase 4: Configuring GPO Settings
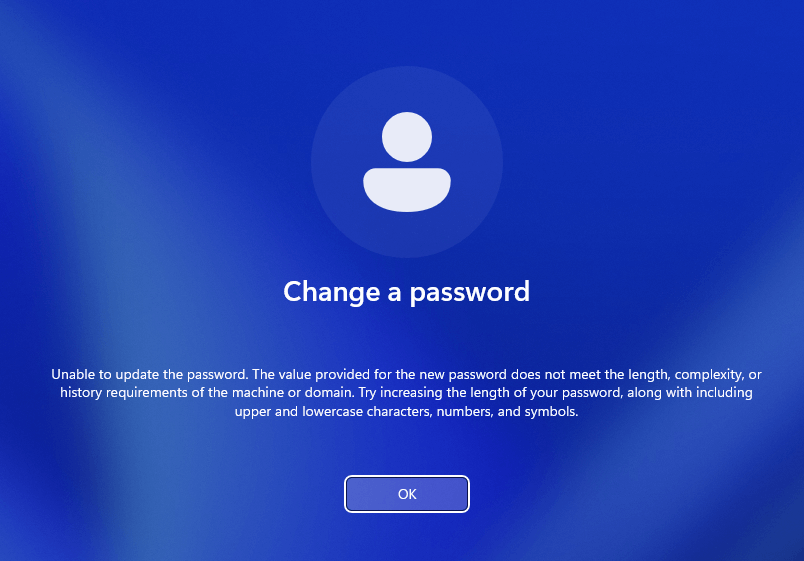
- Password Complexity: Enforced through Default Domain Policy or the “Password Policy GPO.”
- Minimum password length: 8 characters
- Password history: 5 passwords remembered
- Enforce password complexity: Enabled
- Disable Control Panel for Sales:
- Configured to prohibit access to the Control Panel via User Configuration > Policies > Administrative Templates > Control Panel.
- Map Network Drive for HR:
- Set up a drive map to \NYC-DC1-S22\SharedHR as drive H: under User Configuration > Preferences > Windows Settings > Drive Maps.
- Ensure the shared folder SharedHR exists on NYC-DC1-S22.
Phase 5: Testing
- Log in with one user from each OU (e.g., ITUser1, HRUser1, SalesUser1).
- Test Results:
- Password policies enforced correctly.
- Sales users cannot access the Control Panel.
- HR users automatically mapped to the H: drive.
- If needed, troubleshoot GPO application with gpresult /r.
Key Problems Solved
- User Account Management: By using PowerShell, I was able to quickly create a large number of users, simulating real-world user provisioning.
- Network Resource Management: Group Policies successfully automated access to shared drives and restricted control panel access for different user groups.
- Consistency Across Environments: Ensured consistent application of policies across both Hyper-V and VMware environments.
Troubleshooting Tips
- GPO Not Applying?
- Check firewall rules to ensure GPO settings can apply.
- Run gpresult /r to see what policies are applied or missing.
- Can’t Access the Network Drive?
- Make sure the shared folder SharedHR exists and permissions are set properly.
What I Learned
- How to effectively use PowerShell to automate user creation in Active Directory.
- The importance of Group Policy for controlling user access, securing accounts, and automating network drive mappings.
- The challenges and benefits of managing multiple environments (Hyper-V and VMware) in a hybrid virtual lab setup.
What’s Next?
In Day 4, I will focus on:
- Automating user permissions with PowerShell to ensure department-specific access control for shared folders.
- Configuring NTFS and share permissions for security consistency across the IT, HR, and Sales departments.
- Simulating and resolving file access issues to practice troubleshooting permission misconfigurations and apply fixes.
- Capturing screenshots of folder paths, permissions, and error messages for documentation in the blog.
Stay tuned as I dive deeper into automating user management and simulating real-world IT help desk tasks!
Follow the Journey
This blog post is part of my Real-World IT Lab in 10 Days series. Stay tuned for Day 4 where I will dive deeper into security management and user access controls.
Follow me on LinkedIn for more updates and insights!


Leave a Reply