
Project Type: Windows Server | pfSense | Firewall Management
Skill Level: Intermediate
Lab Platform: Hyper-V + VMware + pfSense + Windows Server 2022
Why I Built This
Day 6 of my 10-day hands-on IT lab series focuses on securing updates and firewall control for the Domain Controller (DC) using pfSense. The goal is to simulate a locked-down DC that can only access updates and internal services, preventing it from browsing the internet unless explicitly allowed.
In this day, I configured pfSense firewall rules to block internet access for the DC, allowed access temporarily for critical updates, and then re-secured the DC to simulate a real-world scenario of maintaining a secure environment while keeping systems up to date.
Lab Setup Overview
| Component | Details |
|---|---|
| Hypervisor | Hyper-V (Main Hypervisor) |
| VMware Platform | VMware Workstation Pro |
| Domain Name | wired.com |
| Subnet | 192.168.1.0/24 |
| DC IP Address | 192.168.1.10 (Static) |
| Client DNS | 192.168.1.10 (Domain Controller) |
| pfSense | Virtual Firewall/Router |
Step-by-Step Breakdown
Part 1: Simulate a “Locked-Down” Domain Controller
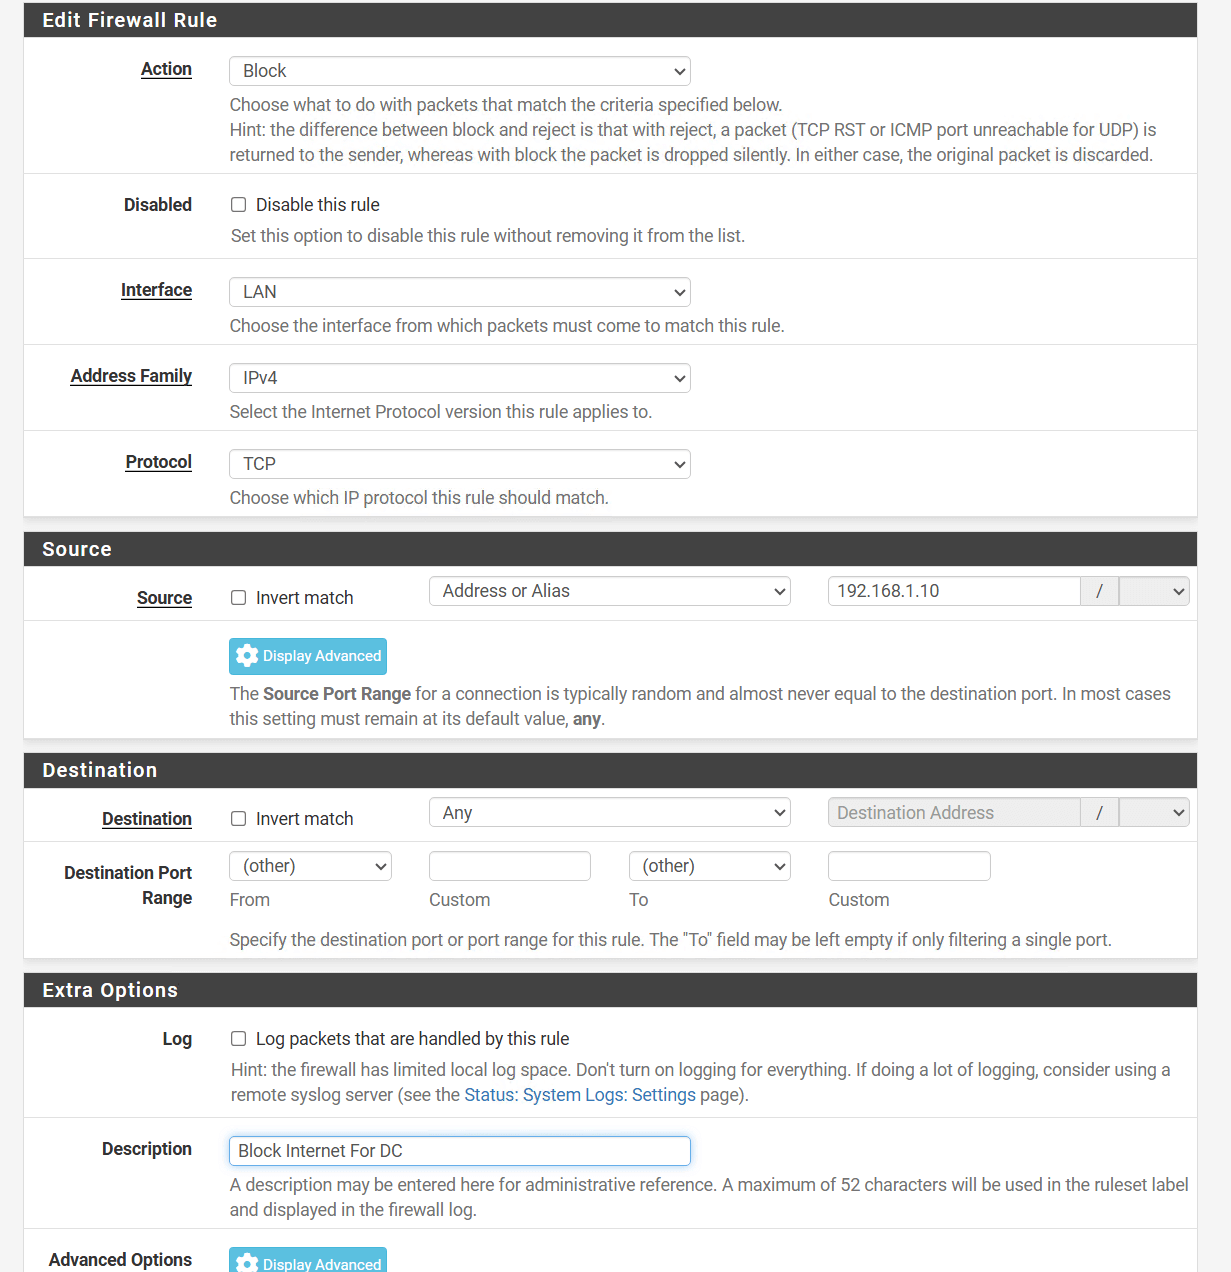
- Create a Deny Rule in pfSense to block internet access for the Domain Controller:
- Go to Firewall > Rules > LAN on pfSense.
- Add a rule with the following settings:
- Action: Block
- Interface: LAN
- Source: NYC-DC1 IP (e.g., 192.168.1.10)
- Destination: any
- Description: “Block Internet for DC”
- Click Save, then Apply Changes.
Part 2: Temporarily Allow Internet to Update the DC
- Disable the Block Rule in pfSense:
- Go to Firewall > Rules > LAN and disable the “Block Internet for DC” rule.
- Click Apply Changes.
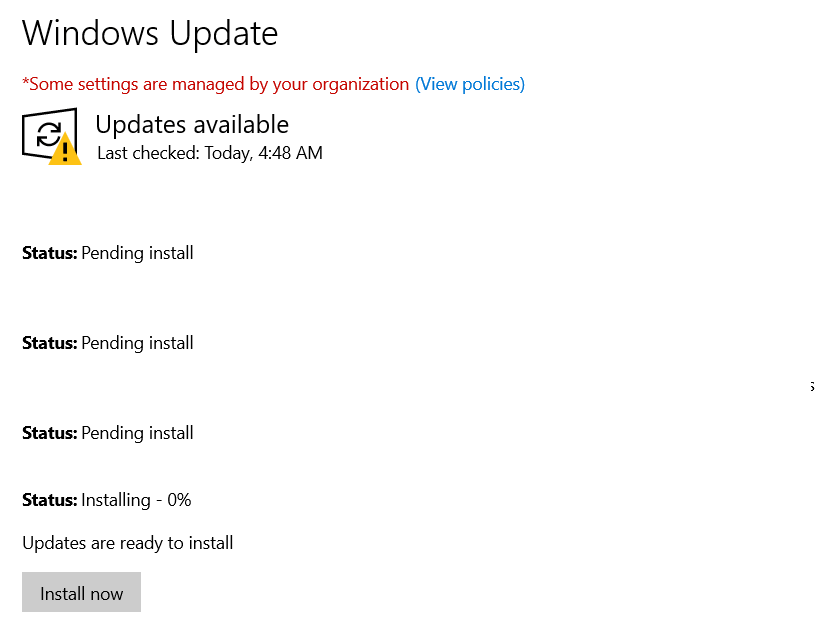
- Update the Server:
- On NYC-DC1, open Settings > Windows Update.
- Click Check for updates and install any critical updates.
- Reboot if required.
Part 3: Re-Secure the Server
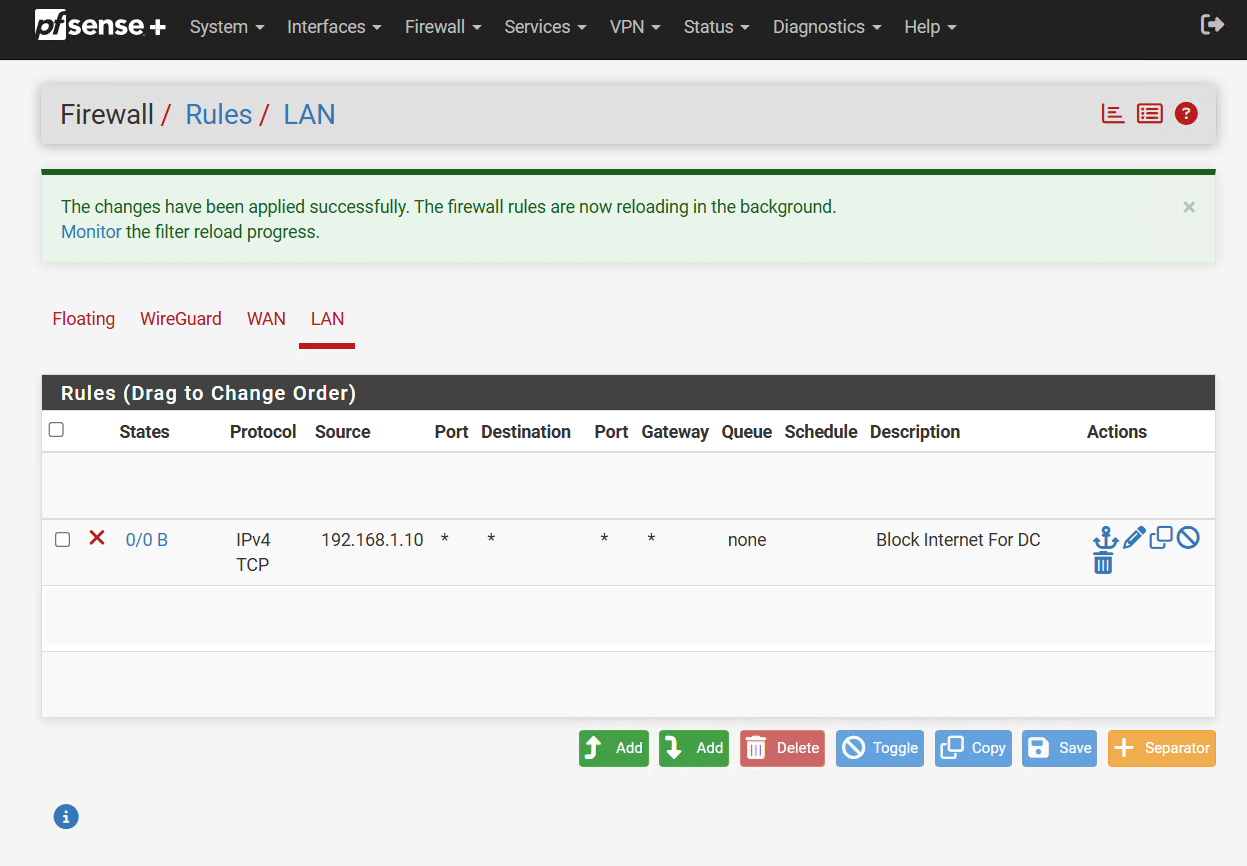
- Re-enable the Block Rule in pfSense to restore the DC’s lockdown mode:
- Go back to pfSense, click the icon to enable the block rule again.
- Click Apply Changes.
Part 4: Write a Simple SOP (Standard Operating Procedure)
- Document the process in a SOP for securely updating a locked-down DC.
SOP Title: Updating a Locked-Down Domain Controller
Objective: Securely update the DC without exposing it long-term to the internet.
| Step | Action |
|---|---|
| Step 1: Enable outbound access | Disable the “Block Internet for DC” rule in pfSense. |
| Step 2: Install critical updates | Use Windows Update to install updates. |
| Step 3: Add Windows features (optional) | Enable additional features (RSAT tools, .NET Framework, etc.). |
| Step 4: Lock the DC back down | Re-enable the block rule in pfSense to restore security. |
Key Problems Solved
- DC Internet Access Control: Successfully simulated a locked-down DC using pfSense, allowing internet access only when necessary for updates.
- Secure Update Management: Ensured that the DC could receive critical updates without compromising security.
- Documenting Procedures: Created a simple, clear SOP for securely updating a Domain Controller in a high-security environment.
Troubleshooting Tips
- Update Fails After Rule is Disabled?
- Double-check the pfSense rule to ensure the DC has internet access during the update process.
- Verify the DC’s Windows Update settings to ensure no firewall issues are blocking the update.
- Can’t Re-enable the Block Rule?
- Ensure that pfSense applies changes properly after clicking Apply Changes.
- Verify there are no conflicting rules or exceptions in pfSense that might override the block.
What I Learned
- Network Security: How to simulate an air-gapped environment and control internet access for critical systems.
- Firewall Configuration: Gained hands-on experience with pfSense firewall rules to enforce security on internal servers.
- Update Management: Learned the importance of updating servers while maintaining security through strict network access controls.
What’s Next?
In Day 7, I will focus on:
- Imaging and rejoining a workstation to the domain.
- Sysprepping a Windows 10 machine to prepare a clean image.
- Cloning and redeploying the image, then rejoining it to the domain.
- Simulating profile migration to restore user files after a workstation reset.
Stay tuned as I dive into the process of creating and restoring system images for efficient deployment and reconfiguration!
Follow the Journey
This blog post is part of my Real-World IT Lab in 10 Days series. Stay tuned for Day 7, where I will explore imaging and rejoining a workstation to the domain and simulating profile migration.
Follow me on LinkedIn for more updates and insights!


Leave a Reply