

Project Type: Windows Server | Virtual Printer | Remote Management
Skill Level: Beginner–Intermediate
Lab Platform: Hyper-V + VMware + Windows Server 2022
Why I Built This
Day 5 of my 10-day hands-on IT lab series is all about virtual printer deployment and remote management. In this lab, I configured a virtual printer (Microsoft Print to PDF), deployed it via Group Policy, and explored remote management tools such as Remote Desktop (RDP), MMC Snap-ins, and PowerShell Remoting. These tools are essential for administrators to manage and troubleshoot client machines from a central location.
In this day, I also learned how to ensure seamless printing for remote users while maintaining security protocols for domain clients.
Lab Setup Overview
| Component | Details |
|---|---|
| Hypervisor | Hyper-V (Main Hypervisor) |
| VMware Platform | VMware Workstation Pro |
| Domain Name | wired.com |
| Subnet | 192.168.1.0/24 |
| DC IP Address | 192.168.1.10 (Static) |
| Client DNS | 192.168.1.10 (Domain Controller) |
| New Clients | FL-CLI1-W10 (Windows 10 on VMware) |
Step-by-Step Breakdown
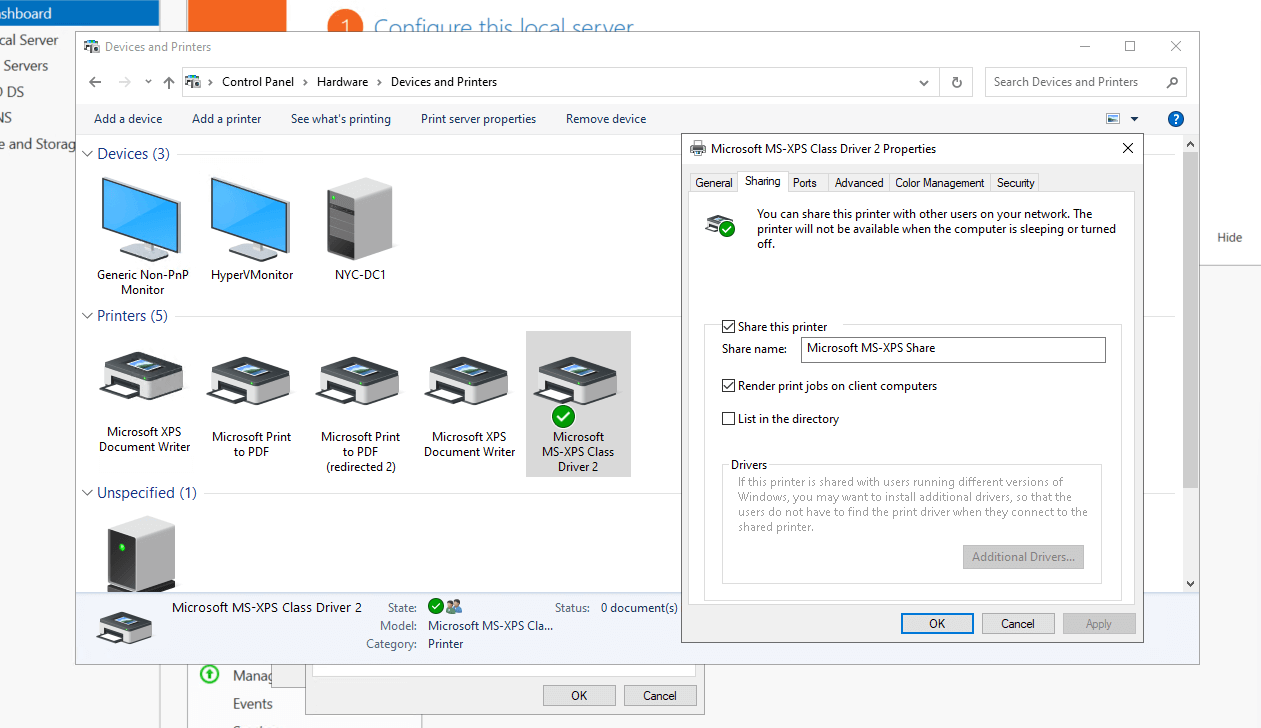
Phase 1: Share a Virtual Printer (Microsoft Print to PDF)
- On NYC-DC1:
- Open Control Panel > Devices and Printers.
- Right-click Microsoft Print to PDF > Printer Properties.
- Go to the Sharing tab:
- Check “Share this printer”.
- Share Name: PDF-Printer
- Click OK.
✅ Result: Your network-shared printer is set up.
Phase 2: Deploy the Printer via Group Policy
- On NYC-DC1 (GPMC):
- Open Group Policy Management Console (Start > gpmc.msc).
- Right-click Group Policy Objects > New
- Name: Deploy PDF Printer
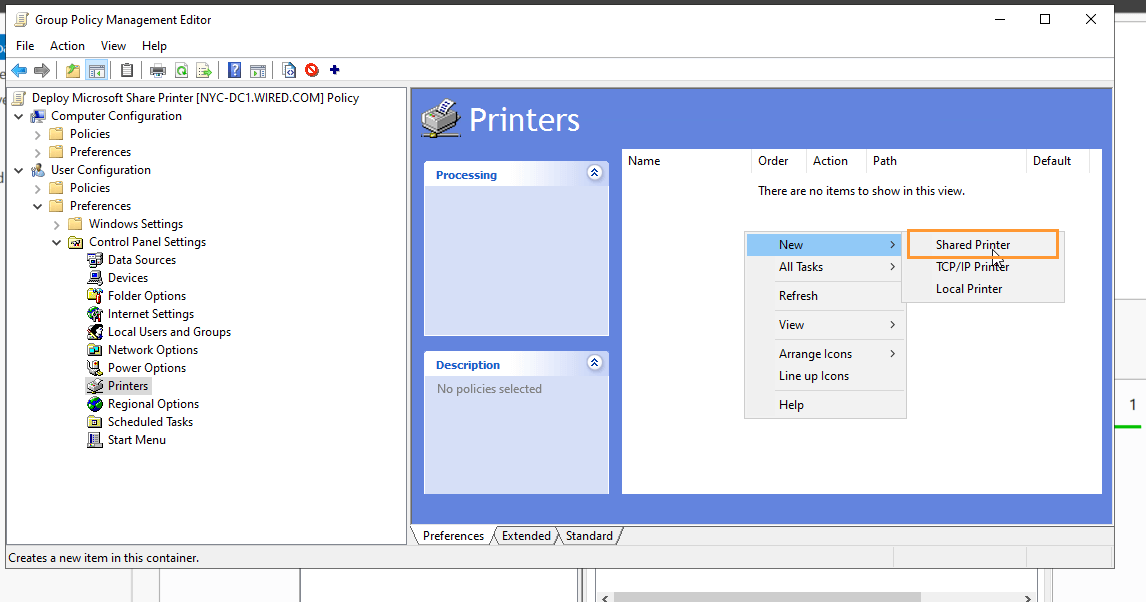
- Edit the GPO:
- User Configuration > Preferences > Control Panel Settings > Printers
- Right-click > New > Shared Printer
- Action: Create
- Share path: \NYC-DC1\PDF-Printer
- Optional: Set as the default printer
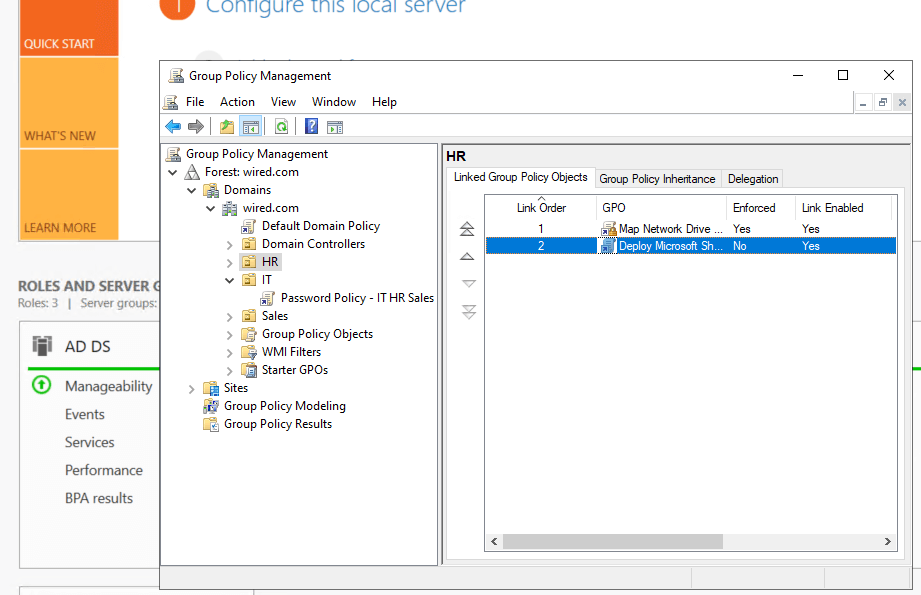
- Link the GPO to the appropriate OU (e.g., HR or Users).
- On client machine:
- Run gpupdate /force
- Log off / back on.
✅ Verify: Log in as an HR-user or test user, and go to Devices and Printers to confirm the PDF-Printer appears.
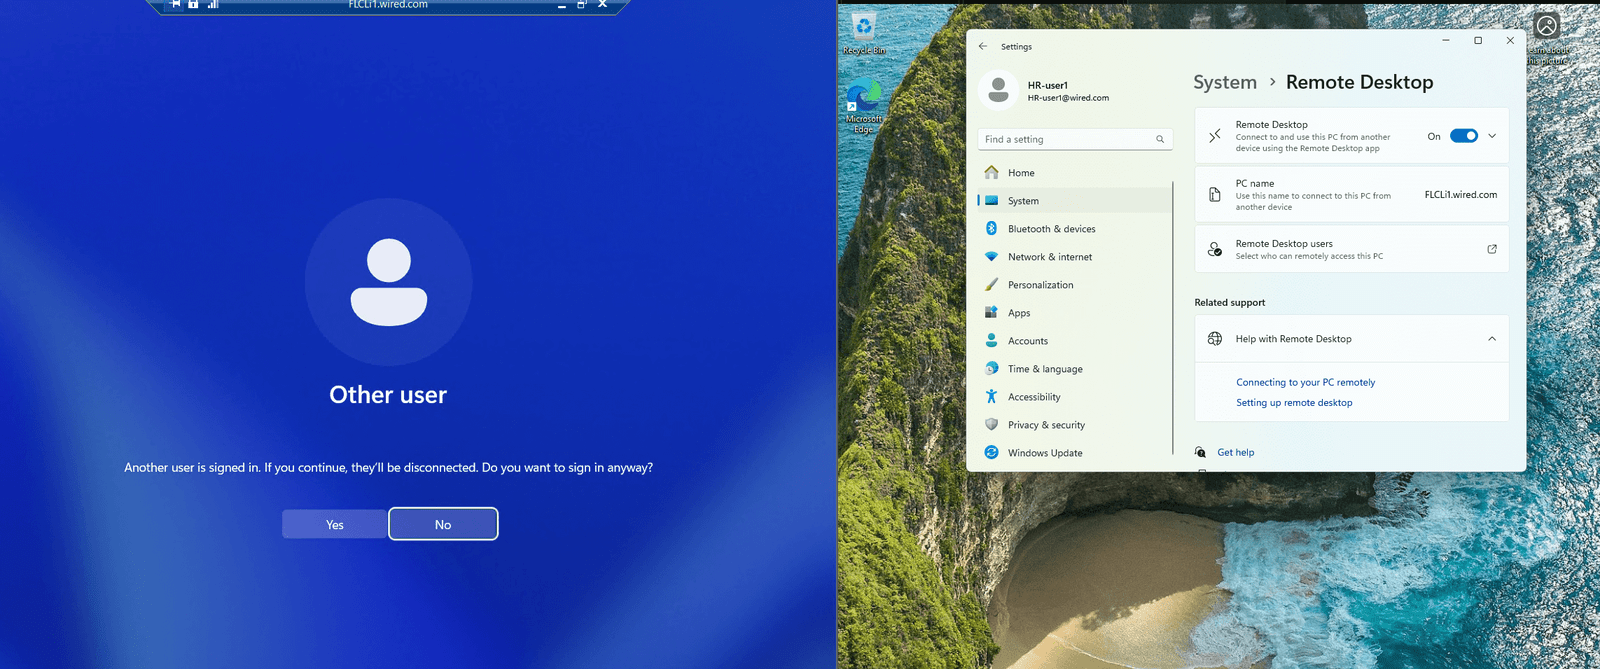
Phase 3: Remote Tools Practice
- Tools to Use (from DC or Admin machine):
| Tool | What to Do | How |
|---|---|---|
| RDP | Connect from DC to client | mstsc > NYC-CLI1 |
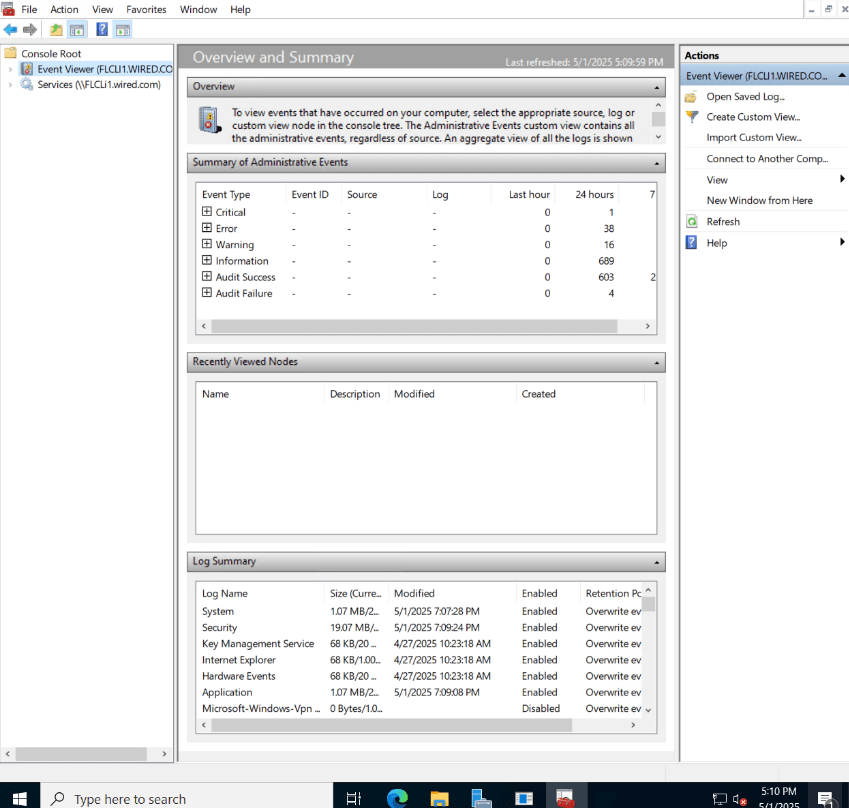
| MMC Snap-ins | Use eventvwr.msc and compmgmt.msc to connect to NYC-CLI1 | Open Run > mmc > Add/Remove Snap-ins |
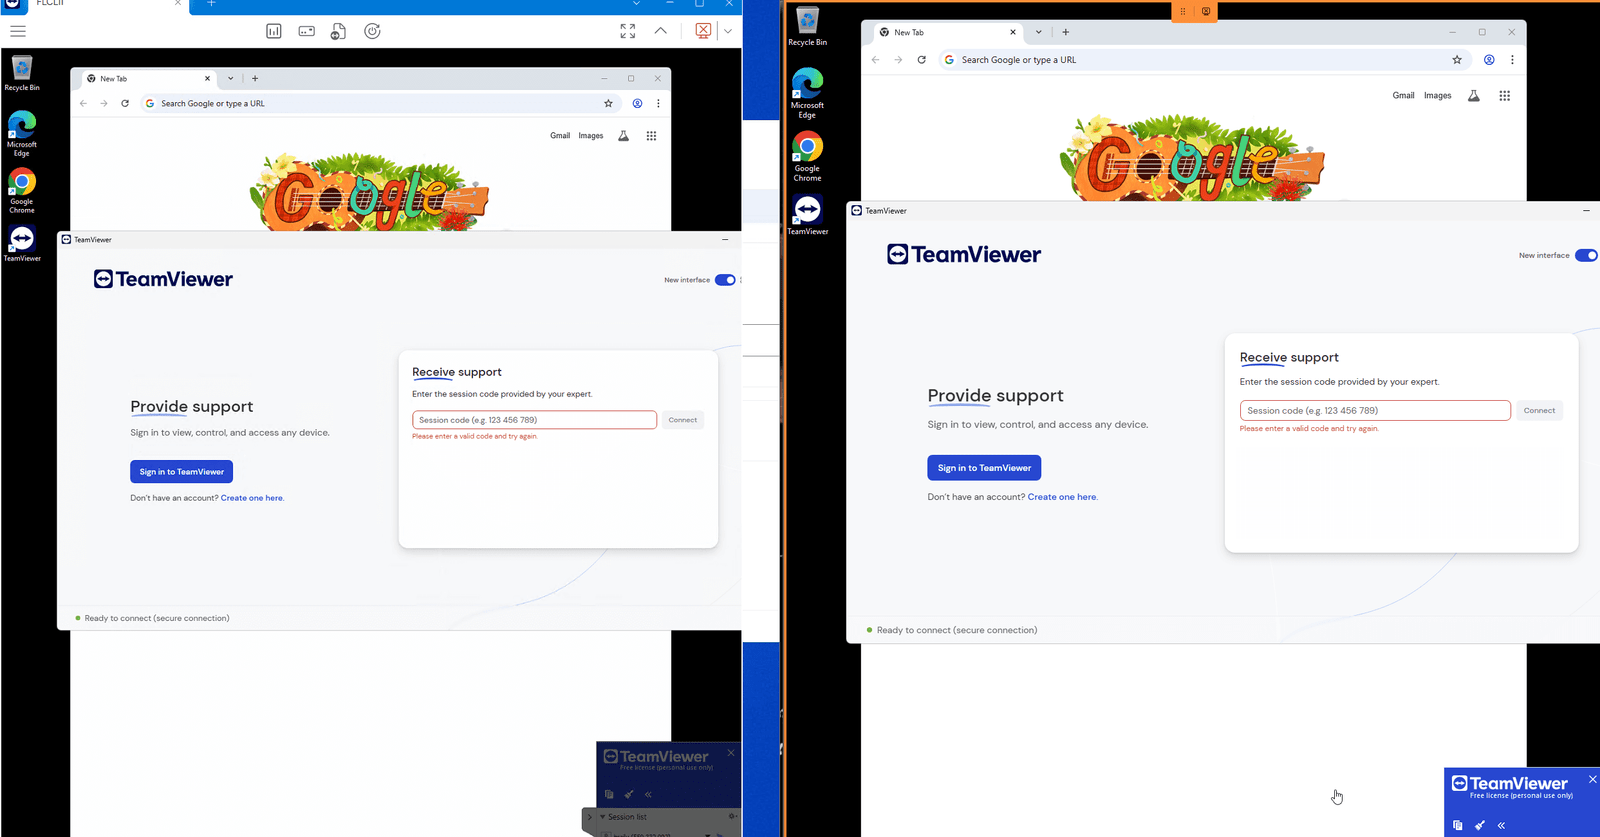
| TeamViewer | Remotely control the client | Install TeamViewer on both DC and client, use ID and Password to connect |
Pro Tip: In a real org, PowerShell remoting should be restricted by GPO or firewall rules. For lab, you can enable freely.
Key Problems Solved
- Virtual Printer Setup: Successfully configured and shared a virtual printer, making it available for remote users.
- Group Policy Deployment: Deployed the printer automatically to users via Group Policy, saving time in enterprise environments.
- Remote Management: Configured and tested remote management tools like RDP, MMC Snap-ins, and PowerShell Remoting to troubleshoot and manage client machines from a central location.
Troubleshooting Tips
- Printer Not Showing on Client?
- Run gpupdate /force on the client machine.
- Ensure network connectivity between the DC and client machine.
- RDP Not Connecting?
- Check that Remote Desktop is enabled on the client machine.
- Ensure the firewall allows RDP connections.
- MMC Snap-ins Not Connecting?
- Verify the correct permissions and that the user has admin access on the client machine.
What I Learned
- Deploying Printers via GPO: Streamlining printer deployment through Group Policy is a key administrative task, especially for large environments.
- Remote Management: Gained valuable experience using tools like RDP, MMC Snap-ins, and PowerShell Remoting for managing and troubleshooting remote machines.
- Time-Saving Techniques: Using Group Policy and remote tools saves significant time in troubleshooting and administrative tasks.
What’s Next?
In Day 6, I will focus on:
- Securing Updates for the Domain Controller using pfSense.
- Simulating a “Locked-Down” DC that can’t access the internet unless allowed for updates.
- Creating firewall rules in pfSense to control outbound traffic for the DC.
- Testing the updates process while ensuring security measures are in place.
Stay tuned as I simulate a locked-down environment and use pfSense to control internet access!
Follow the Journey
This blog post is part of my Real-World IT Lab in 10 Days series. Stay tuned for Day 6, where I will simulate a locked-down domain controller and secure its updates!
Follow me on LinkedIn for more updates and insights!


Leave a Reply